

Wrist Pain & Yoga: Physiotherapy & Yoga Perspectives on How to Resolve
Yoga is a great form of exercise that not only incorporates stretching, but also mindful awareness of your body through movement.
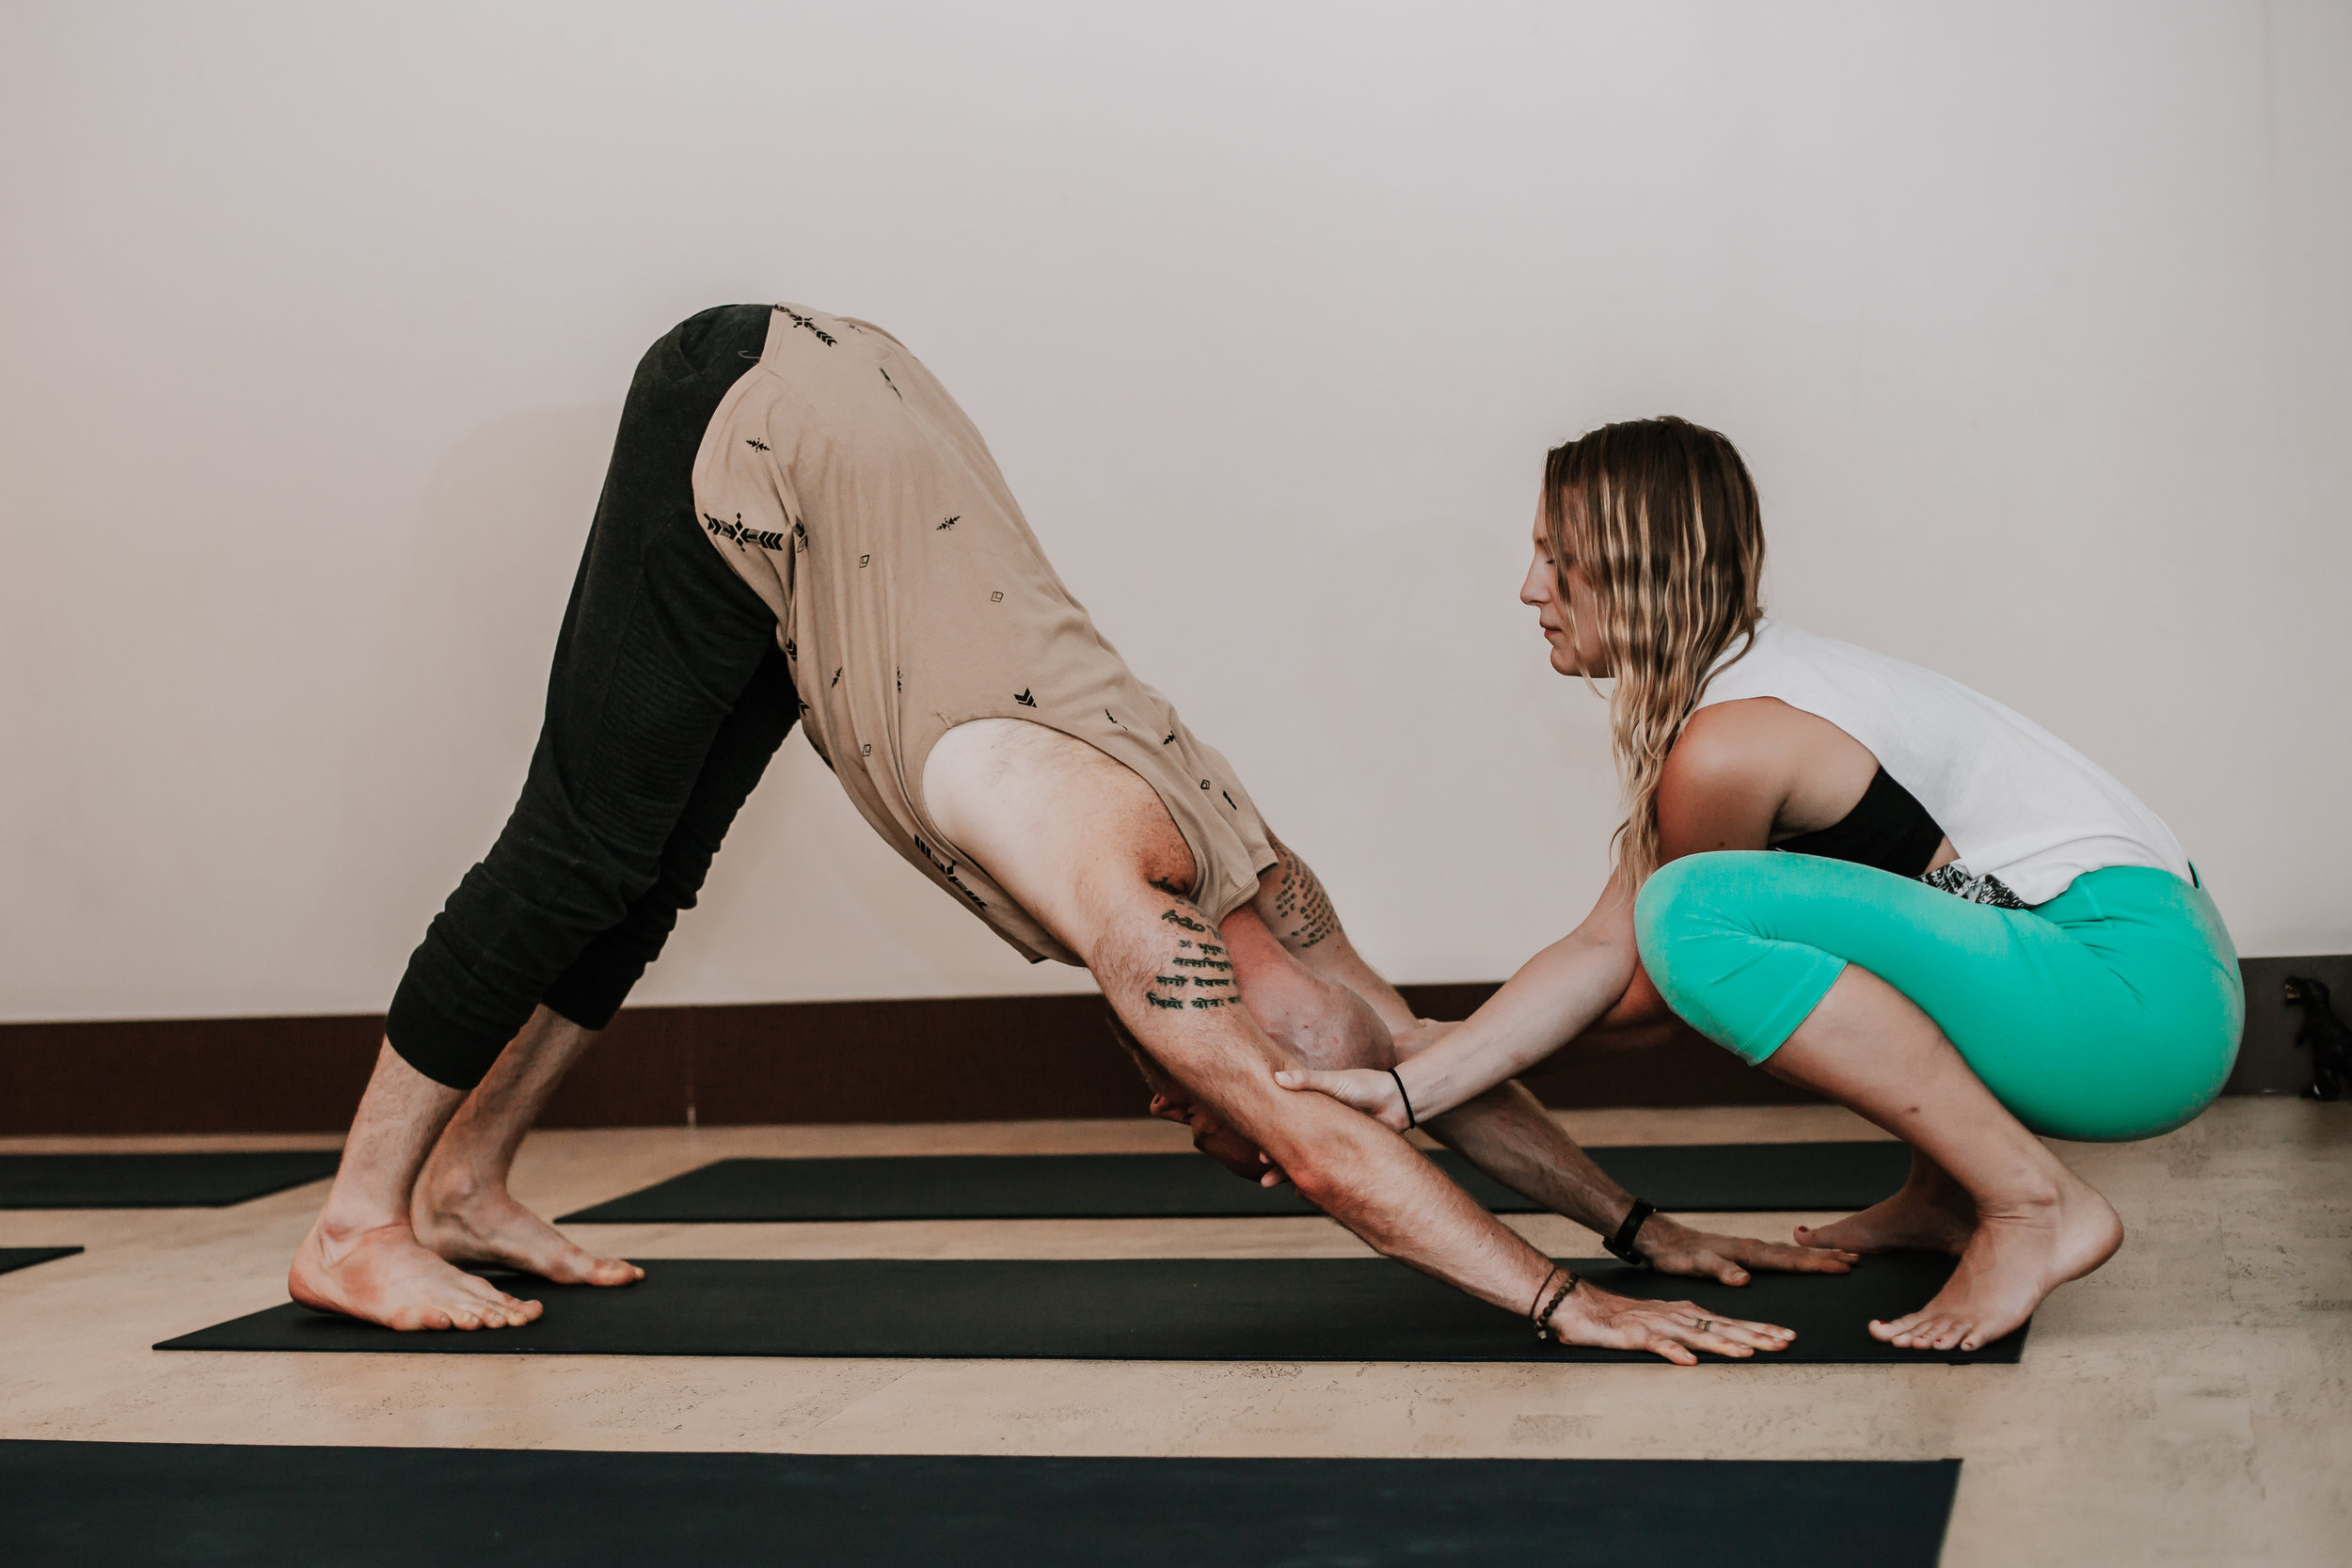
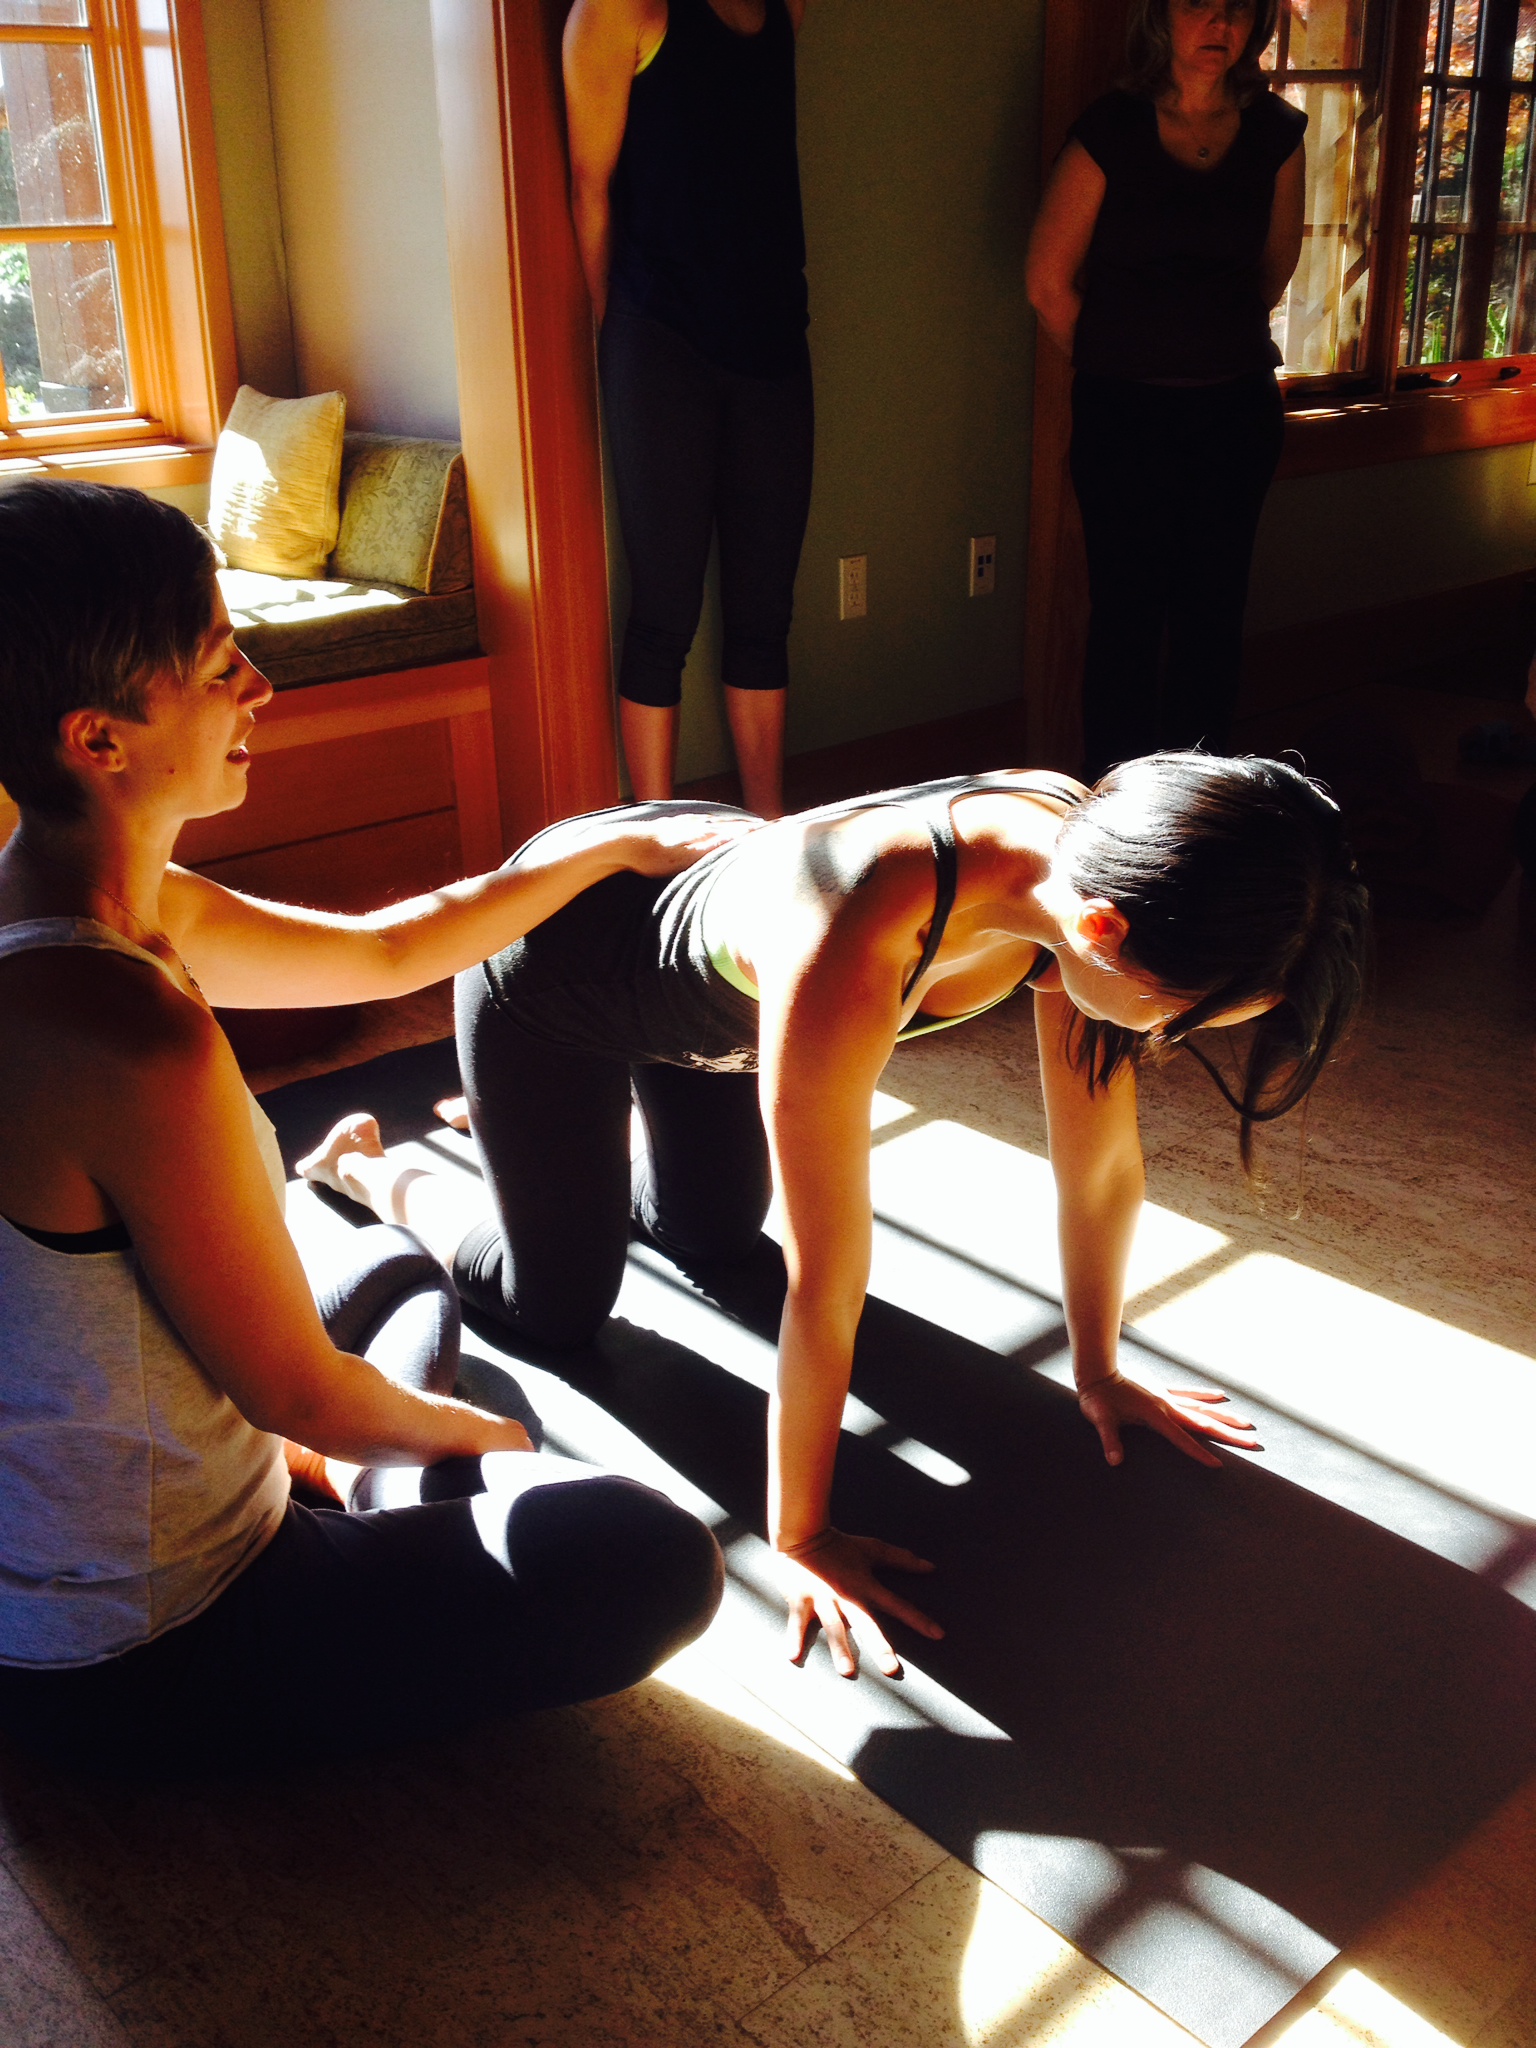
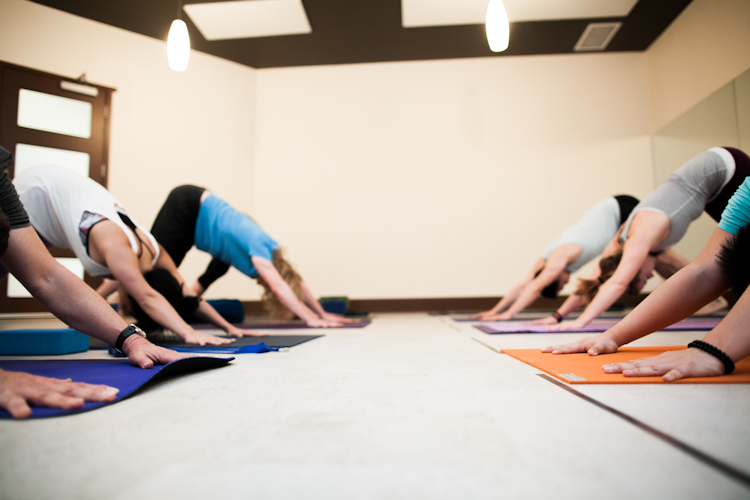
There are many schools of yoga with a wide variety of different poses. One of the most common schools of yoga is hatha yoga. The movement sequences, or flows, in hatha yoga incorporate exercises where you need to put body weight through your wrists. For example, downward-facing dog is one such pose.
It’s not uncommon for some people to experience wrist pain when doing these wrist-loading exercises. Wrist pain when doing body-weighted yoga poses can be a result from an old injury, a muscle imbalance or overtraining. Although you may feel your yoga practice is limited because of this, don’t fear!
In this article, Innovation Physical Therapy & Yogalife are teaming up to bring you a complementary perspective on this issue.
Wrist Pain in Yoga
There are a variety of yoga poses that can load the wrists. Downward Facing Dog, Upward Facing Dog, Plank and Chaturanga are among the most common poses especially in a Vinyasa style class.
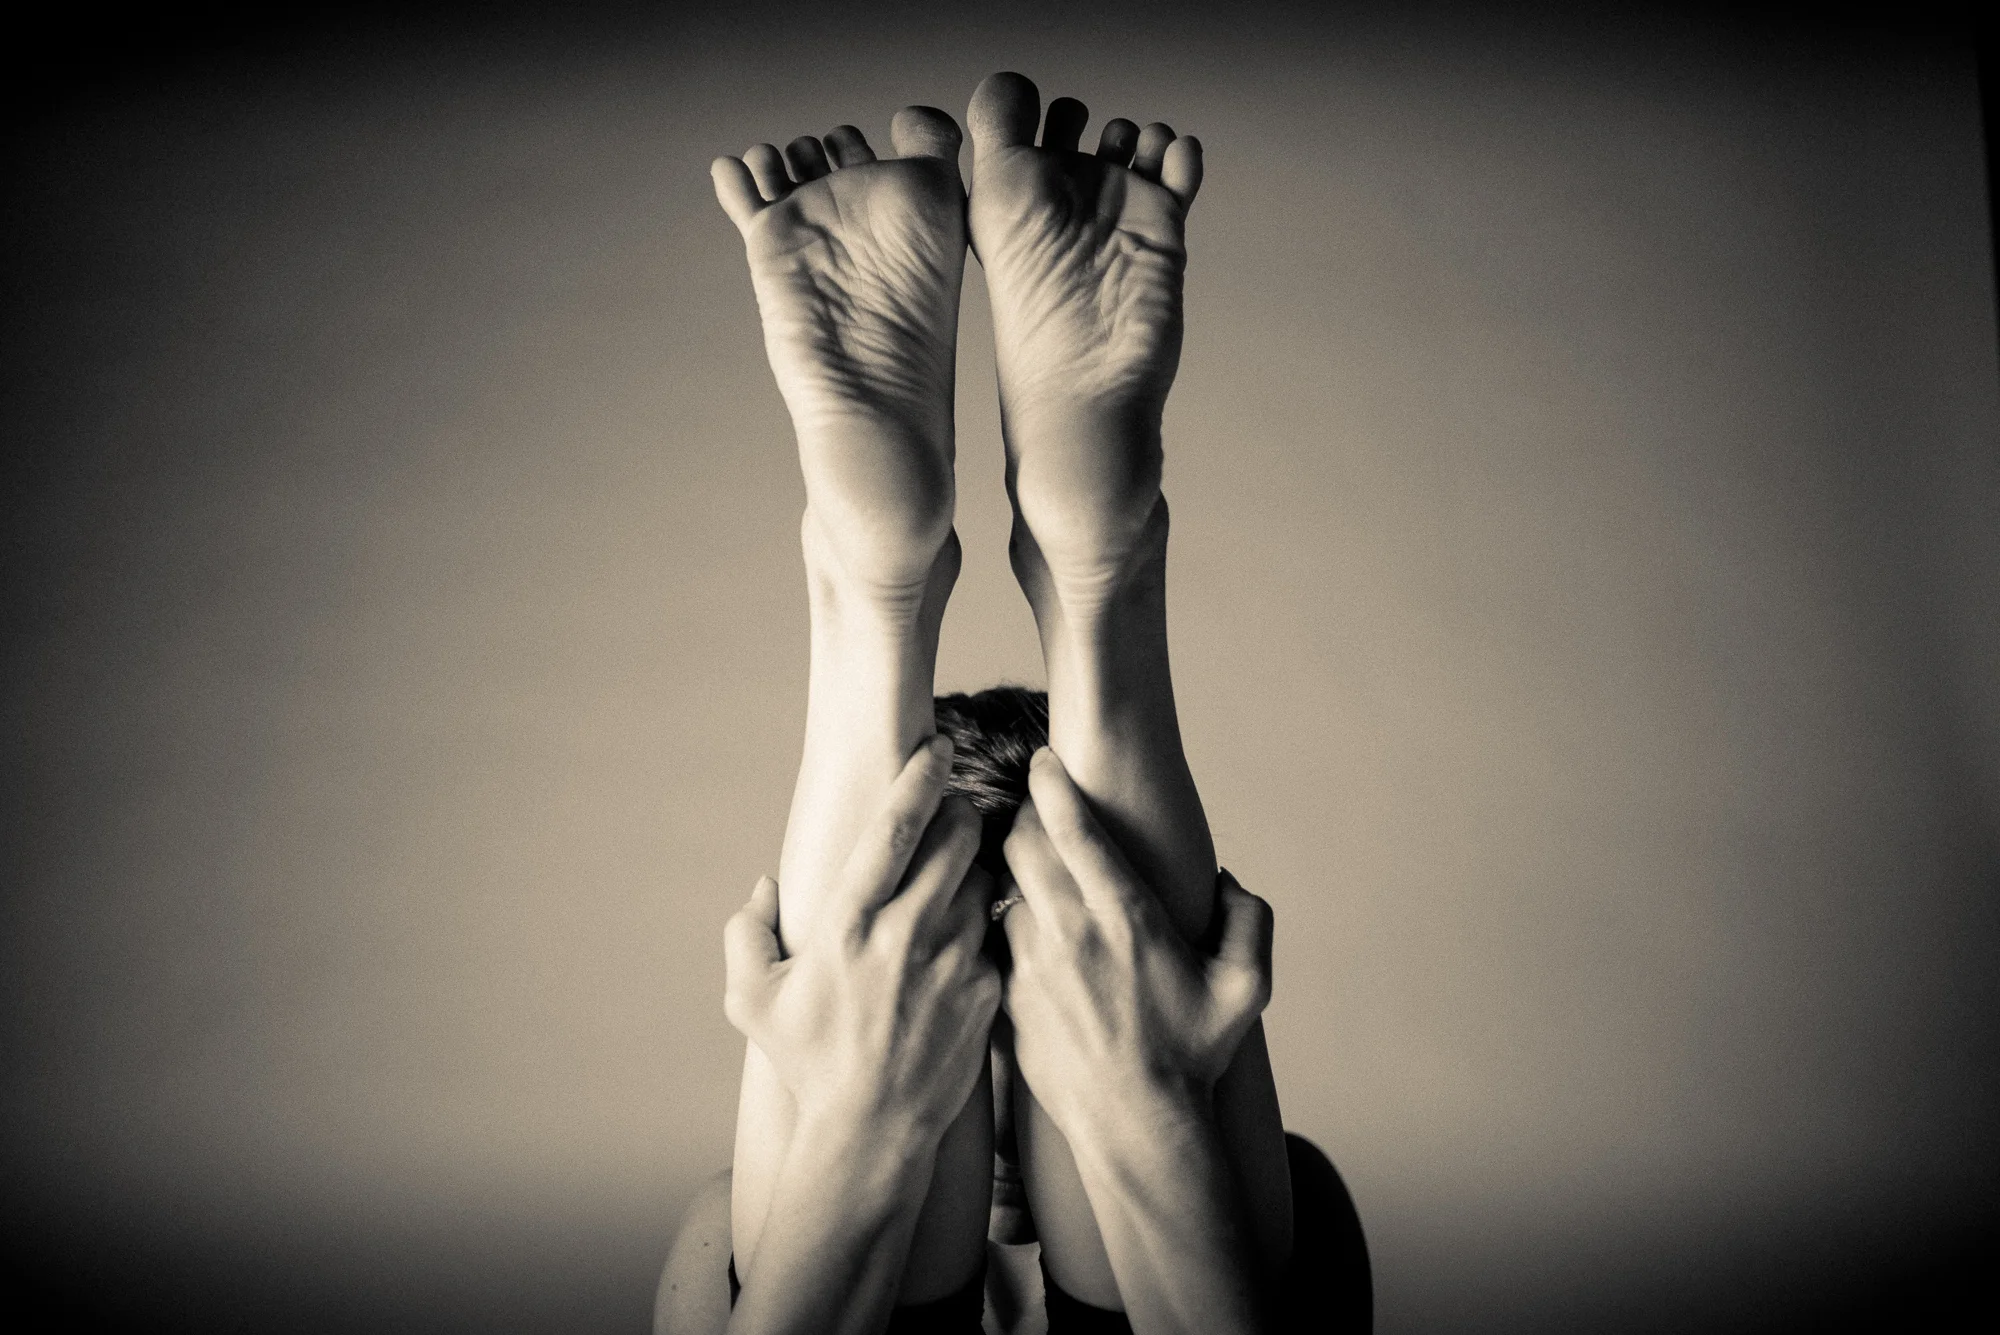
There are quite a number of bones that make up the wrist joint. 13 in fact! These bones work together to provide flexibility and stability to the wrist. Wrist pain can occur in a number of places, but the most common would be just below the thumb in the small divot that shows up when you spread all your fingers. As well, pain can commonly be experienced on both the front and back of the wrist.
Yoga Recommendations on How to Reduce Wrist Pain
When starting out in yoga, there is a common tendency to grip like a bear into the yoga mat. This can end up causing pain at the base of the wrist. When you’re in the plank position lowering down to Chaturanga (or half push up), your elbows need to stay close to your body. Your legs should remain engaged while you lower down to the floor. This will keep your weight distributed throughout the body rather than using only your hands to lower your body.
One of the main instruction cues that yoga teachers remind students during a weighted wrist pose is to focus on pressing down into the base of the thumb and index finger. This helps to take the pressure off of your wrist. When you’re starting out in yoga, it’s easy to lift your thumb and index finger off of the matt which causes excess tension and body weight to be translated through your wrist.

Another important strategy to reduce wrist pain is to activate your core a little more so your body weight shifts away from your wrists. It’s also important to not forget your legs. Activating your legs in any pose (even a handstand) will help you lift your weight out of your hands and spread it more throughout your body.
It can also be helpful to stretch your wrist muscles as well as opposing movement to help relieve any of the repetitive strain you may feel when practicing yoga.
If yoga students need to reduce or avoid weight bearing through their wrists then yoga instructors can adapt poses to help reduce wrist strain. This could include weight bearing through the forearms as opposed to the wrists (e.g.baby cobra instead of upward facing dog for instance) or using a closed fist (e.g. during chaturanga) to help maintain the wrist in neutral alignment.
Finally, it may be necessary to look at transitioning to a more gentle class style that has fewer wrist loading poses.
PT Recommendations on How to Reduce Wrist Pain
As physiotherapists, we focus on understanding the root of your pain and it’s no different if you are experiencing pain in your wrists during yoga.
It is hard to say what could be causing your wrist pain since we have not physically examined your wrists or upper body. But assuming no specific injuries, there is one foundational concept we find helpful in those with wrist issues during yoga.
The concept we want to share is the importance of opposing muscles sharing an equal amount of tension and length. Let us explain.
You have muscles on the front of your forearm (that let you grip) and muscles on the back of the forearm (that let you extend your fingers). These muscles cross the wrist. When one group of muscles tightens more than the other, the unfortunate result can be increased strain through your wrist joint.
We do a lot of gripping in life (writing, holding things, opening doors, lifting weights, etc) so it’s likely that your wrist flexors will become shortened in relation to your wrist extensors. This can strain your wrist and you may find yourself experiencing pain with yoga poses.
The solution: Start working on strengthening your wrist extensors. This Youtube video walks you through what this looks like. Low weights are ok (typically 1-3 pounds) and focus on working up to 3 sets of 15.
It goes without saying that getting assessed by a physiotherapist is important to understand what is going on. There are many other reasons for wrist dysfunction! Also you may experience numbness and tingling in your hand and fingers. This is something not to ignore and should be looked into.
Key Takeaways
We hope you found this article helpful bringing together two different perspectives on wrist pain during yoga. Here are your key takeaways:
- Engage your leg muscles while doing yoga poses so your weight can begin to move throughout the body and not just your hands
- Increase your contract pressure through your thumb and index finger during wrist load bearing poses so pressure through the wrist is reduced
- Balance the muscles that cross your wrist joint by strengthening your wrist
- Adjust your poses to take weight off your wrists
Next Steps
Need to dig a little deeper? We’d recommend you give Innovation Physical Therapy a call to get an in-depth assessment of your movement challenges. They have 6 physiotherapy clinic locations throughout Edmonton & Sherwood Park including Riverbend, Meadowlark, Belvedere, Namao, Sherwood Park and West Henday (January 2018).
For all our Yogalife guests, you can now benefit from Yogalife priority bookings, rates and access to their therapeutic facilities through our new Yogalife + Innovation Physical Therapy priority access program. Simply, provide your Yogalife member number at time of booking. Call (587) 524-8200 to book an appointment.
Yoga for Athletes
Yoga for Athletes by guest blogger, Carolyn Fallon.
Throughout most of my life I have been an athlete of some kind – whether it was participating in various sports in school or playing recreationally on different club and intramural teams in and after college. As an avid athlete, I find that there are other aspects that are part of being an athlete than just the physical skill that each particular sport calls for. There is a need for various characteristics personality-wise, but what I find is extremely important no matter what sport I am playing is the need to be fit and in shape in every way possible. As I have (yes, I will admit I have been out of college for a few years…) gotten a bit older, I have come to find that yoga is a great activity that allows me to be fit regardless if I am playing sports still, and also helps me have an edge over all the athletes out there that believe there is no “real use” for yoga!

Of all the workout styles, yoga is the oldest and most comprehensive practice combining weight-bearing exercise, cardiovascular endurance and meditation. Many people associate yoga with general fitness or just for people who “aren’t athletic”, but a growing body of literature on the effects of yoga on athletic training is changing this. Researchers have found a number of unique and positive results that have come from athletes adopting a regular yoga routine.
Yoga begins with a focus on increasing self-awareness. It starts with the control of breath. Once the individual has learned the use of different breathing styles effectively, these are incorporated into both static poses and dynamic movements that differ based on the particular school of yoga. Once these beginning aspects of yoga have been mastered, athletes can begin to use yoga to propel themselves past the workout plateau by increasing athletic strength and flexibility, while also protecting themselves from various injuries.
Yoga and Strength There are all kinds of ways that yoga can increase an athlete’s strength, training potential and even their recovery time. Just from the practice of controlling one’s breathing, results have been found in the increased strength of people’s grips. Additionally, as athletes become more practiced in yoga they will begin to move in to more vigorous types of yoga, such as power yoga and ashtanga, which will demand more exertion from them physically, and in turn improve their strength over time. Furthermore, because specific sports tend to emphasize certain muscle groups at the expense of others, yoga allows athletes to increase their core strength (and seriously, who doesn’t want that?!) and ultimately optimize their overall training efficiency!
Yoga and Flexibility Athletes have more to worry about than just muscle strength. The tendons, ligaments and other connective tissues of the joints must be trained to handle the extra work of the muscles. Unfortunately, athletes often face the reality of compromised joint health after only one or two decades of training! This problem is largely preventable with the practice of yoga. In fact, many orthopedic surgeons attest that yoga is excellent for strengthening both flexibility and balance. I think we can all agree that these are both pretty important aspects for any type of athlete!
Yoga as Injury Prevention
No matter what sport is involved, the constant movement and exertion that is expected of an athlete’s body can be exhausting. Exercising in general can make one’s legs, back, shoulders, and many other body parts feel sore and tight. Restorative yoga can help athletes to get back to their normal range of motion, which prevents future problems from occurring the next time they are active. Another benefit of yoga in injury prevention is the effect of increased circulation and reduced swelling which allows athletes to return to normal training without a hitch.
Yoga has so much to offer the modern athlete! It combines a body-focused meditation with complete joint and muscle workout, and has proven results that include better muscle coordination, faster recovery times, reduced fatigue due to efficient oxygen use, improvement to long-term joint stability and a reduction in athletic injuries. With so many benefits coming from the practice of yoga, what athlete wouldn’t want to try it out?!

3 Tips For Your Psoas & Happy Hips


Psoas & Happy Hips
Tight hips? Work on your psoas. Tight psoas? Work on your hips. The psoas are the only muscles in your body that connects the spine to the legs. As a result, if your psoas are tight and stressed, many different parts of your body will be affected from the neck, down to the feet and everywhere in between.
We are so excited to welcome back Brea Johnson to Yogalife Studios South for the second instalment of Psoas & Happy Hips.
As an extension of the Psoas Part 1, we will explore the relationship that the psoas has with the rest of the body, specifically focusing on the hips. Whether you attended Part 1 or are completely new, you will gain new insight and understanding of your psoas in a tangible and hands-on way. Traverse all the nooks and crannies in your hips and legs to increase range of motion and build structural stability. When your hips have more freedom, then the psoas can stay supple and happy.
 Gain a wide variety of self-care tools that you can integrate into your everyday life to maintain the health of your psoas. You will be able to better understand, manage and prevent back pain, pelvic floor issues, sleep, posture, flexibility, digestion, immune, adrenal & hormonal function just to name a few. The workshop is movement-based so that we can integrate intellectual understanding of the biomechanics of our body with the tangible experience of healthy alignment and movement.
Psoas Releases
Psoas Release on Block
Place block (or bolster) underneath your pelvis. You want to have the block fairly low down, toward your tailbone to allow your pubic bone to lengthen toward the ceiling.

This tilt will allow your low back and ribcage to move towards the ground. Start to feel the back of your ribcage soften down and the belly relax completely. If you have the habit of thrusting your ribs, then you can place your hands on the front of your ribcage to remind yourself to relax toward the floor. Stay for 5-10 mins. Psoas Release with Bolster Under Shoulders
Place one edge of your bolster between your shoulder blades. The rest of your spine and ribcage will be off of the bolster and relaxing towards the ground. If your psoas is really tight, the front of your ribcage will be lifted and most of your back will be off the floor. Over time, the psoas will relax enough that most of the back softens down and connects more on the floor. This isn’t something that you can force, you just have to hang out and allow your psoas and muscles to relax. Stay 5-10 mins or as long as it feels comfortable. You can also place a blanket over your body for more warmth and grounding. Stack your bones, not your psoas
One very simple cue that you can remind yourself of all day long while you are standing, is to back your hips over your heels. Most of us have the habit of thrusting our hips forward which places strain on your back, knees and feet. Just by backing your pelvis so it is lined right over your heels, your bones get to do the weight bearing that they are designed to do and your psoas doesn’t have to hold you up.

Yoga and the Psoas with Brea Johnson Saturday, October 24 || 2:30-5:30 Yogalife Studios South

Yoga and the Psoas with Brea Johnson


If there is one set of muscles you want to work on to make your whole body happy, work on your psoas.
Learn how to support, relax and nurture these important muscles both in a yoga practice and in your everyday life to prevent back pain, create stability and strength in your yoga postures and enjoy more freedom and ease throughout your whole body.
The psoas is one of the most important muscles in the body and yet often the least understood.
It is involved in moving your body and stabilizing your spine so that you can move, run, dance, jump and play with more freedom and ease. It is also intimately tied to your fight or flight response. If you have had trauma or been under stress, your psoas will hold that in your body. In this dynamic workshop, you will learn about this fascinating part of your body and how a relaxed, functional psoas relates to and improves everyday movement, back and neck pain, pelvic floor issues, sleep, posture, flexibility, digestion, immune, adrenal & hormonal function just to name a few.
• Discover important postural keys to align your body in a way that your whole spine is supported and your core will work more naturally and effortlessly. • Learn about the emotional and energetic elements of this powerful, deep core muscle. • Explore a variety of movements, postures and stretches to release deeply held tension and emotions in your psoas. • Utilize simple and effective techniques for daily self-care. • If you are a massage therapist, chiropractor or bodyworker of any type, you will gain insight and effective tools to augment the healing work you are doing with your clients. • Yoga, pilates and many other movement practices will be enhanced and pain-free through a deeper understanding of your psoas.
Yoga and the Psoas with Brea Johnson Saturday, March 7 || 2:30-5:30 Yogalife Studios South

The following is a piece from an informative blog post written by Brea. Check out the full article here.
While there are a whole bunch of things we can do to support and release the psoas, here are three things you can do everyday.
Psoas Releases
Psoas Release on Block
Place block (or bolster) underneath your pelvis. You want to have the block fairly low down, toward your tailbone to allow your pubic bone to lengthen toward the ceiling.
This tilt will allow your low back and ribcage to move towards the ground. Start to feel the back of your ribcage soften down and the belly relax completely. If you have the habit of thrusting your ribs, then you can place your hands on the front of your ribcage to remind yourself to relax toward the floor. Stay for 5-10 mins.

Psoas Release with Bolster Under Shoulders
Place one edge of your bolster between your shoulder blades. The rest of your spine and ribcage will be off of the bolster and relaxing towards the ground. If your psoas is really tight, the front of your ribcage will be lifted and most of your back will be off the floor. Over time, the psoas will relax enough that most of the back softens down and connects more on the floor. This isn't something that you can force, you just have to hang out and allow your psoas and muscles to relax. Stay 5-10 mins or as long as it feels comfortable. You can also place a blanket over your body for more warmth and grounding.
Stack your bones, not your psoas
One very simple cue that you can remind yourself of all day long while you are standing, is to back your hips over your heels. Most of us have the habit of thrusting our hips forward which places strain on your back, knees and feet. Just by backing your pelvis so it is lined right over your heels, your bones get to do the weight bearing that they are designed to do and your psoas doesn't have to hold you up.
If you are looking to learn more about your psoas and enjoy a nourishing and supportive practice, join us on March 7th at Yogalife Studios South and click here to purchase Your Supple Psoas video.

Happy Psoas, Happy Mama

Foundation Friday | Prenatal Yoga
Our Foundation Friday series delves into the basics of yoga—looking at its postures (asana), breath (pranayama), philosophy, and all the other essentials—giving you the foundations upon which to build a solid practice. Today we're sharing tips on prenatal yoga.

Our post today comes from Emily NcNicoll (who you may remember from Monday), our prenatal-passionate yogalifer. This piece was written specifically for teachers and is equally important for an expecting yogi to understand the limits of her body and practice.
Pregnancy in Yoga by Emily McNicoll
Although it can be intimidating to have a pregnant lady walk into your class, it is a wonderful chance to serve a woman that is going through a lot of change and would likely appreciate your support. Remember that knowledge is power and keeping educated with simple guidelines can make a big difference to your teaching experience and the way in which you serve your community.
Just like asking people about injuries, being informed about a pregnant woman in class is important. A simple “If you’re pregnant, come have a chat with me before class starts” is a good way to let a woman know she is seen and cared for by her teacher. Also, talking with front desk staff at the studio can be a good way to stay informed. Knowing the basic do’s and don’ts about practicing yoga while pregnant is a great way to build confidence as a teacher and a great service to all potential students.

Things to keep in mind and at heart:
Pregnant women produce high levels of a hormone called Relaxin. One of the roles that this hormone has is allowing for the ligaments around the pelvis to relax therefore allowing the bones of the pelvis to shift for childbirth. In terms of any exercise that involves stretching, it is very important for a pregnant woman to stay away from acute sensation in her joints (i.e knees) as Relaxin can make her ligaments and tendons more susceptible to injuries than a person who is not pregnant. My advice to the woman is to engage firm foundation of hands and feet (hasta and pada bhanda,) avoid hyperextension, and ease away from any painful sensations.
Pregnancy tends to induce heat in the body as it is literally working to grow life. With this in mind, encouraging woman to ask the teacher to cool down the room when she is feeling too hot is really important. A cooler room is often a relief to a pregnant woman as her internal temperature is high. I often bring a sweater when I teach prenatal so all the woman can remain comfortable, myself included!
Just like paying close attention to painful sensations and her own temperature, encouraging a pregnant woman to set her own pace and listen to her body is important. Teaching modified postures first and then offering more challenging variations is a great way to allow a woman to empower herself with choice. One day she meets her mat she may be up for a lot of physical challenge and the next day it could be different. This is why as a teacher being educated in modifications and prop use is really important.
When a woman asks about other classes that she can attend, going through a studios schedule with her and advising her of a few “don’ts” is really important. Here are the things she should know when exploring her yoga practice:
Always talk to the teacher before class to inform them of the pregnancy.

No hot or warm yoga. As explained above, a pregnant womans body temperature is on the rise. It is important not to aggravate this further. Also, pregnancy is thought to be a good time to introvert and build the bodies energy. Hot yoga can easily exhaust energy reserves which are needed for childbirth and being a mother. This is another great reason to encourage a woman to go at her own pace as only she will truly know what she’s feeling and her own personal needs.
No core yoga. A little bit of core engagement is encouraged (like 20-25% of her capacity) as it helps to tone and strengthen the pelvic floor and support her spine and hips. A core yoga class would not be recommended.
No arm balances. Unless a woman already has a strong inversions practice, staying away from arm balances is a safe bet. The risk of her falling out of the posture must be considered. Keeping her and her child safe is obviously important. Likewise when doing one legged balancing postures. Pregnant woman should be encouraged to use a wall when getting into and out of the poses with the option to play with taking hands off the wall. Some women find their balance to be way different when they are pregnant and the wall is there for her safety.
No deep twists. Gentle twists are a great way to lengthen and restore the spine but deeper twists with core engagement are a great way to encourage elimination. Keeping a soft lower belly and lots of room for the uterus is important.
A couple other things to consider:
The feet in forward folds should be a little wider than hip distance apart. In the beginning stages of pregnancy it will leave space for the womb and with in the later stages it will be the best way to accommodate the babies growth.
In the second and third trimester laying flat on her back is not recommended. The baby can put pressure on the mothers aorta (a main artery) and cause loss of blood flow to the brain and heart. Modifying reclined postures like savasana with bolsters is a good way to keep her more upright. You can also recommend resting on the LEFT side with a bolster between the thighs and one under her head. The left side is important due to the position of the aorta.
Know your oils! Some essential oils can cause uterine contractions. If you’re using oils in class be aware of the contraindications and when in doubt, don’t use them.
If you're interested in prenatal classes at Yogalife Studios, please get in touch with us at info@yogalifestudios.ca or by calling either of the studios.
Our next round of prenatal yoga classes start December 4th at Yogalife Studios South with Sara Cueva and December 5th at Yogalife Studios North with Emily McNicoll.

Body Talk


Body Talk: Are You Listening?
Self study happens on many levels. Each cell in our body shares our human experience; love resonates in our every fibre, as does shame, guilt, fear and anger. You may hear the hips referred to as the "emotional junk drawer of the body" or notice that certain parts of your body ache more with certain stresses. Humans store emotional experiences in their bodies and a yoga practice is a way to not only study these imprints, but to release them.
Alanna Kaivalya at MindBodyGreen shares the following:
"What we hold in our bodies as tightness translates into what we hold in our bodies as energetic stress and tension. For example, most of us recognize that someone with a hunched upper back has more than just shoulder and chest tightness, they also may have depression, sadness or fear. Other portions of the body store specific kinds of energetic tension that are exhibited as tightness and inflexibility.
Energetically speaking, our hips are where we store the emotional stress caused by a lack of creativity, difficult intimate relationships and the coinciding emotional roller-coasters. The hips are the energetic location of the second chakra, which is ruled by emotions, creativity and intimacy. Life stressors in these areas become lodged in the hips, resulting in difficulty opening up - both literally and metaphorically."

If you're looking to deepen the way you release in your yoga practice, we have the perfect offering coming up on November 22 at Yogalife Studios South.
Yin, Partner Massage & Self-Healing with Sara Cueva
Join Sara Cueva for a three hour workshop designed to educate you on the various methods to incorporate a more well rounded approach to your existing yoga practice. This workshop will include a short discussion on the relevance of, and importance of exploring, fascial release. Sara will guide you through the various techniques used to incorporate instrument assisted fascial release into your body to ensure the proper flow of nutrients within, followed by techniques for partner yoga massage, and will complete this nourishing journey with a yin practice to focus on the connective tissue of the body. This workshop will involve hands on work, so come with a friend, partner, or spouse, OR ensure you are comfortable touching and being touched by someone you may not know. This workshop is open to all levels (no prior yoga experience is required).

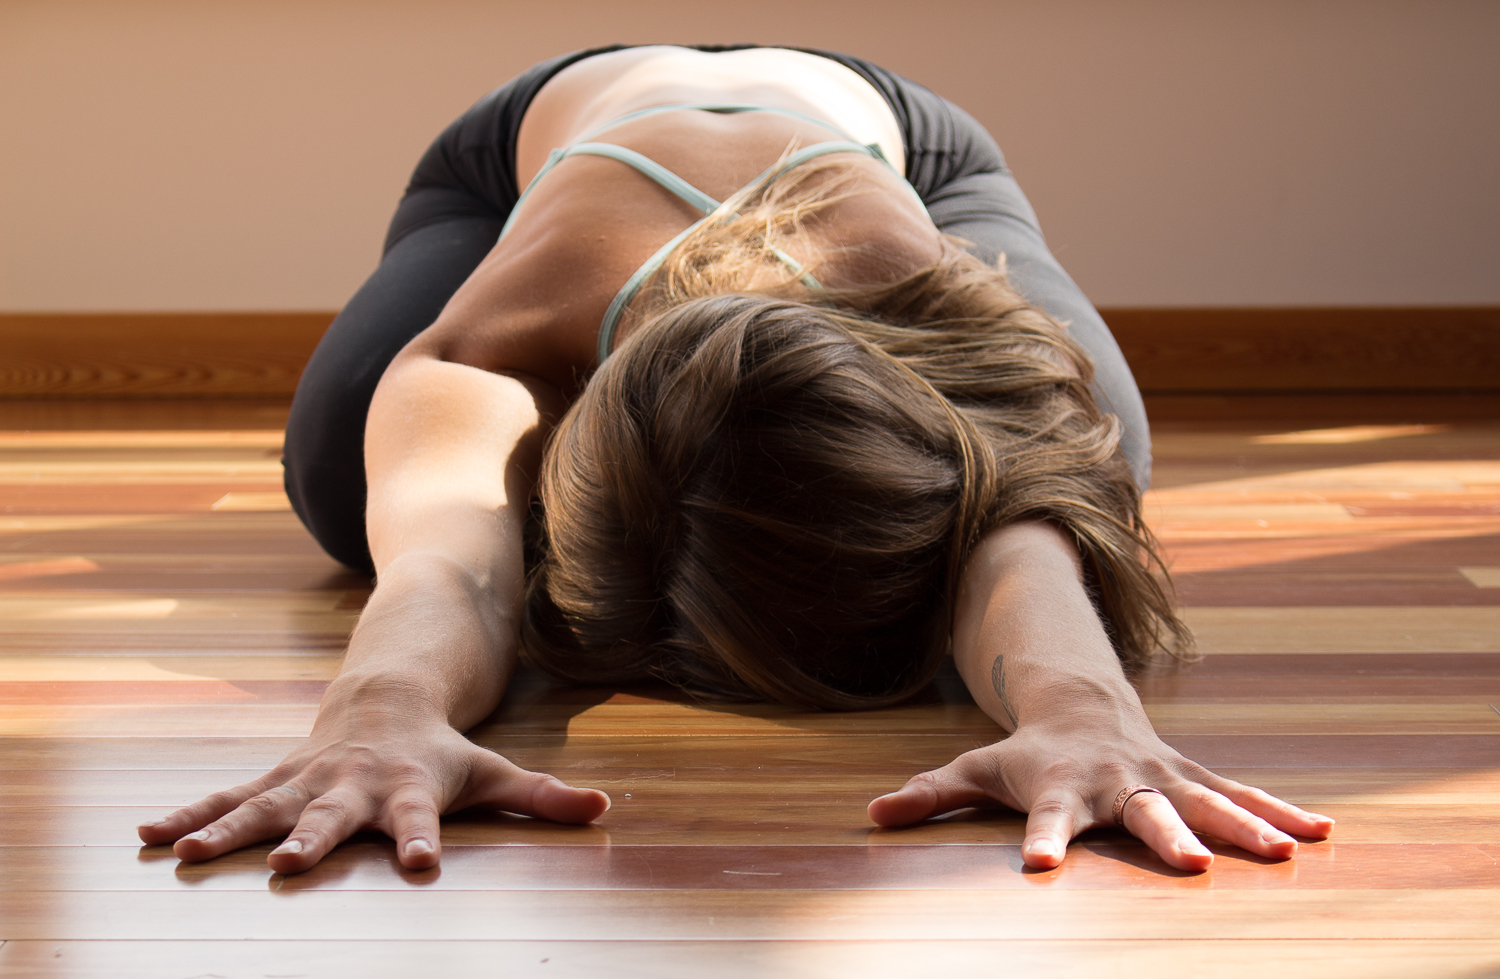
Foundation Friday: Balasana
This post is yet another instalment in a series that delves into the basics of yoga—looking at its postures (asana), breath (pranayama), philosophy, and all the other essentials—giving you the foundations upon which to build a solid practice. Today's posture is another great addition to our Grounding Series.
Foundation Friday: Balasana
Pose, or Asana Child's Pose bah-lah-sah-nah

Mmm. Child's Pose.
Don't you just love it when your teacher says those words, offering you the chance to retreat inside, to turn inwards, to shut off all external noise and simply breathe? Child's pose, or Balasana, is frequently offered as a break within sequences, a time to re-establish steady breath, calm the heart rate, or return to intention if we've gravitated away from what we've set out to do.
Why is child's pose so grounding and calming?
- First of all, the shape of the spine in a child's pose mimics the shape of the spine in a fetal position—and our time in utero was, for most of us, the most stress-free, comforting, and grounded environment we've ever known. It's a gentle reminder to our bodies, and then our minds, to return to that calm, quiet state.
- Secondly, all forward folds are—in their physical nature—calming and quieting as our bodies are literally turning in towards themselves. The anatomical action of folding our bellies, chests, and faces into our legs—or in this case, the floor—seals us away from whatever is going on externally so we can only look at ourselves.
- Further, the action of resting the forehead down on something (the earth, stacked fists, a block) gently stimulates the vagus nerve. The vagus nerve helps to regulate the parasympathetic nervous system (the part that allows us to rest and relax), and in doing so it naturally lowers our heart rate, blood pressure, lessens tension and the stress hormone cortisol. That's why child's pose is also an excellent bed-time posture!
Balasana may help…
- Opens through your hips, thighs, and ankles
- Open the shoulders (especially in the traditional variation)
- Calm anxiety, soothe stress, and relieve fatigue
- Help move your nervous system into a more relaxed state

So, how do I get there?
- From Downward Facing Dog, lower your knees down, about mat-distance apart.
- Touch your toes together, and rest your seat back on your heels.
- Fold your torso forward. Let your belly rest in between your thighs.
- Extend your arms forward, palms facing down.
- Find someplace for your forehead to rest—if the ground is not available, you can use a block, a folded blanket, or even stack your palms or your fists.
- Breathe.
We hope this helps you better understand balasana, or child's pose. Please feel free to comment on our Facebook with any further questions. And let us know if you have something you would like to see featured in Foundation Friday!

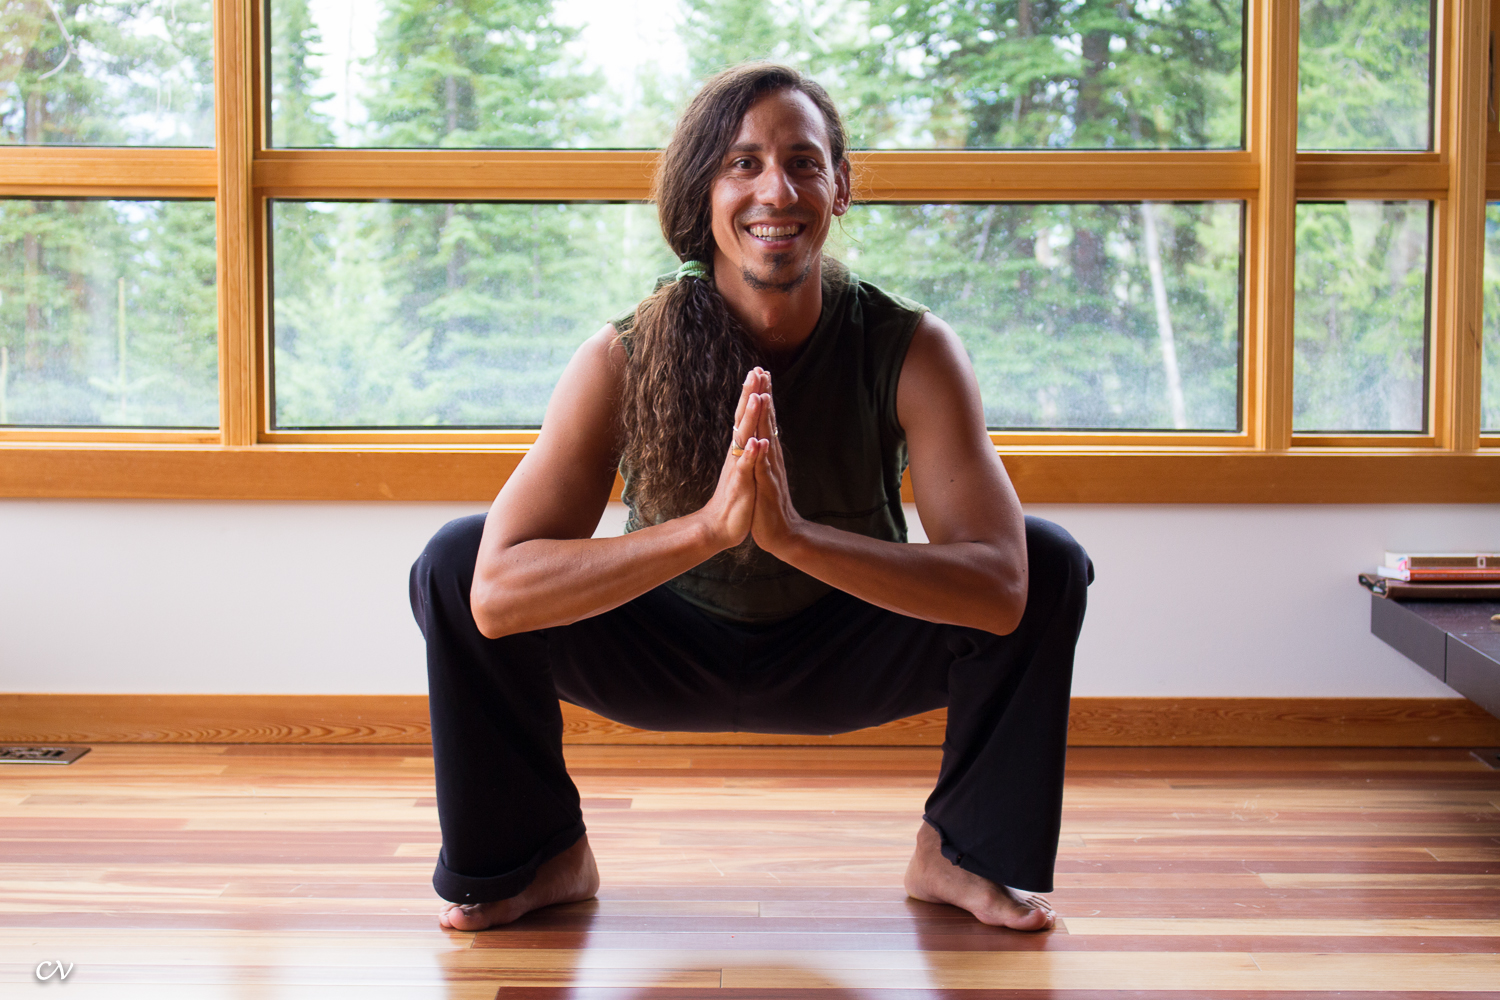
Foundation Friday: Malasana
This post is an instalment in a series that delves into the basics of yoga—looking at its postures (asana), breath (pranayama), philosophy, and all the other essentials—giving you the foundations upon which to build a solid practice. Today's focus will be on Malasana, or Garland Pose.
Foundation Friday: Malasana
Pose, or Asana Garland Pose, or "Yogi Squat" mah-lah-sah-nah

In conjunction with our monthly theme, Malasana is one of the ultimate grounding yoga postures. The rooting through the feet, the closeness of the pelvis to the earth, and the general feeling of heaviness and surrendering to the weight of gravity in this posture all encourage a downward flow of energy. Malasana's energetic qualities are calming, soothing, and quieting for the busy mind, as this asana activates a flow of prana down through the body, towards the ultimate source of grounding—the earth.
Many Eastern cultures are accustomed to sitting on the floor for meals and meetings, or squatting comfortably as they go about their daily activities— whereas In our Western world, we spend so much of our lives seated in chairs, car seats, or on couches. We lose the softness and suppleness of our hips, calves, and ankles, and the strength of our low back, thighs, and core. Physically and energetically, malasana helps to counteract these losses.
Malasana may help…
- Tone your thighs, glutes, and calves
- Strengthen your low back and abdominal muscles
- Open through your hips and inner thighs
- Aid in digestion and elimination
- Soothe anxiety and promote calm

So, how do I get there?
- Start standing with your feet about mat-distance apart. Turn your toes slightly outwards.
- Lower your hips in between your legs. Keep your heels on the floor if you can, or support them with a folded mat or towel. You might even try this posture with a prop—like a block, or bolster under your seat.
- Draw your hands into anjali mudra (prayer position) and slide your shoulders back. Press your outer elbows into your inner thighs, and vice versa. If this is too much, keep both of your hands on the floor in front of you for support.
- Lengthen your tailbone down towards the earth—like gravity is pulling it lower—but lengthen the crown of your head higher to elongate your spine.
- Broaden the front of your chest.
We hope this helps you better malasana, or garland pose. Please feel free to comment on our Facebook with any further questions. And let us know if you have something you would like to see featured in Foundation Friday!
Foundation Friday: Pada Bandha

This post is an instalment in a series that delves into the basics of yoga—looking at its postures (asana), breath (pranayama), philosophy, and all the other essentials—giving you the foundations upon which to build a solid practice. This post focuses on one of the "bandhas", or "locks"—in what might be our most literal "Foundation" Friday yet!
Foundation Friday: Pada Bandha
Lock, or Seal ("Bandha") Foot Lock, or “Pada Bandha” pah-dah bahn-dah

First off—what is a bandha?
The sanskrit word "bandha" translates to lock, seal, or closure. During asana (postural) or pranayama (breath work) practice, bandhas help to energetically "lock" in energy and prana (life force), consciously sealing it inside of our bodies so that it can aid us in our practice. There are three main internal bandhas, one "mother" bandha, and two stabilizing, grounding bandhas—pada bandha, as we'll look at today, is of the stabilizing, foundational variety.
What then, is pada bandha?
Pada, in sanskrit, means "foot"—so pada bandha, is then a "foot lock," or "foot seal." It is a sealing of your connection—or a rooting—with the earth beneath you. It is a solid foundation upon which you can balance. It's a way to get acquainted with all the tiny, underused muscles in your feet (all twenty of them!).
Pada bandha may help…
- You to feel more energized by "locking" your energy in
- Give a sensation of "grounding" while simultaneously lifting (may aid in anxiety or depression)
- Protect your knees
- Support your balance
- Alleviate problems with fallen arches
- Strengthen your legs
- Activate mula bandha (more on that to come!)

So, how do I get there?
- Take a good look at the bottom of your foot.... get really up close and personal! Notice its curvatures, and its raised and recessed areas. Thank them for all the work they do—these feet are what support you, day in and day out!
- Find the four corners of the sole of one foot—the mound of your big toe and pinky toe, and your inner and outer heel. From standing, place your foot down on an even surface and press each of those four corners down evenly.
- Pick up all five of your toes and spread them away from your foot and as far apart from each other as you can.
- While still pressing down through your "four corners," and with your toes lifted, draw, or squeeze the ball of your big toe mound towards your inner heel, and your inner heel towards the mound of your big toe in a way that lifts your arch. Without releasing through the inner edge, do the same with the mound of your pinky toe, and your outer heel. Perhaps you might notice your ankle lift slightly, or feel like you can draw the strength of your feet up your whole leg.
- Keeping all of the engagement you found in Step 4, place your toes back down—one at a time if you can—still spread widely, almost as if you had webbed feet, or spacers in between your toes (this is what we like to call "yogi toes!").
- Do the same with your other foot.
We hope this helps you better understand the concept of pada bandha. Please feel free to comment on our Facebook with any further questions. And let us know if you have something you would like to see featured in Foundation Friday!

Foundation Friday: Downward Facing Dog
This post is an instalment in a series that delves into the basics of yoga—looking at its postures (asana), breath (pranayama), philosophy, and all the other essentials—giving you the foundations upon which to build a solid practice. This post focuses on the ubiquitous downward facing dog.
Foundation Friday: Downward Facing Dog
Pose, or "Asana" Downward Facing Dog, or “Adho Mukha Svanasana” odd-oh mook-ah shvah-nass-ah-nah (not to be confused with savasana)

Why do we practice downward facing dog?
Downward dog is probably one of the most prevalent of all yoga postures. Though it may not feel like one when you first begin practicing, downward facing dog is actually a resting pose, and is often offered as a break between sequences, or as a starting and finishing point in a flow, or vinyasa. This pose will likely be taught in your first-ever beginner's class, and will carry you through as you advance your practice—downward dog is a quintessential pose, so it's important to get your alignment, er... down!
Downward dog may help…
- Calm the mind, relieving stress and mild depression
- Energize your body
- Stretch your shoulders, hamstrings, calves, arches, and hands
- Strengthen your arms and legs, which acclimatizing you to weight-bearing in your arms
- Improve digestion
- Offer relief for sinus pain, headaches, insomnia, back pain, and fatigue
- Ease conditions of menopause, high blood pressure, asthma, flat feet, and sciatica, and prevent osteoporosis
Traditional Chinese Medicine and acupuncture tend to favour Downward Facing Dog for its activation and extension of the Bladder Channel, the longest channel in the body. According to their perspective, elongating the spine throughout this posture aids in strengthening immunity, among a host of other benefits.

How do I get there?
- Start from a table top position, on your hands and knees. Place your hands slightly wider than shoulder distance apart and spread your fingers wide.
- Turn your hands so that the space between your pointer finger and your middle finger points to the top of your mat.
- Press down through the four corners of your hands, especially the mound of your thumb and pointer finger, while gripping your mat with your fingertips.
- Tuck your toes under, and press your hips up so that your body looks like an inverted pyramid from the side.
- Squeeze your forearms towards each other, and roll your upper arms away from each other.
- Ensuring your feet are hip-distance apart, take a soft bend into your knees and press your heart back towards your thighs.
- Roll your inner thighs back and wide behind you.
- Tilt your sitting bones skyward, and draw your tummy in towards your spine.
- Hug your shins towards each other, and press your heels down towards your mat (but it's okay if they don't touch!)
- Look between your feet, shins, thighs, or upwards at your belly.
If this position is uncomfortable, you can:
- Place your hands on blocks if your shoulders are quite tight
- Prop a towel, rolled mat, or some small sort of padding underneath your palms to alleviate pressure on your wrists
- Take a bigger bend into your knees if your legs are tight
- Support your head with a bolster or a block
- Or, start from standing with a wall or chair in front of you, then bend at your waist and press your palms into a wall or chair instead of the floor. Progress by walking your hands lower towards the earth as the posture becomes more accessible.
We hope this helps you better understand the concept of downward facing dog. Please feel free to comment on our Facebook with any further questions. And let us know if you have something you would like to see featured in Foundation Friday!

Essential Cyclist Asanas


This month we are joining along in the YEG celebration of cycling! As yogis, we know how incredibly essential it is to honour our bodies with the right movement, finding balance after rigorous activity. Yoga, in all its magnificence and splendour, is the perfect compliment to pretty much anything; give me a side of asana before and/or after a long ride and I am a happy camper!
Yogi and endurance athlete Josh Schrei shares the following:
Pedalling long hours astride the saddle with the neck up shortens the spine and causes tightness in the lower back, sacrum, and hips. The neck and jaw can lock up, too. Good posture and stretching will help diminish these after-effects of serious rides.
First, look at your posture in the saddle. Focus on lengthening the spine—be conscious of keeping space between the shoulders and neck. Also, lift the navel to engage the lower abdomen. This will keep the support in your core to protect your lower back.
Second, do these four yoga postures every day to stay loose and maximize your potential on the bike.
1. Cat/Cow
Cat/Cow brings length to the spine in both the forward- and back-bends, working out stored tension from cycling.


2. Downward Facing Dog
Downward dog will not only open the lower back, it will also strengthen it, giving you structural support when you’re on the bike.

3. Chair Pose Into Forward Bend
Like Downward Dog, this pose alternately strengthens and opens the low back and hips. It also lengthens the upper spine.


4. Plow
This pose will open up the whole spine, particularly the sacrum at the base of the spine.

adapted from outsideonline.com
What are you favourite post-cycle stretches? Connect with us on Facebook, Twitter and Instagram. Happy riding!

Wring Out the Winter


You may have noticed a little twist in your yoga practice here at Yogalife lately. It is by no mere coincidence that many of our instructors have been focusing on twisting poses in practice—as the seasons turn, so should our bodies.
Spring is an excellent time for detoxification and cleansing, clearing out the old to make room for the new.
Just as we might spring clean our houses—scrubbing out the dust bunnies and packing the warm, thick layers away—it is also important to spring clean our bodies, removing the heaviness and slowness of winter to make room for the lightness of the warmer months (and since we claim residency in Edmonton—home of the long winter—we have plenty of work to do!).
In yoga, a great way to aid and promote cleansing the body is through twisting postures. Similarly to the way you might wring out a wet washcloth to squeeze out all the water, twisting our bodies helps to “wring out” our internal organs, facilitating a more efficient cleansing process.
Here’s how:
Twists temporarily restrict the flow of blood throughout the body. When we release a twist, our now freshly oxygenated blood floods through our veins. This enhanced circulation helps bring fresh nutrients and oxygen to our internal organs and provides them with the tools they need to do their job optimally. Spring is the best time to support the liver, as it is our body’s main vehicle for detoxification. If you subscribe to traditional Chinese medicine, this is the time of year where the liver is the most sensitive—prime time for us to focus on keeping it clean and working like a champ.
The compression of internal organs through twisting helps to move along stagnated digestion and bloating, promoting the cleansing of our digestive tract for a happier, healthier belly. For anyone who has struggled with digestive upset, twists—alongside strong pranayama, or breath—can help to ease discomfort and facilitate better digestion and absorption.
In addition, deep breathing has a cleansing effect, as we are able to bring in the new—fresh oxygen—while releasing the old—stale, depleted carbon dioxide. In combination with deep twists, long inhales and exhales further aid the body in its gentle purging process. In whichever variation of a twist you might practice, try using your inhales to lengthen your spine and broaden your chest, and your exhales to gently bring yourself into a deeper expression of the pose.
Alongside their detoxifying effect, twists can also aid in properly aligning the spine, releasing the muscles and pain or discomfort through the spine all the way down into the hamstrings, increasing or maintaining range of motion in the back body, toning the abdominal muscles, and helping to release tension, stress, and anxiety stored in the chest, shoulders, and back.
You might twist from your feet, the floor, atop a bolster, or even balancing on your hands—different poses and variations make twists accessible to every body. Do you have a favourite twisting pose? Do you have any spring rituals or routines for cleansing the body? Let us know!

Cleansing Your Vessel


I just finished my lunch and it was DELICIOUS. I chewed slowly and enjoyed every single bite. This was day one back on a regular eating schedule after a 9 day colon cleanse that included 5 days of no solid foods. During this 5 days I only ingested a powdered combo of bentonite clay, psyllium husk, apple pectin and ginger shaken up in 8 ounces of organic apple juice followed by all the water in the world. I dumped this stuff down my throat starting right when I woke up in the morning and then every 3 hours after, 5 times a day. I would consider this an extreme form of cleansing but my conditions that led me here were also extreme and this was sort of my last resort. We'll get back to that.
In hindsight this was one of the best things I have ever done for myself and will complete this same cleanse at least once a year.
Let's rewind a moment and start thinking about the idea of cleansing and restoring the body. As we move into Spring (internally and on the calendar, not outside) we are entering a time of renewal. After a long winter of hibernation and perhaps lethargy, it feels really good to start sloughing off some of the excess.
In winter we nourish and conserve our qi (life force) so we are ready to burst into this next phase of growth and awakening.
Various healing methodologies (Ayurveda, Naturopathy, Traditional Chinese Medicine) know that our energy mirrors that of the changing seasons. Just as little green buds (eventually) pop from the trees and bring new life, our internal regeneration process is craving detoxification and cleansing so that we too can emerge with new buds.
So back to the colon cleanse... I chose Blessed Herbs (available at Noorish or online) which comes with a shaker jar for my 5-times-daily concoction, all the little packets easily divvied up as well as digestive stimulator capsules (a fancy way of saying laxatives) and my user's guide. This cleanse is intended to be simple and straightforward and I really appreciated the amount of positive feedback and testimonies (alongside some serious pictures of people's "success") available on their website.
In the past two weeks I have learned tons about my colon and have delighted in sharing this knowledge with others (perhaps against their will!).
In most vertebrates, the colon is the last part of the digestive system. It is responsible for three functions: absorb sodium and water, incubate beneficial bacteria and eliminate waste. Amazingly is it a little more than five feet long and hosts ten times the amount of bacteria in the intestines than there are cells in the human body. THESE are the kind of facts your friends and family can't wait to hear!!!

The following is information that I found quite fascinating from my user's manual:
It is common after years of eating to build up mucoid plaque on the walls of our intestines. This plaque greatly lowers our ability to absorb nutrition and makes our bodies much more toxic. Mucoid plaque may be a layer or many layers of adhesive, hardened mucus lining the inner walls of the digestive tract. It can be from less than one-sixteenth of an inch to several inches thick. It is usually compacted with old fecal matter, bound up toxic waste, 'bad' bacteria, and/or unwanted guests. The plaque can vary in length anywhere from a few inches to, amazingly, over three or four feet.
Even re-reading this information gets me so excited that this CRAP is out of me! (I had to have at least one pun in here, come on.)
But seriously, better out than in. My main personal reason for completing this cleanse and thus starting on the road to cleaner eating in general (including no wheat or dairy) is because I have suffered from eczema for years and years: 15 of them, on and off. Often, the state of your skin is a reflection of what's going on in your digestive system and how well your body eliminates waste. After this past few-month bout with eczema I am surprised I even have skin left on my arms to heal... but this body, just like yours, is an amazing vessel. When you let yourself be healthy and give in to what actually needs to happen, IT WORKS. I am ecstatic to report that my eczema is 95% GONE and I feel more energetic and alive than ever. When you make a commitment to health, you heal.
"I easily release that which I no longer need. The past is over and I am free" - Louise Hay
If you have any other questions about colon cleansing, eczema, eliminative diets, cleansing in general, never hesitate to email me at caitlin@yogalifestudios.ca
Is there another cleanse you'd like to see featured on here? Let us know!

Rest & Digest


How to cure digestive woes? It is a life style. It is NOT a momentary diet, though these can be helpful to get the digestive system back on track. If we want to truly nourish our health, it is through our food and it is over our entire life span from the moment we choose to be healthy to the moment we pass on.
It is healthy living, it is choosing to love yourself so much that you only want to put good things into your temple/vessel/body.
People change their diets when they are pregnant so that the baby has a chance to come out healthy, but why do we ourselves not want to be healthy? Marketing? Corporations tell us otherwise? If you are truly wanting to uplift your digestion, you must uplift your Self first, so eating healthy comes from a place of truth and yearning for well being, not from a place that wants to be skinny so that other people will think you are perfect.
It is meditating so your mind is clear and free of desire, it is avoiding rag mags, tv, and general advertising that makes you think you need to be anything more than your truest self.
At the core of your being, you want to live a fruitful, healthy, happy life and I can guarantee you, that truth does not say " I want McDonald's."
Amen, Namaste, Om Sarah Z
Sarah is leading the upcoming 'Digestive Restore' workshop at Yogalife Studios North this weekend. This session is full but please stay in touch at info@yogalifestudios.ca to learn about her next one!
How-To: Full Vinyasa Flow

How To: Full Vinyasa Flow from Yogalife Studios on Vimeo.
- Step 1: From downward facing dog, bring yourself forward into a plank position on an inhale breath. Shoulders over the wrists, legs strong and straight, core engaged. Be sure not to collapse through your low back.
- Step 2: On the exhale, lower yourself to chaturanga, keeping the elbows hugging into the side ribs, bring your upper arms parallel to the floor while maintaining the strength in your legs and core
- Step 3: On the inhale lift into upward facing dog, rooting down through the tops of the feet, lift your chest by straightening through the arms, sliding the shoulders back to open the heart.
- Step 4: On the exhale, tuck your toes under and move back into downward facing dog.
A Bit About Vinyasa Yoga...
adapted from Shiva Rea/Yoga Journal
Vinyasa yoga teaches us to cultivate an awareness that links each action to the next—on the mat and in our lives.
Like rhythms in nature, a beautiful dance, or the notes of your favourite song, the sequence of vinyasa unfolds with harmony and intelligence. The progression and interconnectedness between movement and breath coordinates in such a way that you inherently move through your meditation (and it moves through you).
"Vinyasa" is derived from the Sanskrit term nyasa, which means "to place," and the prefix vi, "in a special way"
Yogalife Studios offer specific Vinyasa Flow classes or you can find this style of yoga presented in many of our flow classes. To learn more about specific classes click here!

Pose of the Month: CHATURANGA DANDASANA

Yogalife Studios are so thrilled to see all these yogis, new and old, hitting their mats like it's going out of style. Whether you're new to the practice or a seasoned vet, chaturanga dandasana (or low plank/push-up) is one of those tricky poses that is easily done incorrectly. Why? BECAUSE IT'S HARD!
This pose takes strength, breath, alignment and ZERO ego. It is truly one of those poses that you need to master the modified version before attempting to move on. Your shoulders will thank you!
Here are some tips to keep your chaturanga strong and healthy:
Remember...
- In order to do the full version of the pose, you must have sufficient arm, shoulder, and abdominal strength. These parts work together in a complicated way to create the perfect alignment here.
- If you don't have the strength to do the full version of this pose, do it from your knees! Let go of the ego and listen to your body.
- Hands under elbows
- Elbows under shoulders
- Abdominals and low ribs pulled in; core engaged
- Thighs pushing up
- Heels pushing back
- Hug all your muscles into the midline of the body
- Roll WAY forward on your toes. Even more than you think you should. (This ensures you will lower down with your arms in a 90° angle.)
- Now begin to lower down until your arms form a 90° angle and stop just at that point.
- Keep your core VERY engaged just as in plank—abdominals and ribs really pulled in
- HUG your elbows into the sides of your body
- Keep the tops of your shoulders pulled back away from your ears and pointing straight forward, not drooping down.
- Imagine that you’re trying to make your clavicles SMILE. In other words, broaden through the chest. “Smile your clavicles”.
Adapted from Mind Body Green

Learn To Fly


10 Messages Your Body May Be Sending You on Your Mat - Are You Listening?!?!

Adapted from Karen Fabian:

"If it doesn't challenge you, it won't change you." "You are beautiful and perfect just as you are." These are just a couple of concepts that I often teach on. Please read on to discover how you can learn to love yourself and your practice even more.
Sometimes when we practice yoga, it’s all we can do to get to the mat. We start practicing, our body is tired, our minds wander and we’re distracted and not focusing on the mind/body connection. Even in the best of practices though, we may also feel somewhat disconnected. We’re dealing with information overload: between social media, the news, our personal schedules and any pains in our body that may have disrupted the passage of messages from our heads to our body.
It’s important to hear the messages our body is sending. This can be the difference between feeling good and feeling great. Sometimes our body is sending us messages but we’re not clear on what to do because we’re new to the pose or to yoga in general.
So, inspired by these thoughts, here are 10 things that may pop up in your sensory body that might be worth listening to:
Is Downward Dog supposed to hurt my hands so much?
From a teacher’s perspective, this is one of the most common messages I’ll bet your body may be sending you, but you’re not sure what to do. If you’re new to yoga and feeling this, you’re probably wondering how anyone could enjoy this pose.
Bend your knees and leverage pushing down into your palms to literally rebound up the sides of your body, pushing your hips up and back. Remember to keep your knees bent a little so that you can draw the weight out of your hands and into your legs. Do this with great awareness so as not to overstretch the hamstrings or create tension in the low back or shoulders.
How can I stop my arm from shaking in Side Plank?
Here’s another pose-related message that I frequently see students struggle with while in class. Turning to the side puts tremendous pressure on the shoulder. Unless the shoulder is stacked over the wrist and/or the knee is down, you may experiences shaking in the supporting arm. Take this modification and you’ll experience less shake while building more strength.
It’s so hard to hold this Triangle Pose. This can’t possibly be right. Triangle pose is a stretch for the inner thighs and sides of the body but it’s hard to experience that sensation if you’re hanging over the front of your leg. Feeling good in this pose is additionally complicated by placing a block in front of the foot instead of behind it. In order to create the alignment of your joints needed to be comfortable, only bring your hand down as far as you can keep the upper body aligned with the front thigh. With this alignment, you’re not fighting gravity and can experience great stretch.
Why is it so hard to reach this block? This is hardly helpful. I often see people grab a block and the lose alignment by placing it too low or struggling to reach it with their fingertips versus using two or turning it on the higher end. Blocks are meant to give you greater stability not create more struggle. Listen to those messages and use more or turn them on their shorter sides.
My hamstring feels like it’s going to pop right out of my body. In our zeal to create flexibility, we may sometimes ignore the messages our body is sending us to let us know that we’re pushing too hard. Muscles should feel stretched evenly throughout the muscle but not to a point where we feel a strong sensation at the beginning or end of the muscle. Bend the knees or make other modifications to the part of the body in question to lessen this sensation.
I can’t breathe. Heated power classes can sometimes result in this feeling and can create anxiety for students. Even in non-heated classes, a crowded class or one where a student is experiencing anxiety for other reasons (yoga-related or otherwise) can trigger a sense of panic. Take a moment to listen to this message. Rest in Child’s Pose. Leave the room for a breather if you feel you need a break but do so mindfully.
I’m so tired. Sometimes, our practice helps us realize we’re really tired. While this seems obvious, as people often complain all the time about how tired they are, this is a deeper awareness; one that only comes after some time on the mat. It can be deep to the level of the bones or may just be an awareness that our mind is constantly moving.
During practice, modify and take time to rest. Give up the urge to keep up or compete with those around you. Meditate at the end of class on what else is going on in your life that could be contributing to this feeling.
Why am I having such a hard time keeping up? In any class we may feel the urge to keep up with those around us. In the midst of doing this, we may feel discouraged and start hearing voices that tell us we’re not good enough or ready for yoga. In these times, we need to practice compassion for where we’re at in our practice. We need to look for ways to make the practice fit our body as it is right now and let go of the need to compete.
I bet I could do this pose. Just as we need to allow for rest and compassion, we also need to listen to that inner voice, as small as it might be, that we could actually do the pose that is being presented. I know lots of students who think they can’t do a particular pose because they’re new, or not flexible or not strong enough. It’s only through trying that we will ever know. Bring your healthy attitude and see what’s possible.
I really feel good. Sometimes it’s easy to look at the glass as half full. We wanted to do a particular pose; we wanted to feel particularly graceful and did not. But sometimes, in the depths of our final rest, we may hear a voice that says, “ I feel great.” This is the magic of yoga.
Listen to that voice and from it, draw strength. You are beautiful, you are strong and you are perfect just as you are.


Habit Mastery - Creating the NEW Normal

")
Adapted by Leo Babuta
Many of us are looking for change. Big, small, personal, life, relationship, etc. We always hear that it takes three weeks to make or break a habit. Here are some ideas and thoughts about creating long-lasting change, in any aspect of your life.
Changing habits, at its core, is simply a process of changing what’s normal for you. This is something I’ve done myself a gajillion times over the last 7-8 years:
- not smoking became my new normal (lots of pain for a month or so)
- running became normal
- eating vegetarian became normal
- later eating vegan became normal
- writing every day became normal
- not having sugar in my coffee became normal
- eating whole foods (instead of junk foods) became normal
- meditating every morning became normal
- having less stuff and a simpler home became my new normal
- reducing and eventually (mostly) eliminating sugar became normal
- and so on: no car, walk and ride mass transit, do less, becoming content with myself, working for myself, etc.

In fact, you could say the last 8 years of my life has been a constant adjusting of what’s normal. Adjusting normal is my normal now. However, for most people, changing is tough because there’s some pain in changing. When you have a problem, there is the pain it causes in your life, but there’s also a pain of trying to change it.
When the payoff of trying to change is outweighed by the pay off of continuing the old way, people stick with what they’re comfortable with.
How do we overcome this problem of the pain of change? Start small, start with one thing at a time, and make the change easier. You want to make changing the path of least resistance, because change usually isn’t for most people. If you make a drastic change, it feels really hard and really different, and not something you can stick to for very long. But when you make a change easier, it makes it easier to take that all-important first step.
Once you take that first step, you have a bit of forward momentum. And it’s much easier to be consistent and stick with something for a long time.
Let’s take an example: I used to drink coffee with lots of added sugar. I used to think there was nothing wrong with that, but eventually I realized I was making an excuse for putting crap in my body. So I started by putting half a teaspoon less in my coffee. At first, it was slightly less good. But after a few days, it tasted exactly like normal, like what I was used to. And then I took out another half a teaspoon, and it was slightly less good for a while, and then after a while it was exactly what I was used to.
Our minds tend to adjust over time. That’s my change process — I gradually adjust what’s normal to me. Eventually I didn’t need any sugar in my coffee, and it was just as good for me, I didn’t have all that crap, and I enjoyed it the same.
You can do this with anything — exercise, meditation, procrastination. Gradually adjust what feels like normal to you.
Here’s the process:
- Start small. What’s the smallest increment you can do? Do this for at least 3 days, preferably 4-5.
- Get started. Starting the change each day is the most important thing. Want to run? Just get out the door. Want to meditate? Just get on the cushion.
- Enjoy the change. Don’t look at this as a sacrifice. It’s fun, it’s learning, it’s a challenge.
- Stick to the change. Notice your urge to quit. Don’t act on it. Keep going.
- Adjust again. When the change becomes normal, make another small adjustment.
This is the process of creating a new normal. It’s beautiful and simple.

Asteya - The Art of Non-Stealing

 Asteya: The Art of Non-Stealing
By Vlady Peychoff
When you hear the word ‘non-stealing’ what does your mind jump to? Personal possessions? Time? Energy? Friendship? It may be none of these answers as each and every one of us have been influenced by different experiences, people and environments.
Non-stealing in yogi terms refers to Asteya, a branch of the Yammas and Niyamas (one of the eight limbs in yoga).
Stealing is a term that stereotypically extends itself to the taking of personal possessions. At any rate, stealing has the potential to encompass in its scope non-material forms such as time and energy. When engaging in a conversation, whether it is in a professional, social or amicable setting, there can be dips in our attention span, we are human. Have you ever dozed off when a friend has been telling you about something seemingly unimportant that does not resonate with you? Sometimes you catch the last part of the conversation, then you tangent off to another topic without acknowledging what was just said. This is an example of stealing, time and energy were wasted; it can even be an unconscious unintentional act, but it happens.
An interesting excerpt from the Huffington Post titled How to Practice Asteya: Non-Stealing of Others' Time by Alexandra Franzen suggests the following ways we can adopt Asteya in our daily lives:
· Write short, concise, elegant emails. Most working professionals receive upward of 100 emails a day. If you're going to add to the queue, strive to be precise.
· Think before you reach out for "help." Can the answer you're seeking easily be Googled? Do you really need assistance? Do you have a specific question, at all?
· Consider not speaking.
"Open your mouth only if what you are about to say is more beautiful than silence." -- Arabic Proverb
· Show up on time. Model punctuality and inspire others to do the same.
· Don't commit to projects that you have no desire to complete.
· Make it easy for people to help you. If you're reaching out to someone to request a favor, tell them exactly what you need, and when, and why.
· Make it easy for people to understand you. Nothing steals away time like struggling to decipher what someone is trying to say!
· If you tend to be overly-wordy, pretend as though you're appearing on a morning talk show and only have a few moments to captivate your audience. If you tend to use a lot of convoluted jargon, pretend that you're speaking to a very young child.
· Try to avoid changing your mind mid-stream -- especially if your new choice creates a significant inconvenience for others. If you must shift gears, do it fast and do it right.

Be concise and precise. Don’t steal your time and the time of others.
A note on Vlady's personal experience:

Asteya is a practice that I try to integrate on a daily basis. It takes discipline and patience, but over time I've noticed a difference. Asteya is not limiting in regards to awareness in conversation, though it has taught me how to attune to the tone of conversation being spoken. Perpetual boredom or feeling complacent can be mitigated when you realize that your time matters. For instance, crossing something off your to do list that you've been procrastinating. "I have no time to do _______" is an expression that has become meaningless when even the simplest of tasks such as 'washing the dishes' turns 'impossible'. In brief, Asteya is to respect the value of time.
What do you do to practice or incorporate the art of non-stealing?
Categories
- Wellness 249
- Zen Habits & Inspiration 101
- Injury Prevention & Health 30
- Classes 1
- Yogalife Classes 7
- Prop Specific 1
- Studio Information 20
- Foundation Friday 25
- Physical Health 3
- Yoga Specific 56
- Curated Playlists 2
- Recipe 11
- Karma Program 5
- Staff Adventures & Journeys 12
- Anatomy & Information 30
- Community Event 19
- YEG Highlight 8
- Instructor Stories 22
- Yogi of the Month 14
- What's Going On 40
- Yogalife Workshops, Retreats & Trainings 42
- Relaxation 1
- Mental Health 2
- Workshops 37
- Registered Classes 4
- Pregnancy & Family 1
- Member Stories 6