

Break It Down: Vinyasa
VINYASA, TRANSLATED:
“To move or arrange in a special way”. It can also mean “movement” or “position of the limbs”.
Written by Kristine Owen Wood | Photographed by Caitlin Varrin
What is Vinyasa?
One term, many meanings!
Vinyasa, translated:
“To move or arrange in a special way”. It can also mean “movement” or “position of the limbs”.

Vinyasa, the style of yoga:
refers to a strong, dynamic, continuously flowing practice which aims to seamlessly integrate movement and breath. a.k.a, ‘Moving Meditation’: The relative quick pace of Vinyasa Flow with its emphasis on matched breath/movement and fluid transitions between poses allows many practitioners to relax habitual thought-loops and enter an embodied “flow state” of being. Same same but different? Styles of yoga at Yogalife which are synonymous with, derived from, or closely related to Vinyasa include “Ashtanga”, “Rocket”, “Sattva”, “Flow”, and the “Yang” portion of “Yin/Yang”.

Why break it down?
Vinyasa classes tend to move more quickly than slower styles like Hatha and in order to “keep the flow”, might not always provide as much in-depth alignment instruction. This can sometimes result in confusion for newbies! It can also create a situation where the most often-repeated set of movements are amongst the least fully-understood.
Potency of practice:
Developing a clear understanding of how to approach Vinyasa for your body, through your body, is essential for unlocking the full potential of your “flow state” experience. Below is a step-by-step guide to aid you in this journey!
Vinyasa, the flow of movement:
“Vinyasa” can also refer to a very specific cycle of poses that repeats throughout any of the above-mentioned class styles.
Rise & Shine!
Vinyasa will often appear first in the course of opening Sun Salutations as a method of evenly warming up the body.
The groove that binds us:
Subsequent Vinyasas alternately serve as fire-stokers, neutralizers, palate-cleansers, and an efficient, elegant method of transitioning from pose to pose.

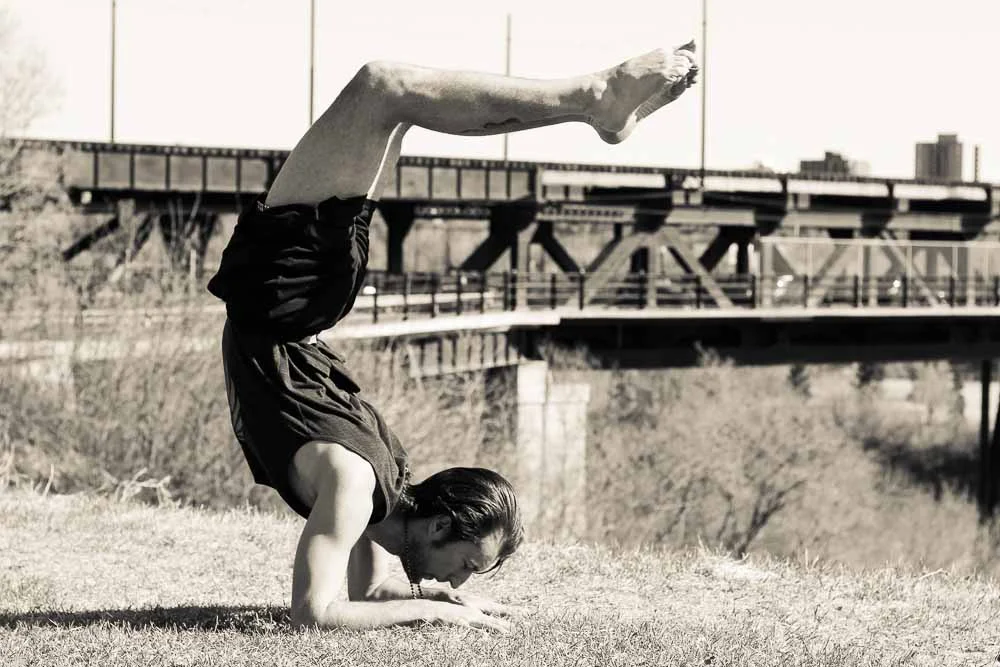
Full Vinyasa, unmodified
Click on image for more details!


Half Vinyasa, unmodified
Click on image for more details!


Awesome Mods
Mythbuster: modifications are not in any way “lesser” the main pose. In fact, modifications are a highly intelligent way to adapt poses to meet your practice where it’s at and ensure that you build the space and strength you need to evolve, sustainably.


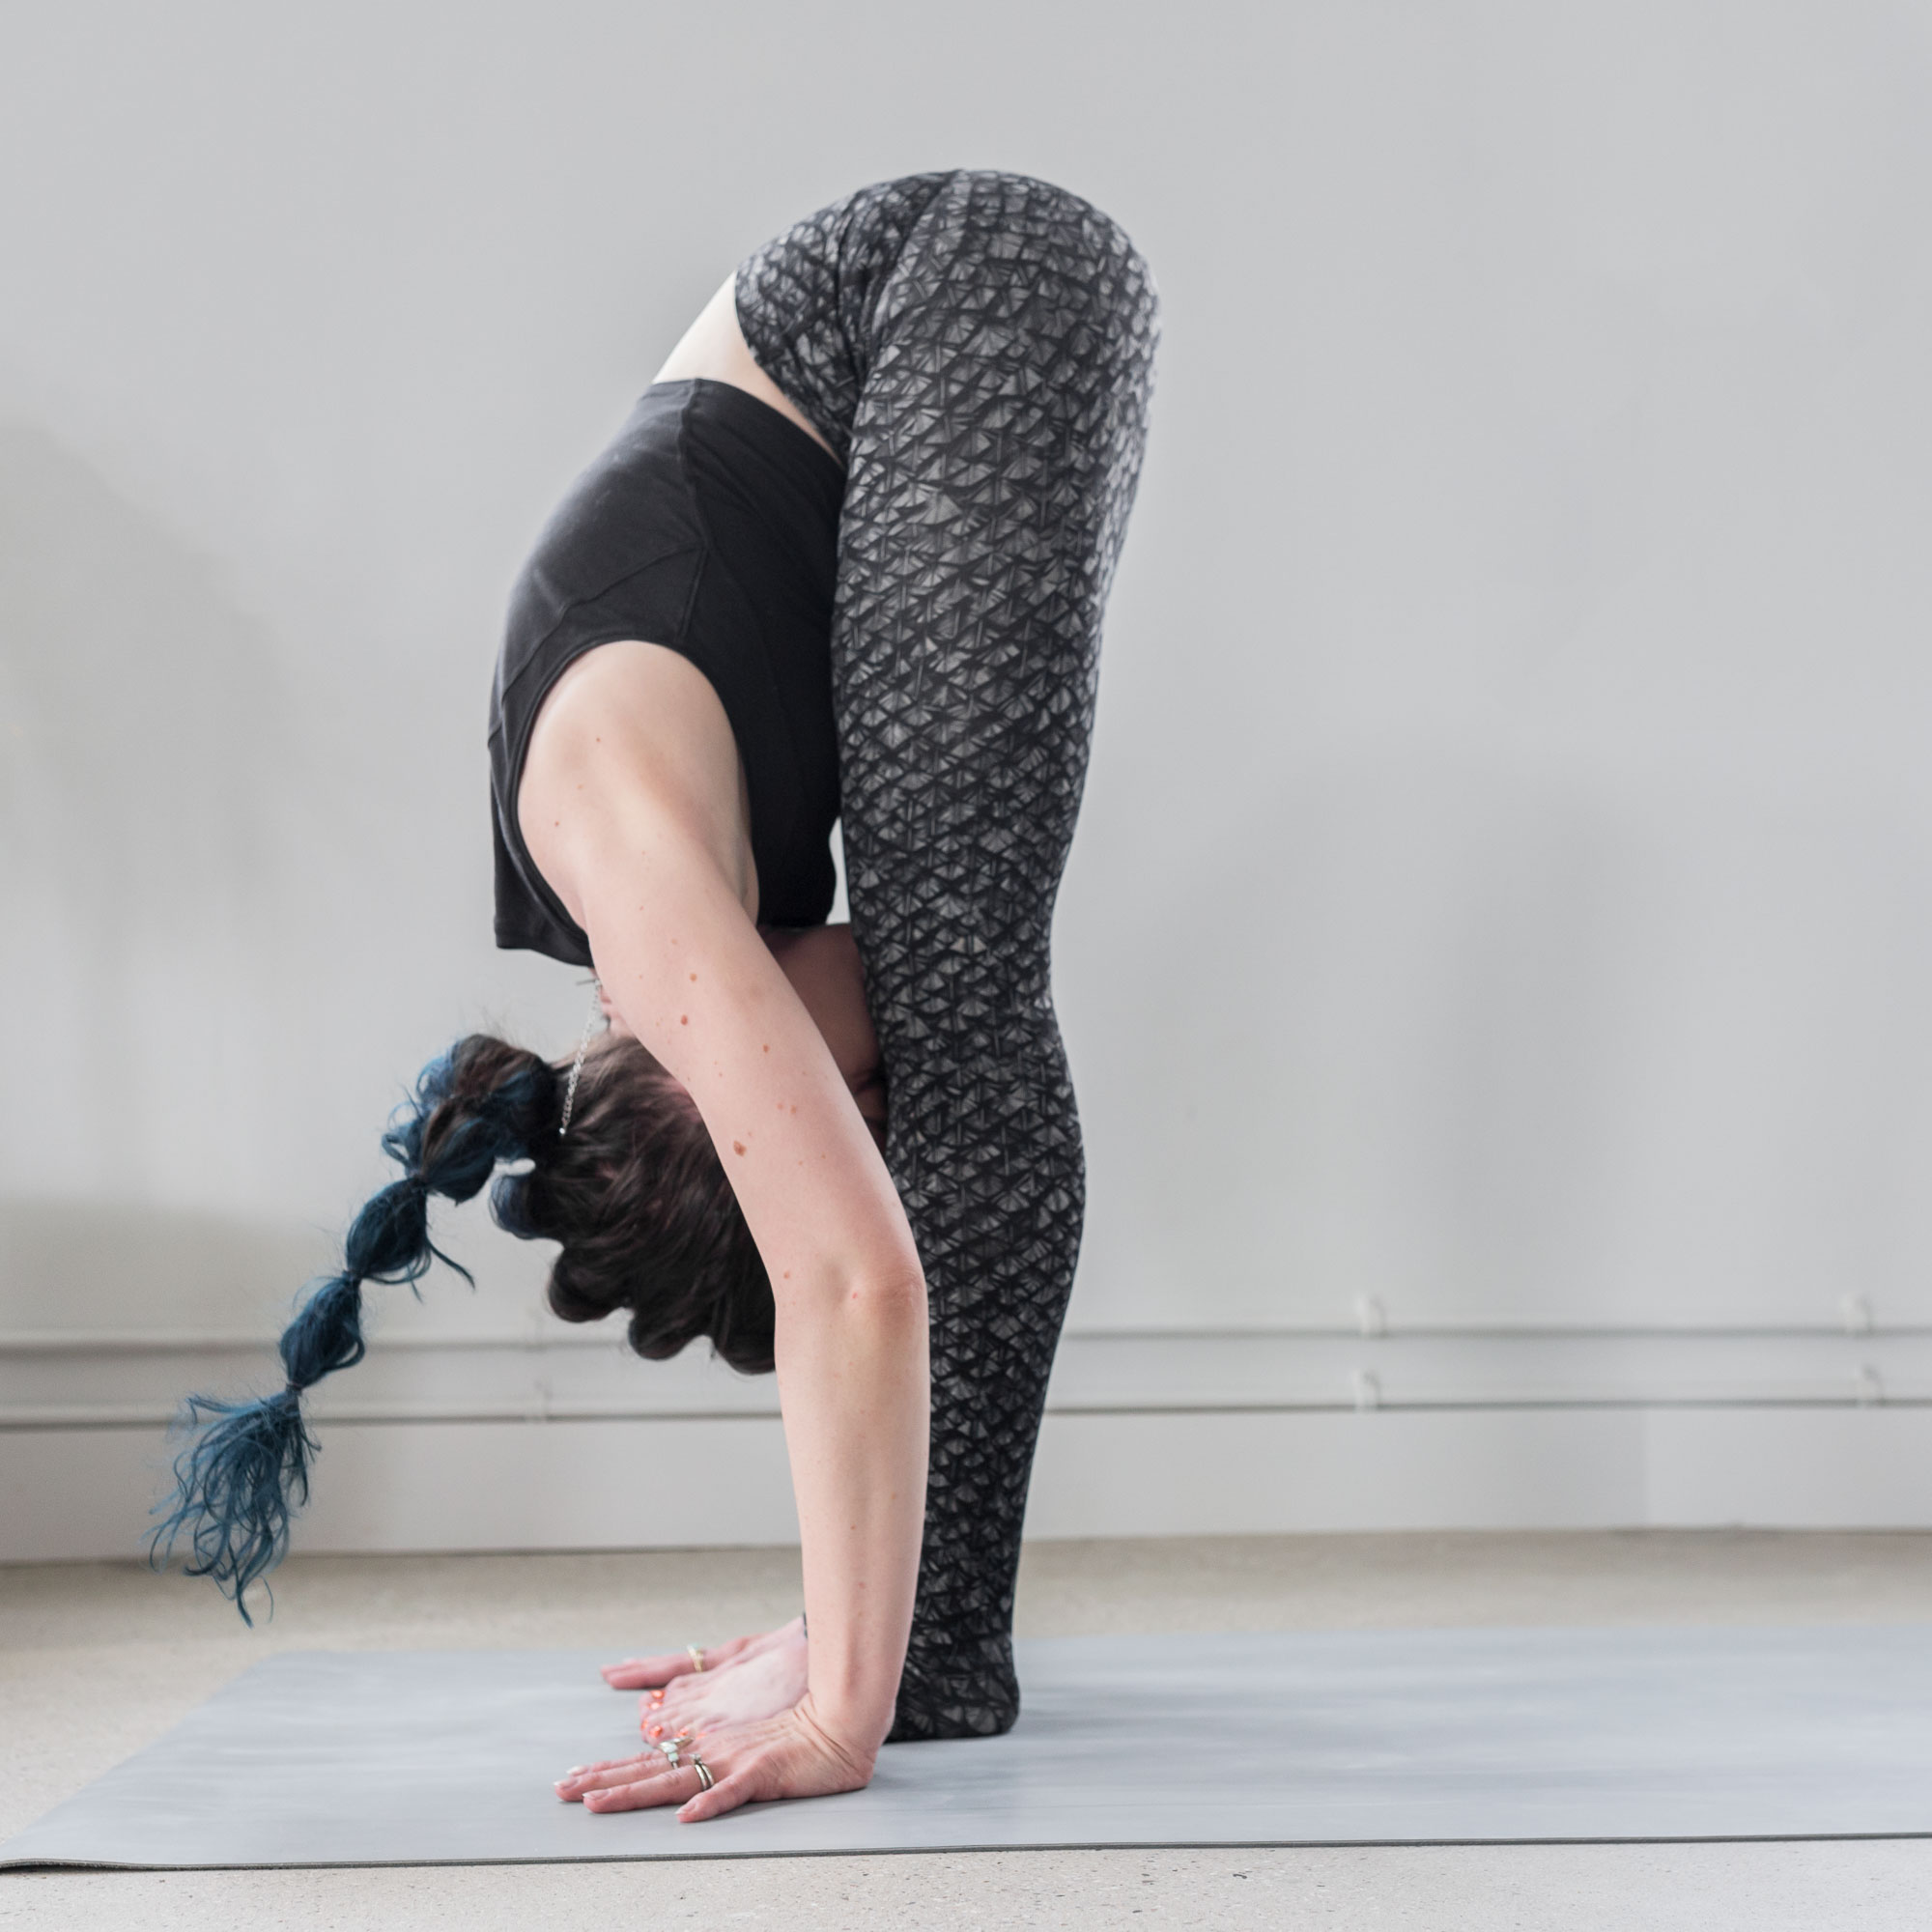
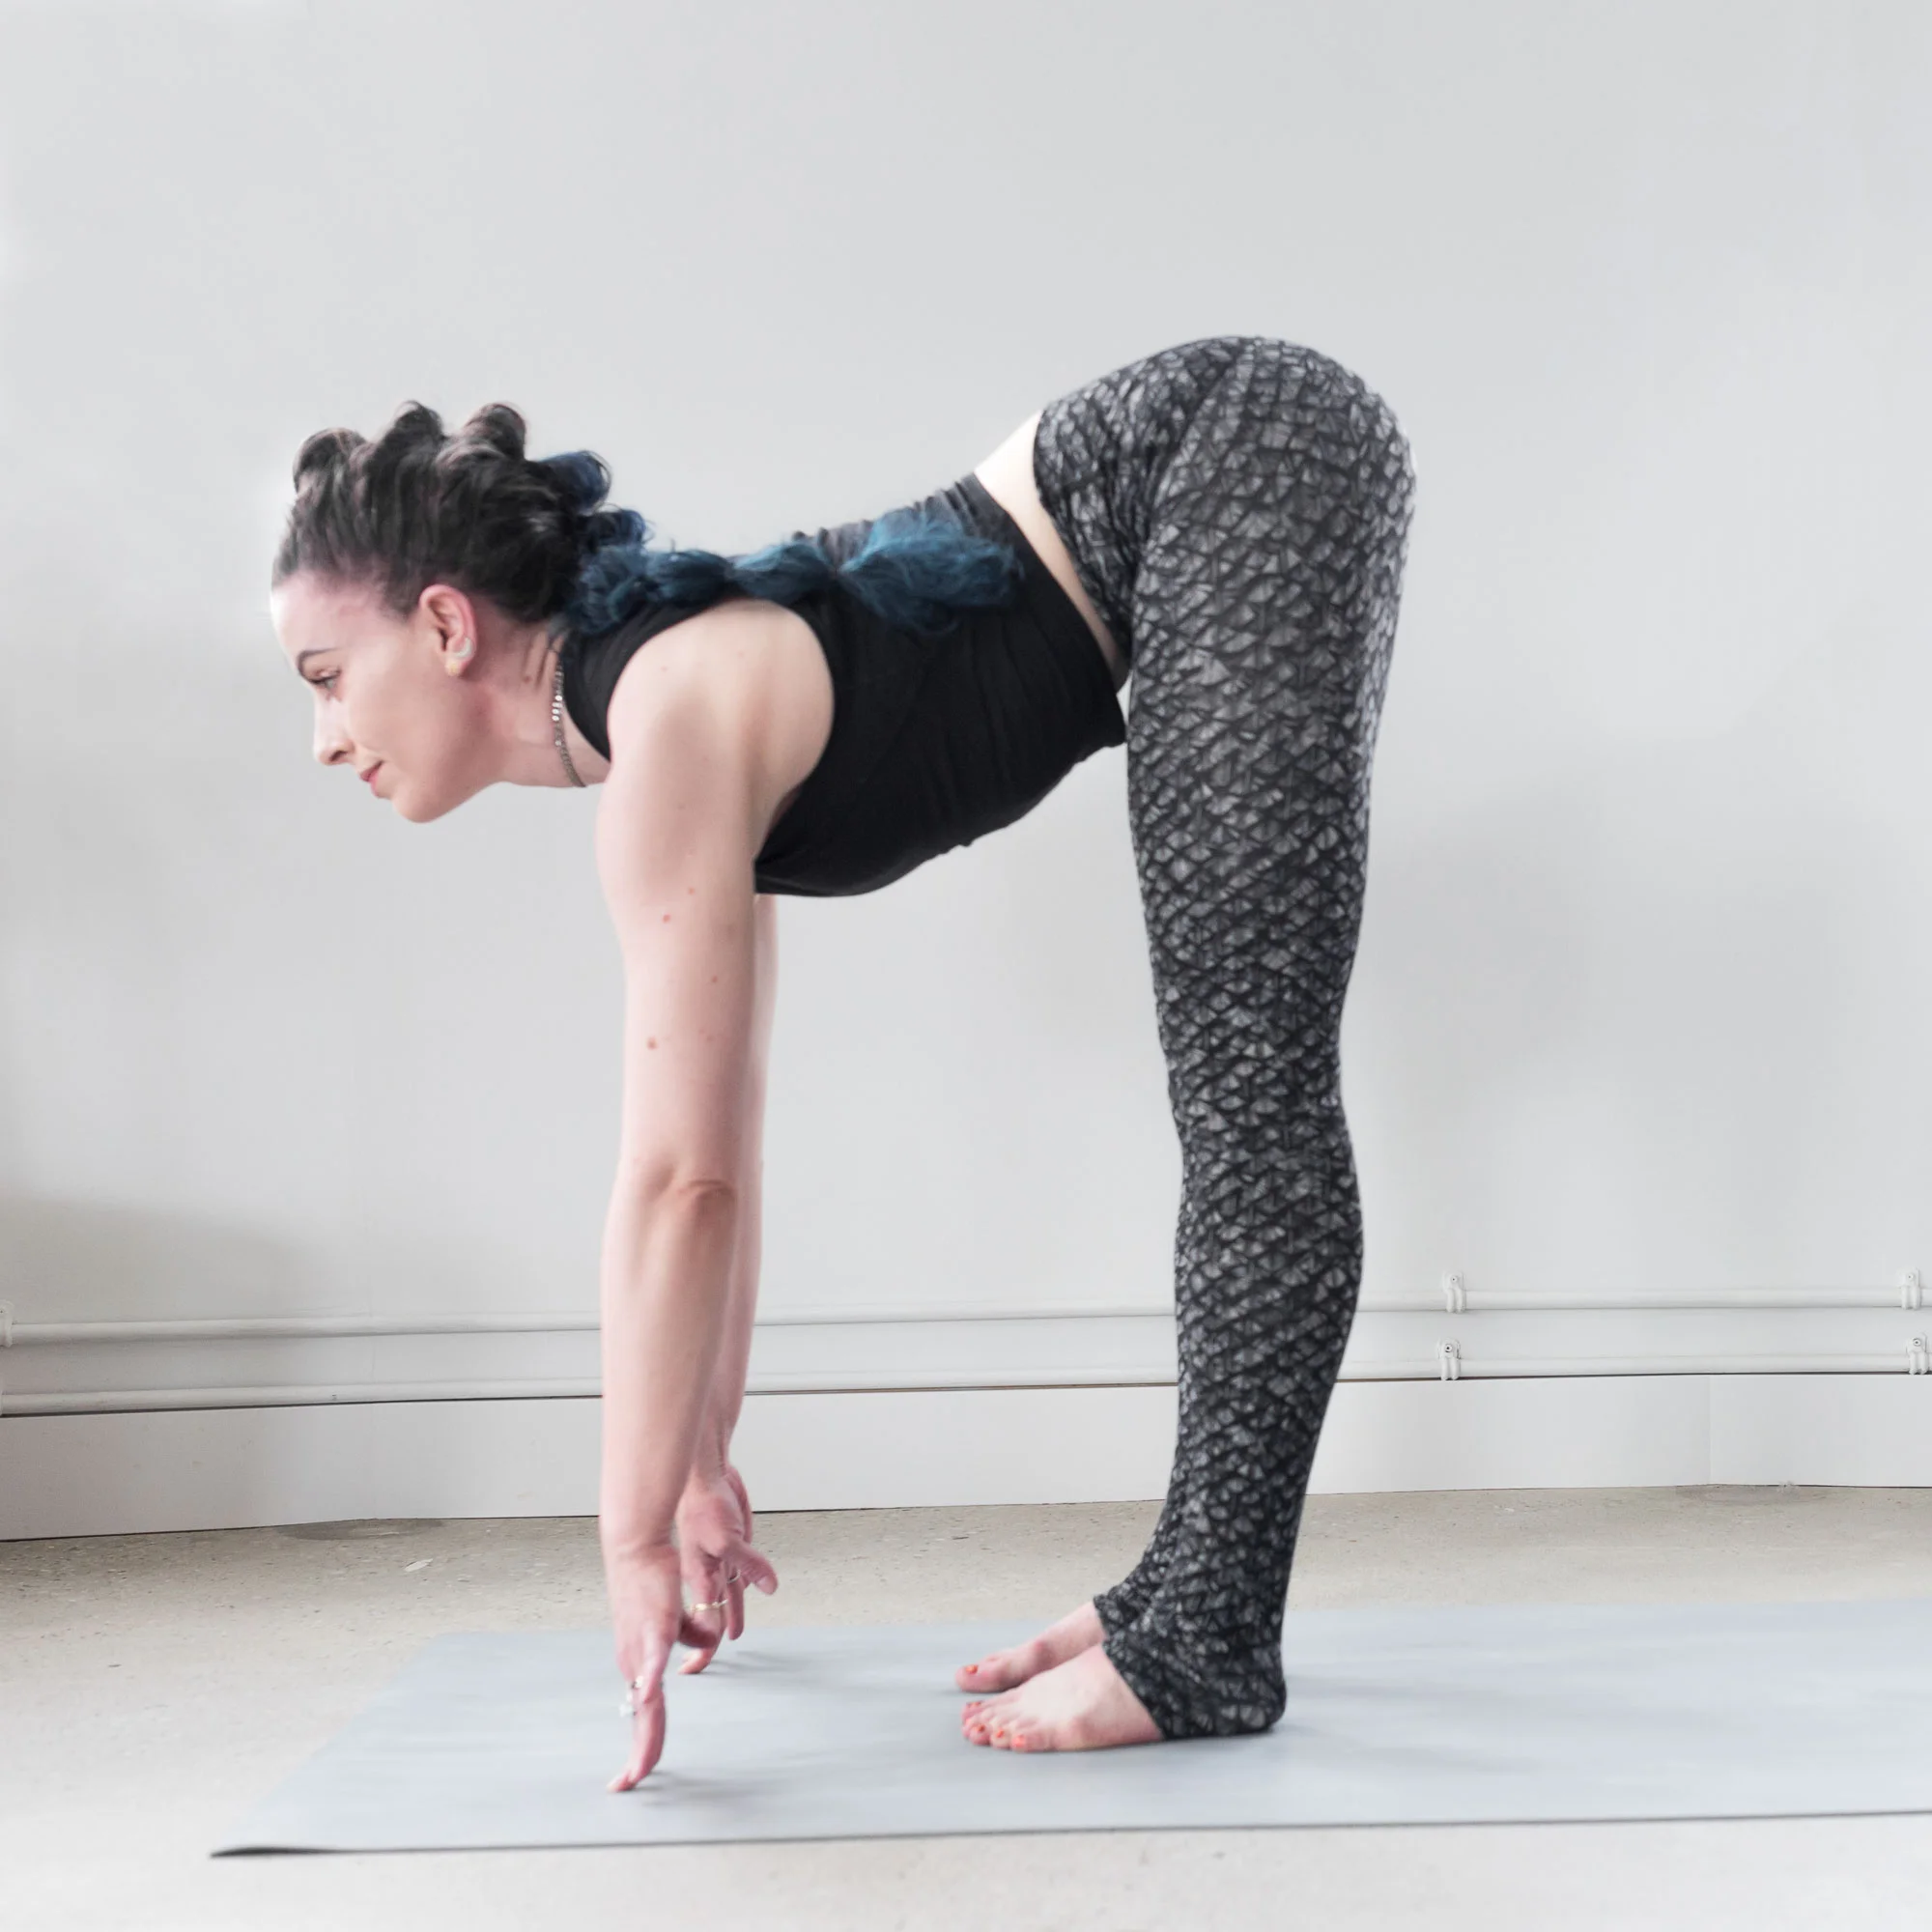
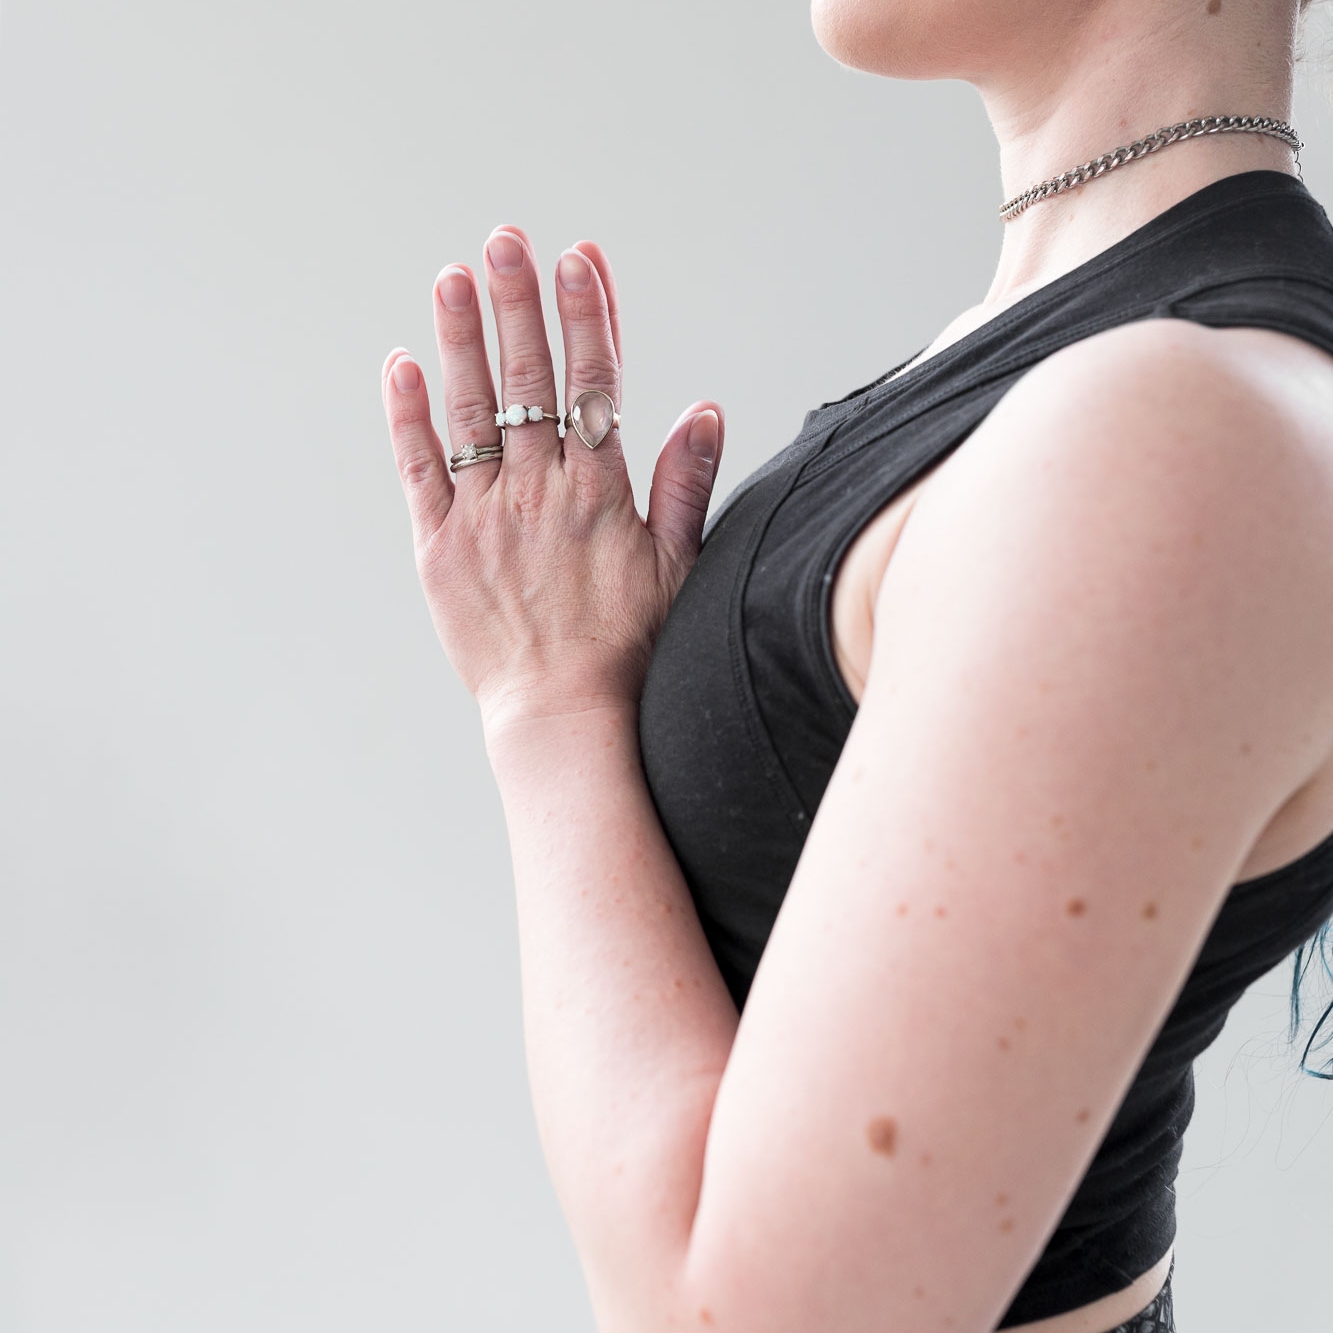
Forward Fold & Halfway Lift
Place blocks underneath hands = more room to stretch out backs of legs & lift through chest

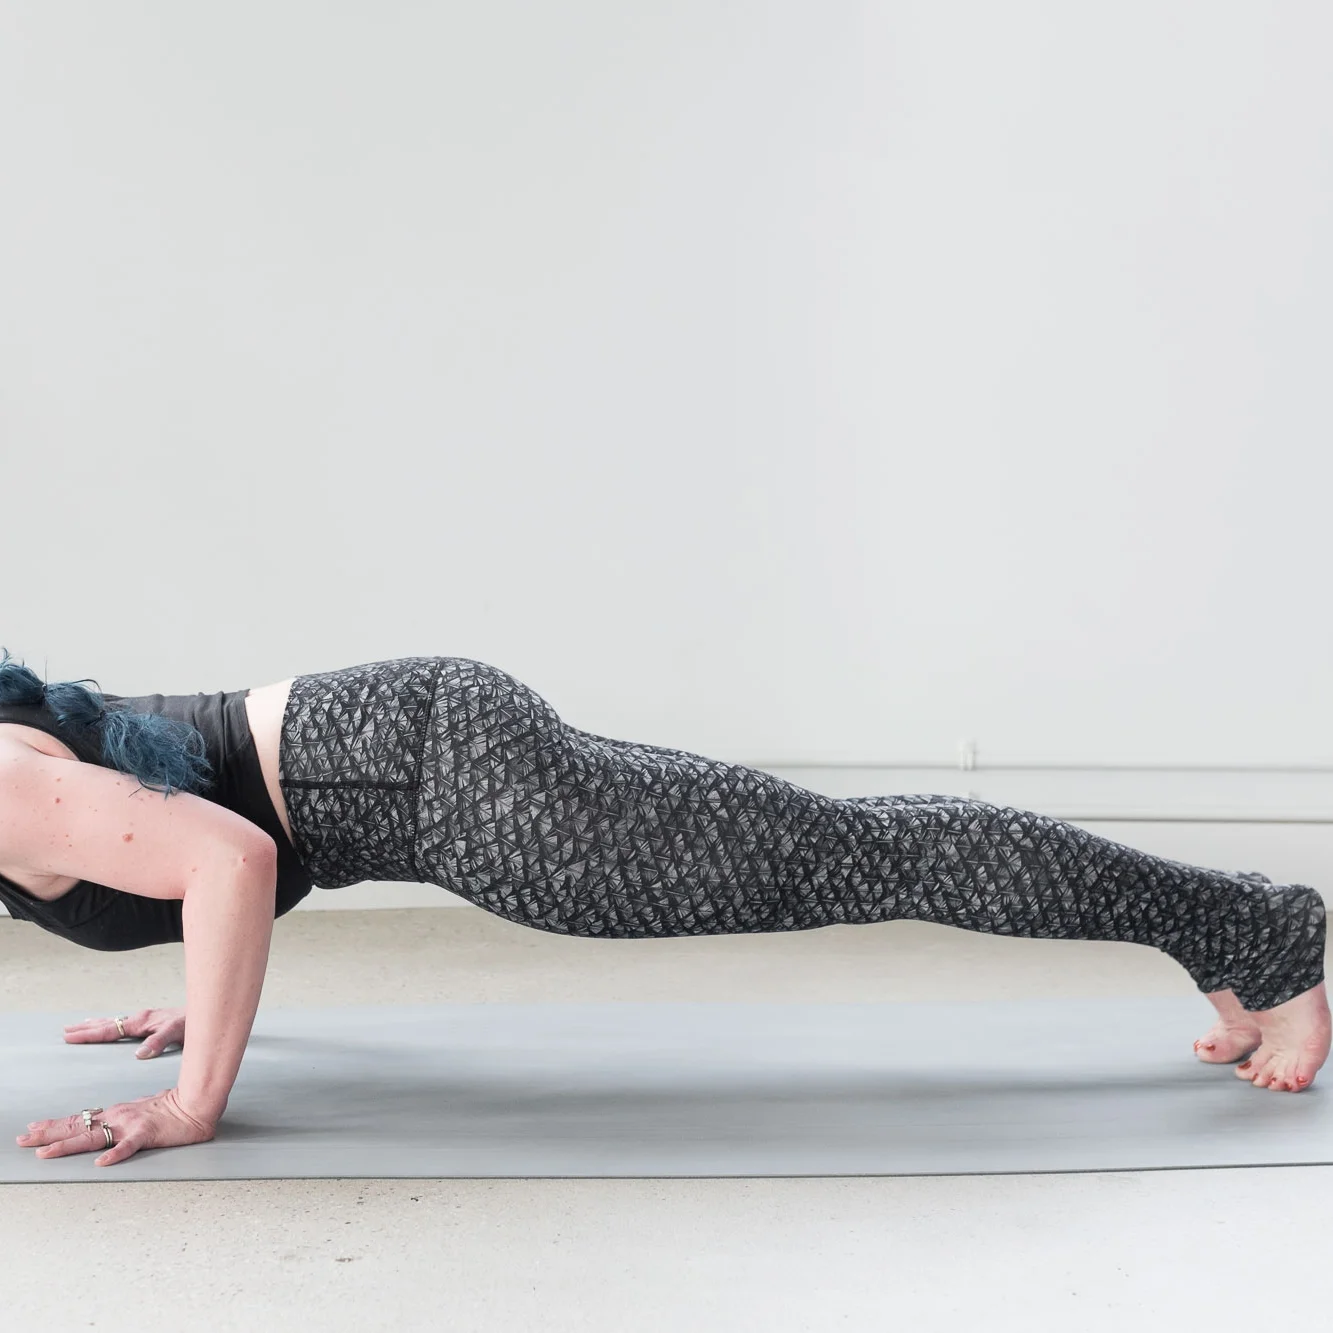
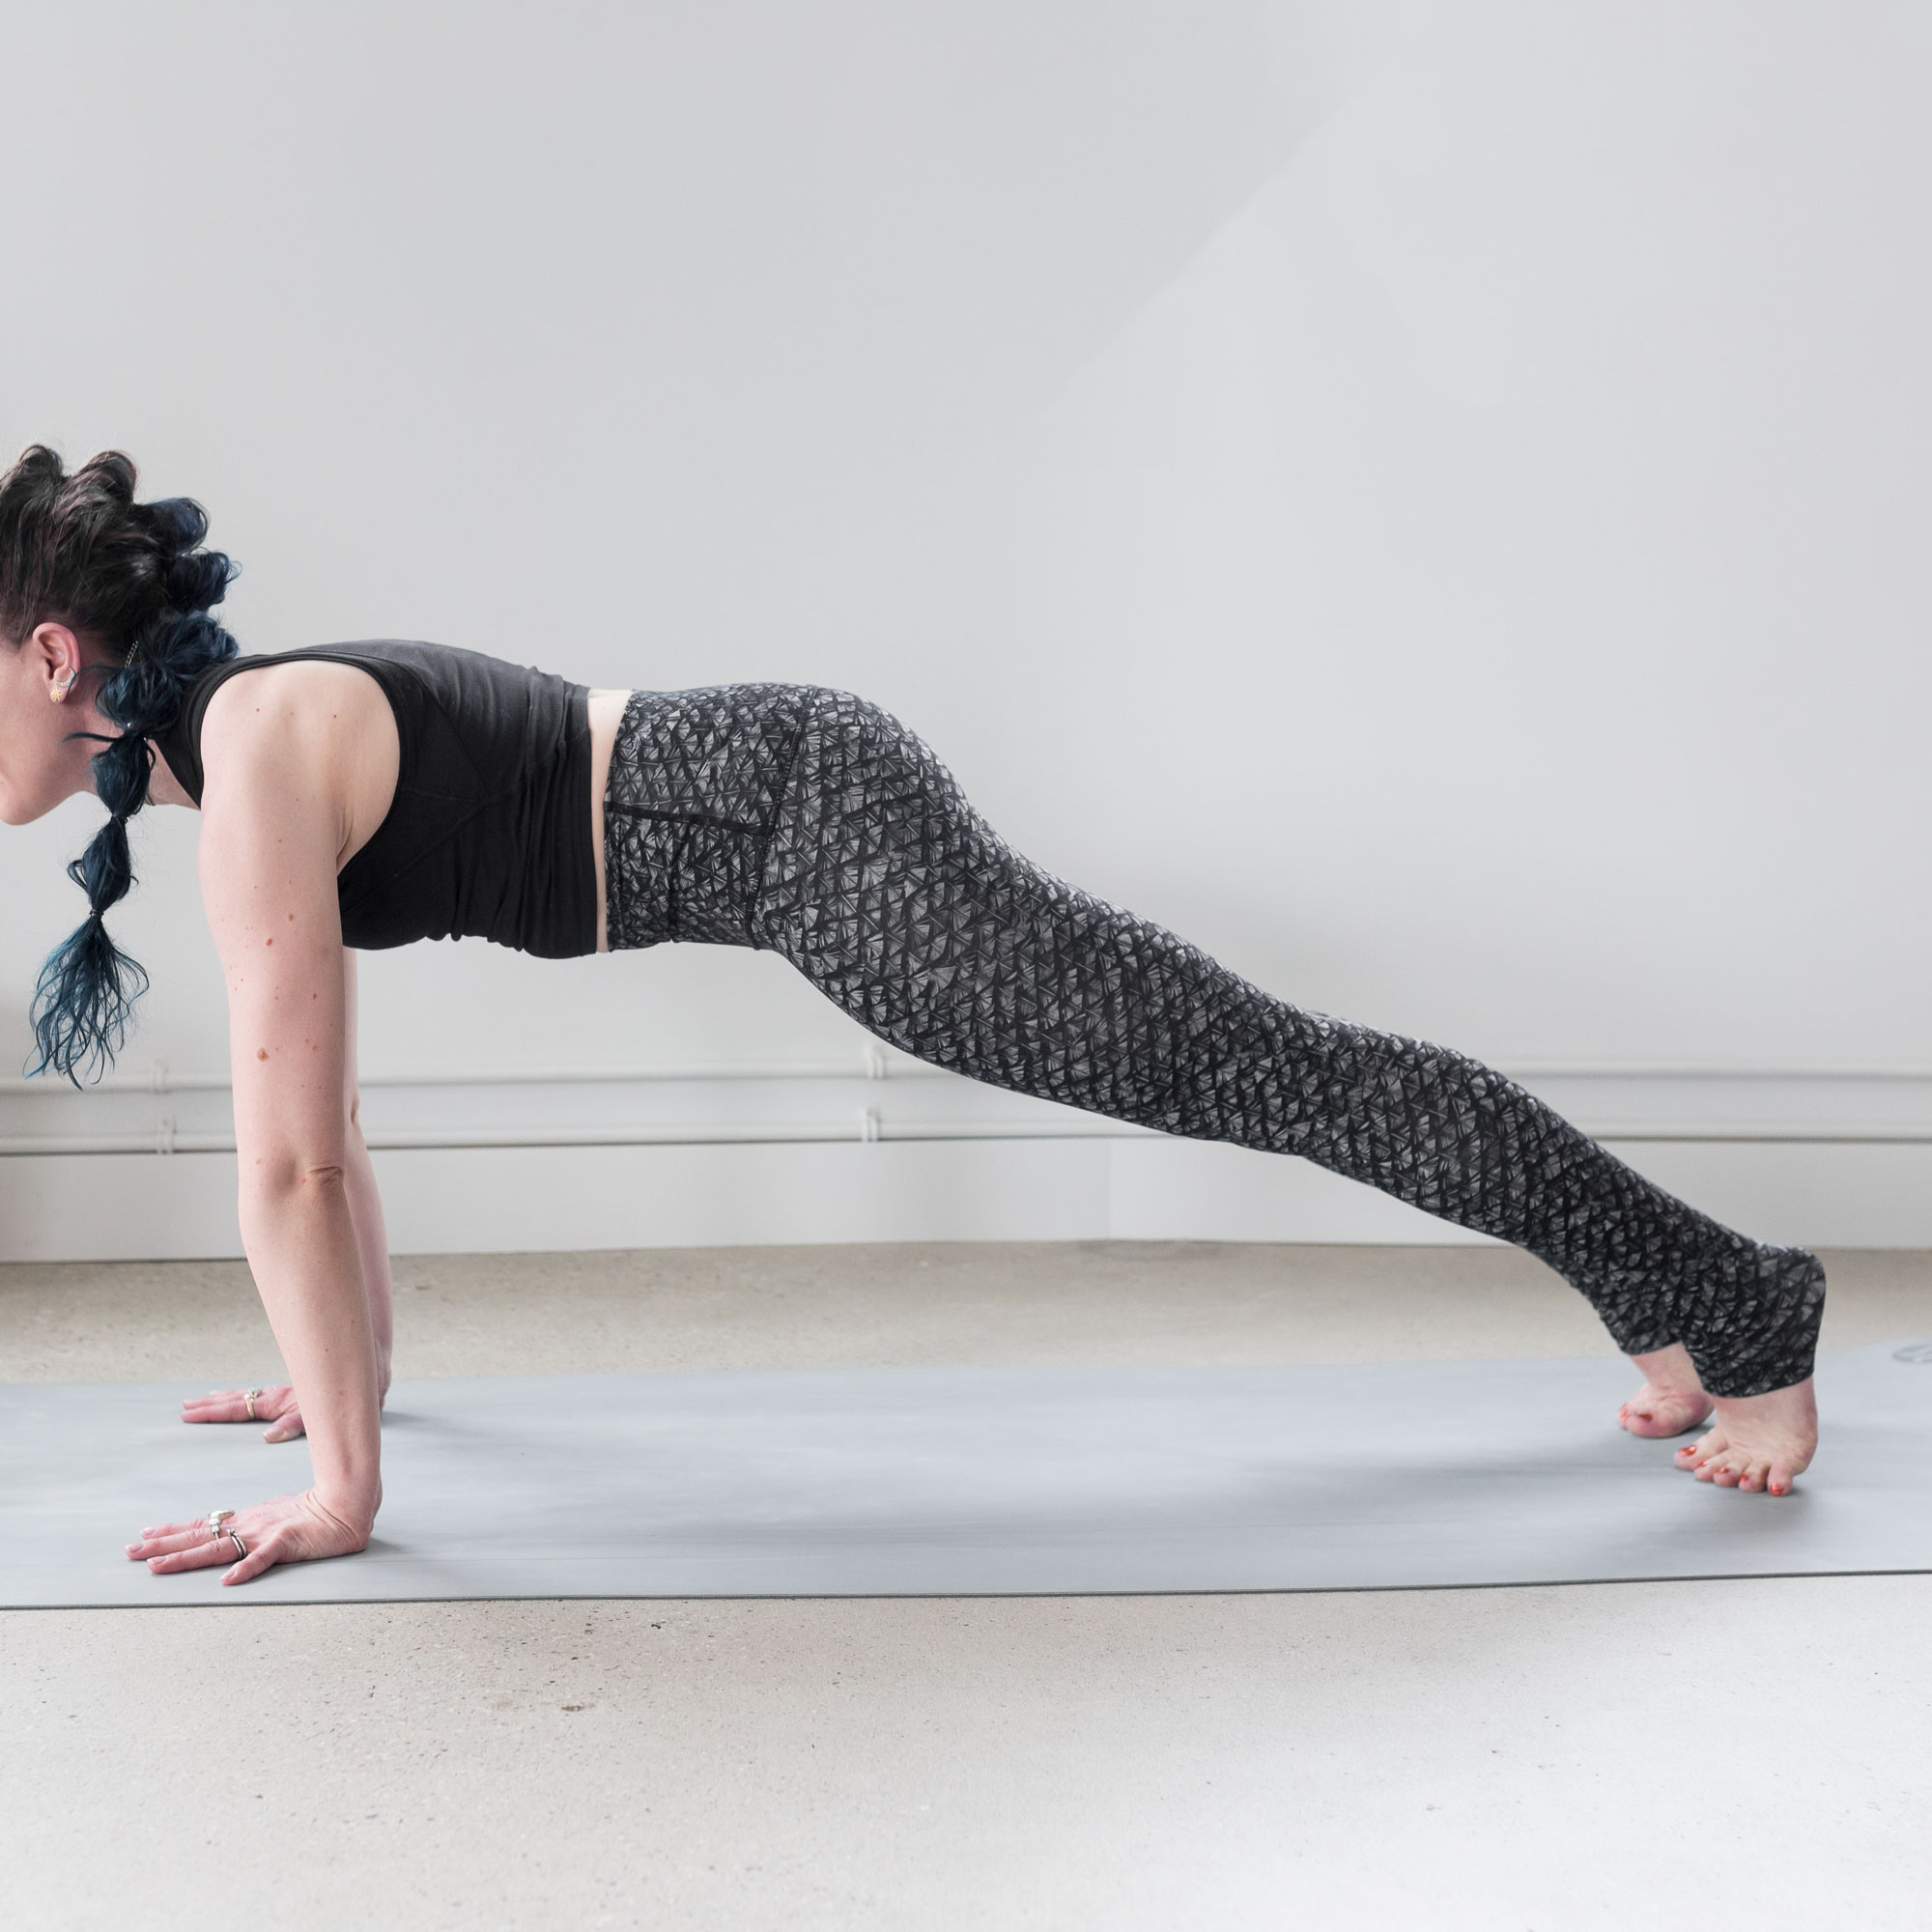
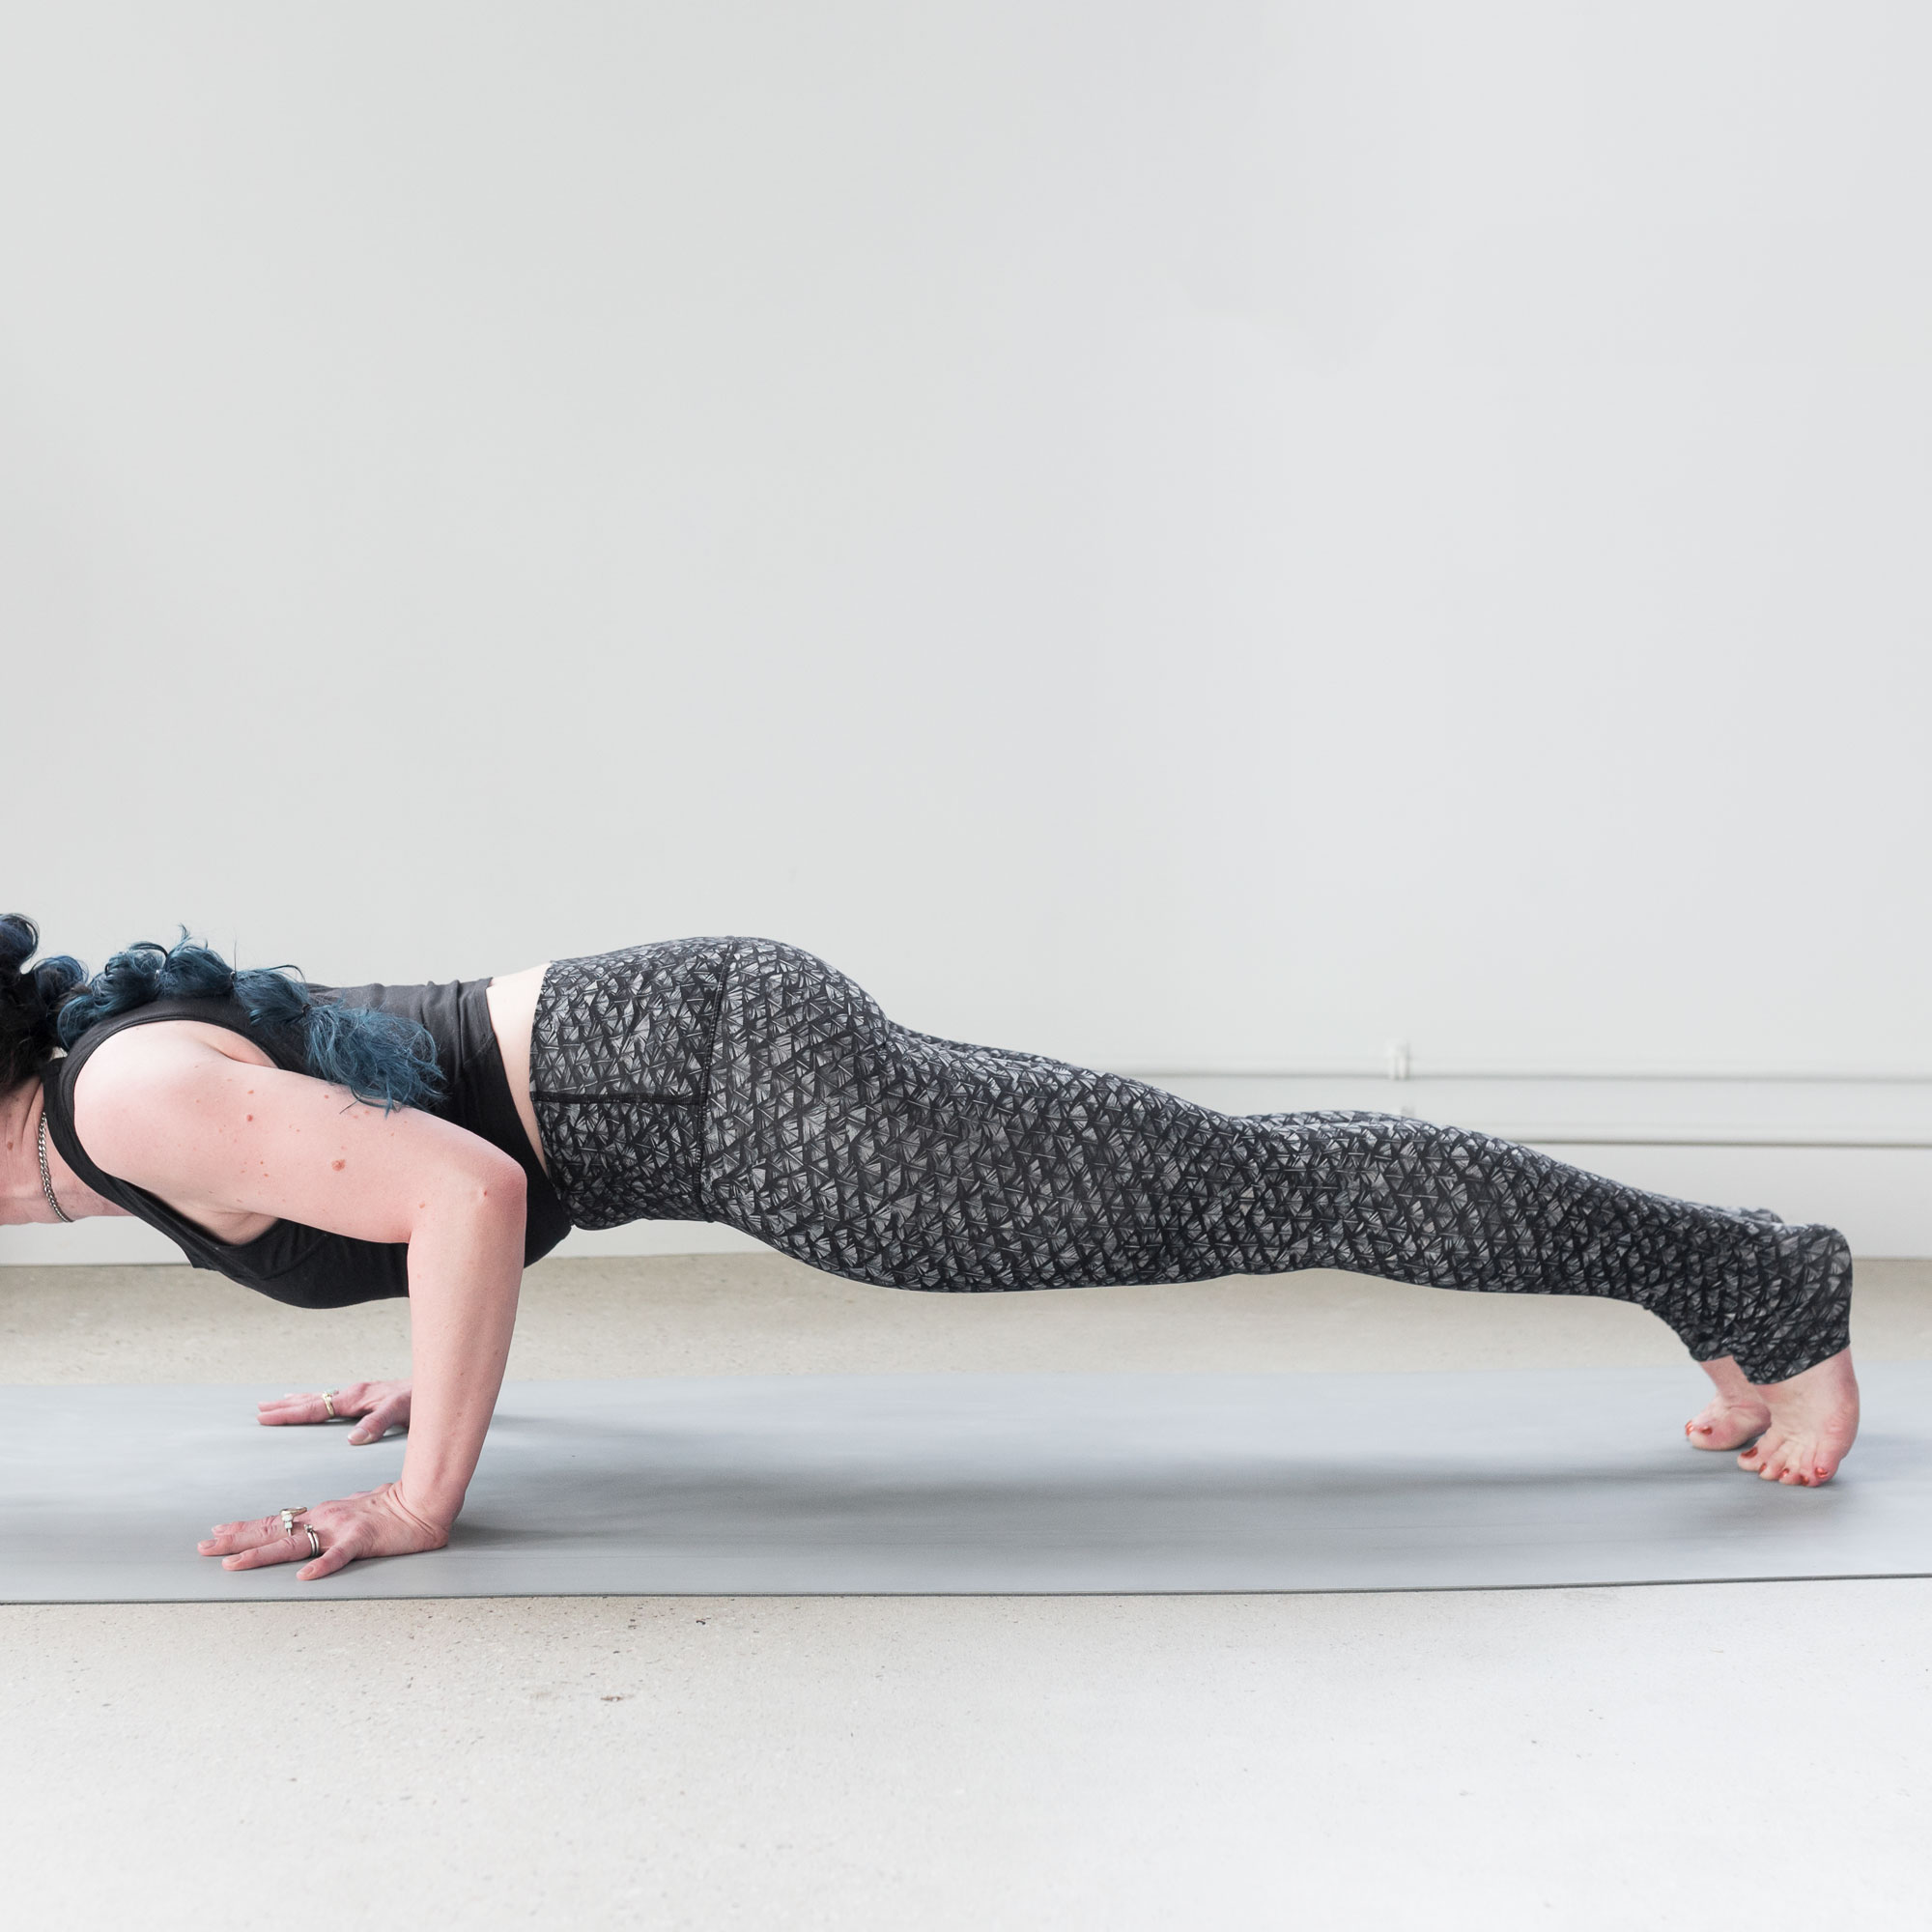
High Plank >> Low Plank
Lower knees to floor = more power to practice correct upper body alignment & thus gain strength. Place blocks under hands to create more height & space in plank.

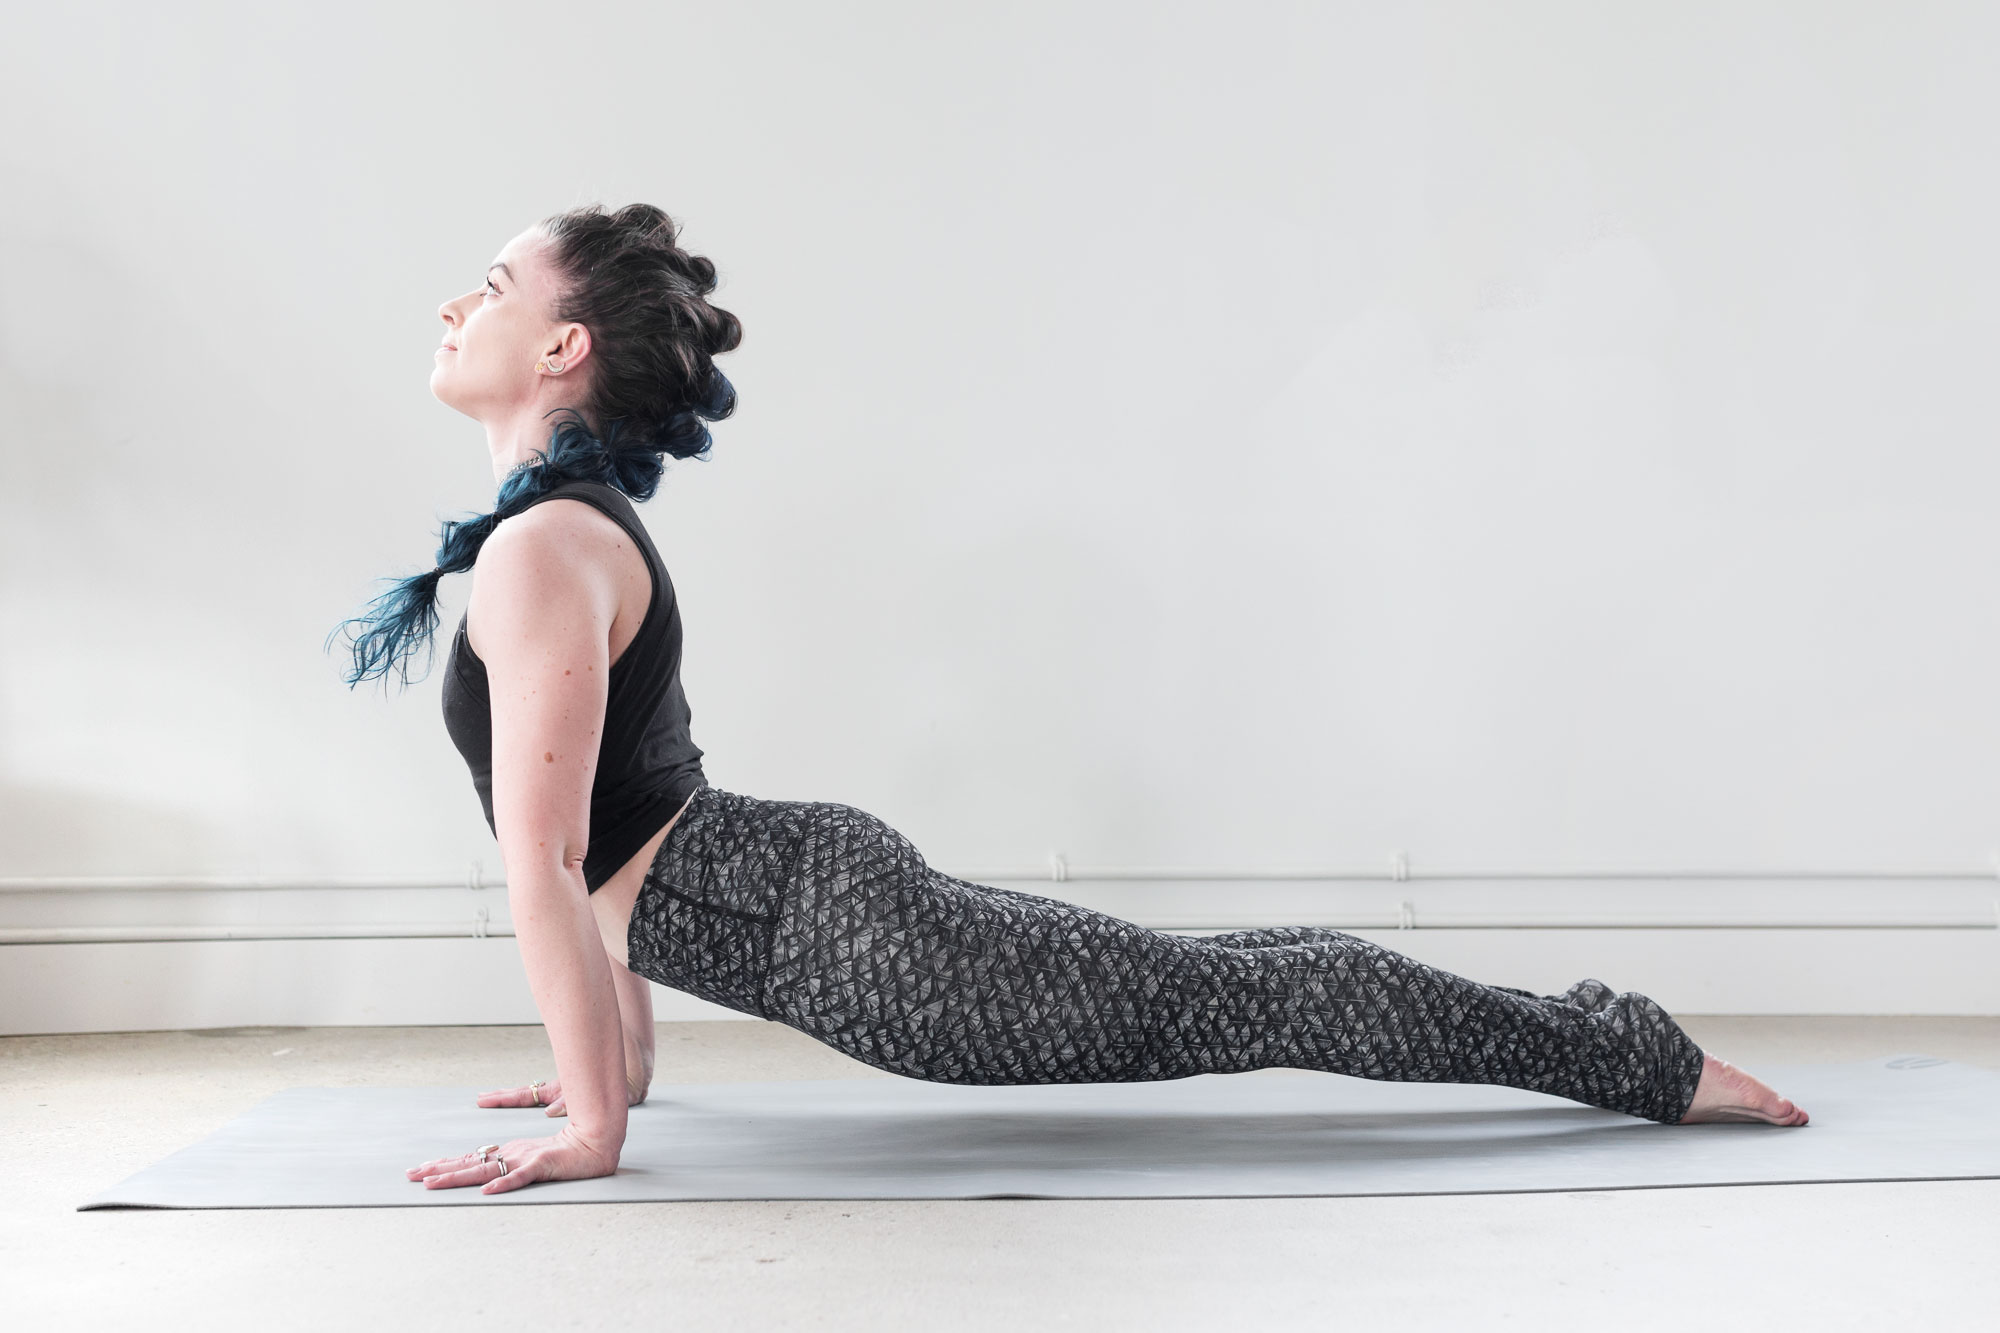
Upward Facing Dog
Cobra instead! All of the backbendy goodness without undue strain on wrists, low back, or feet. Blocks under hands = more space for spine to lengthen & curve.
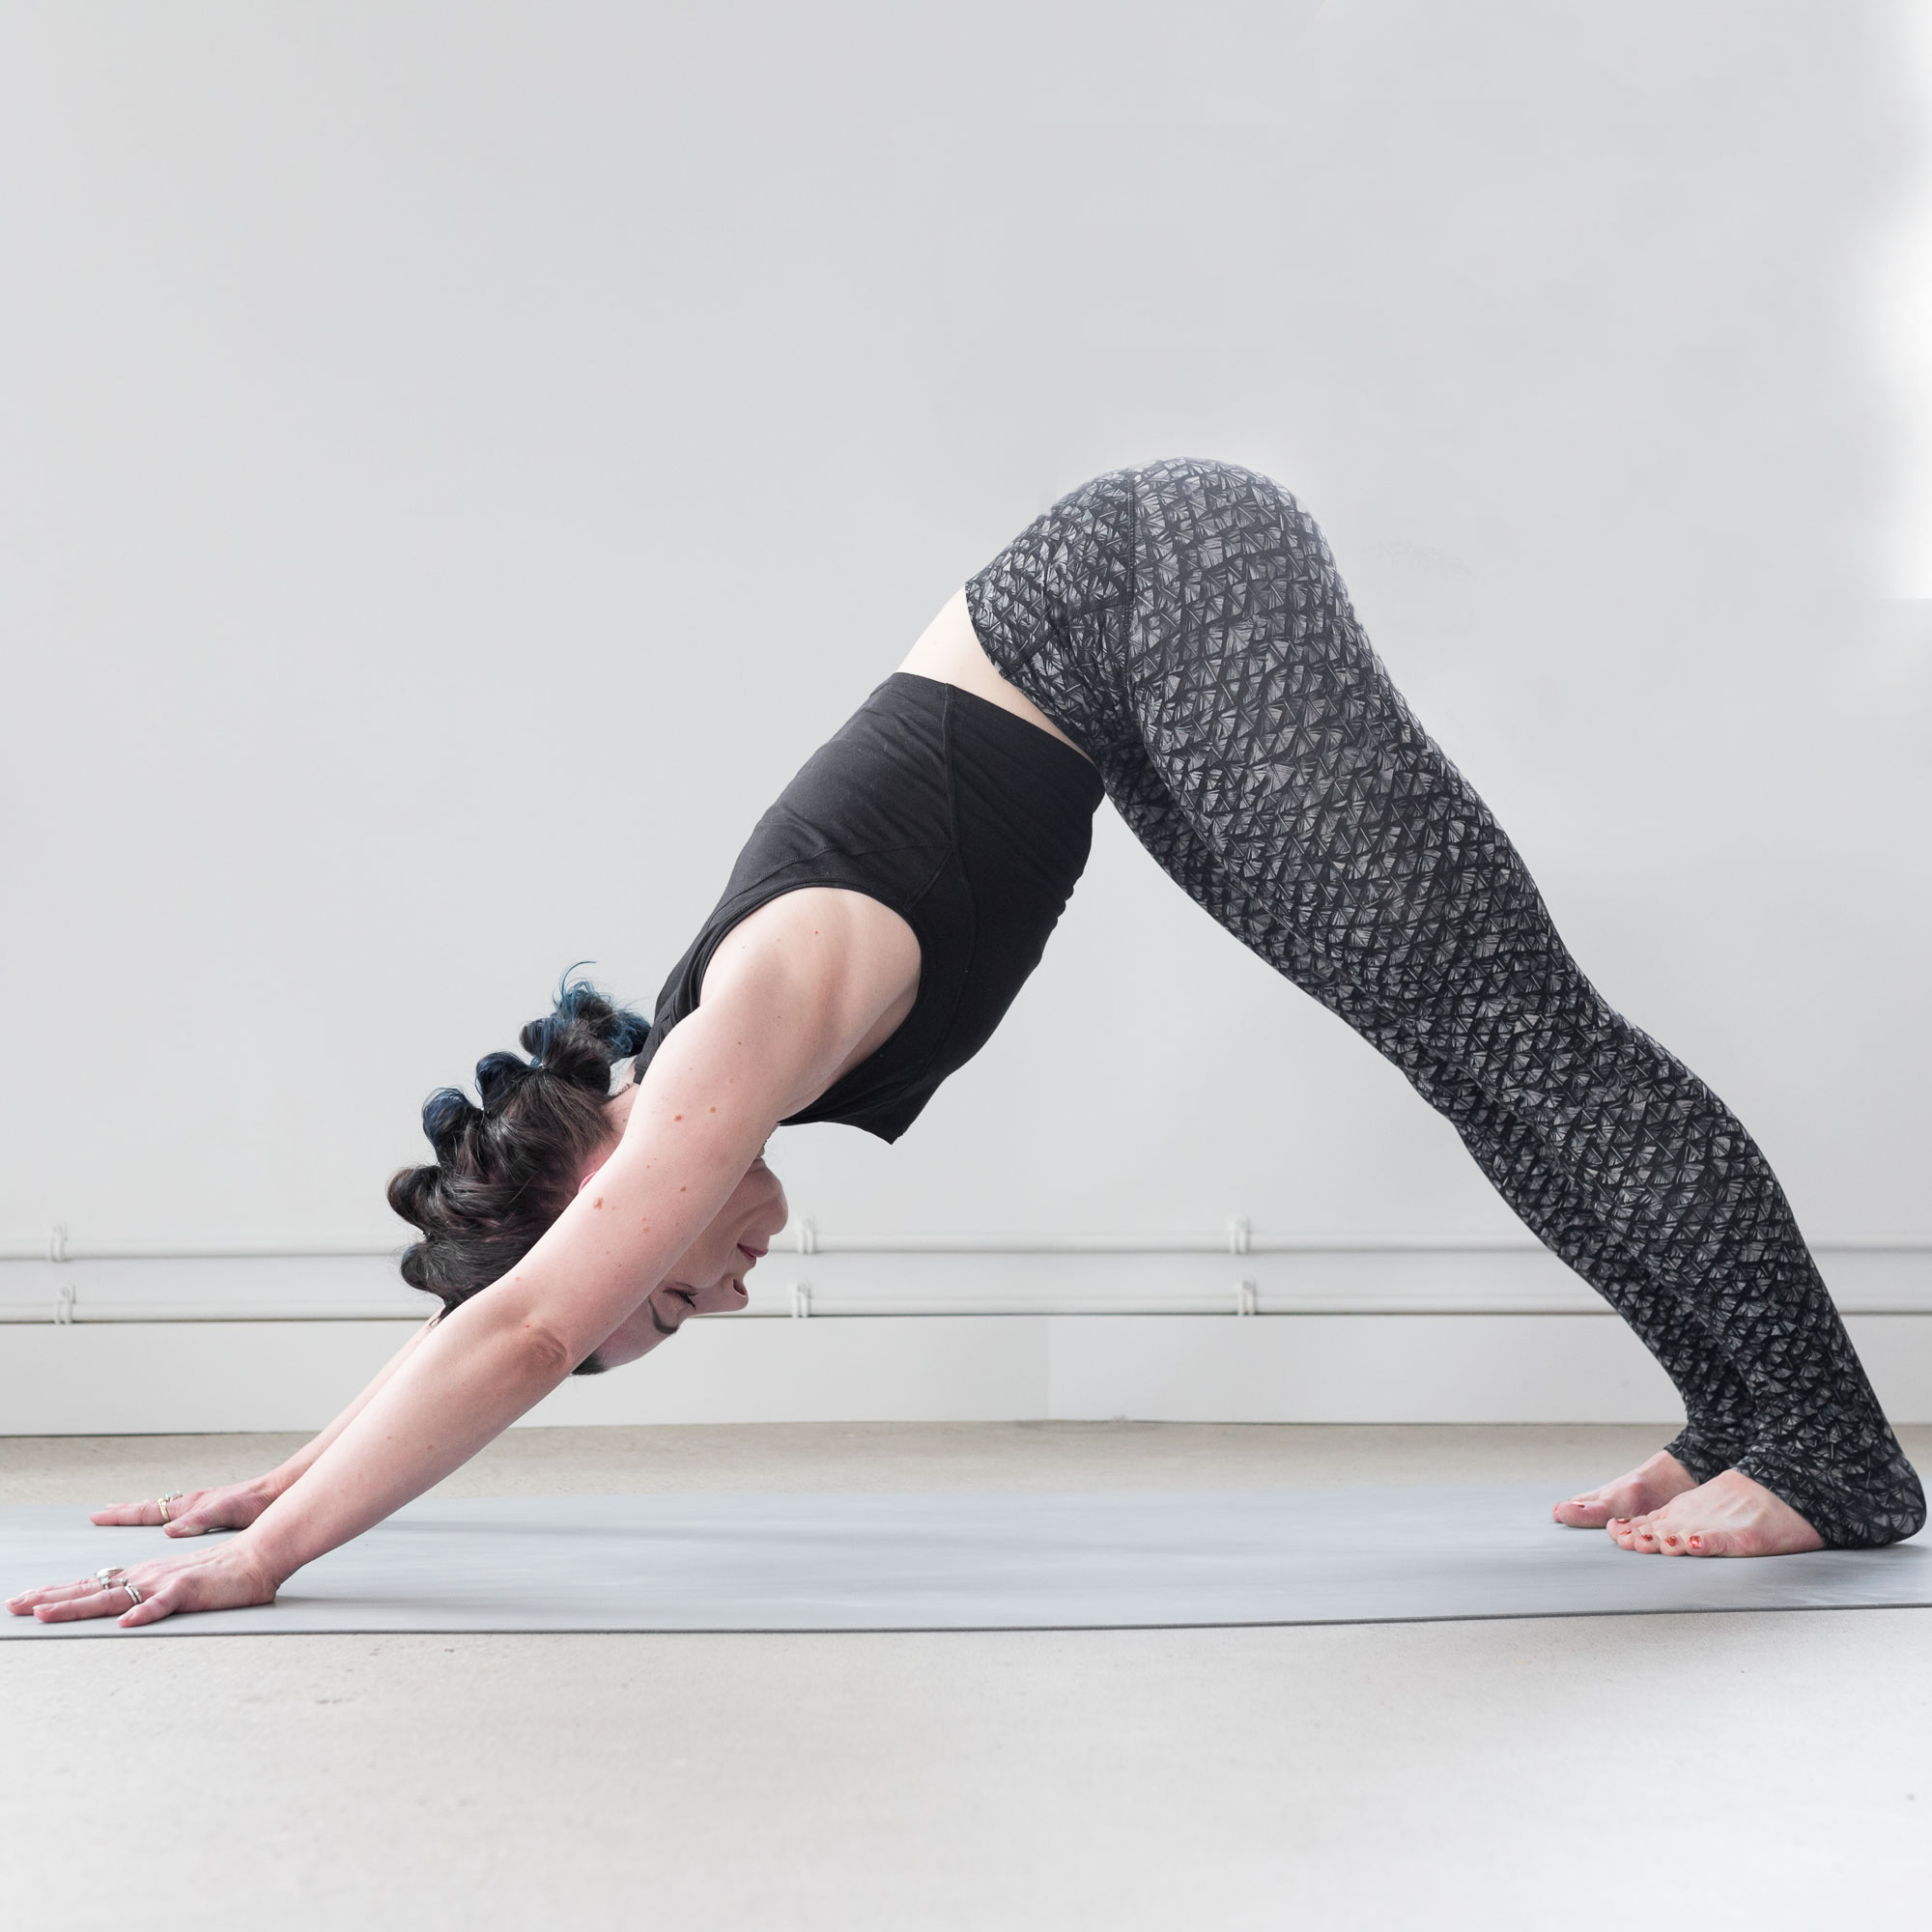
Downward Facing Dog
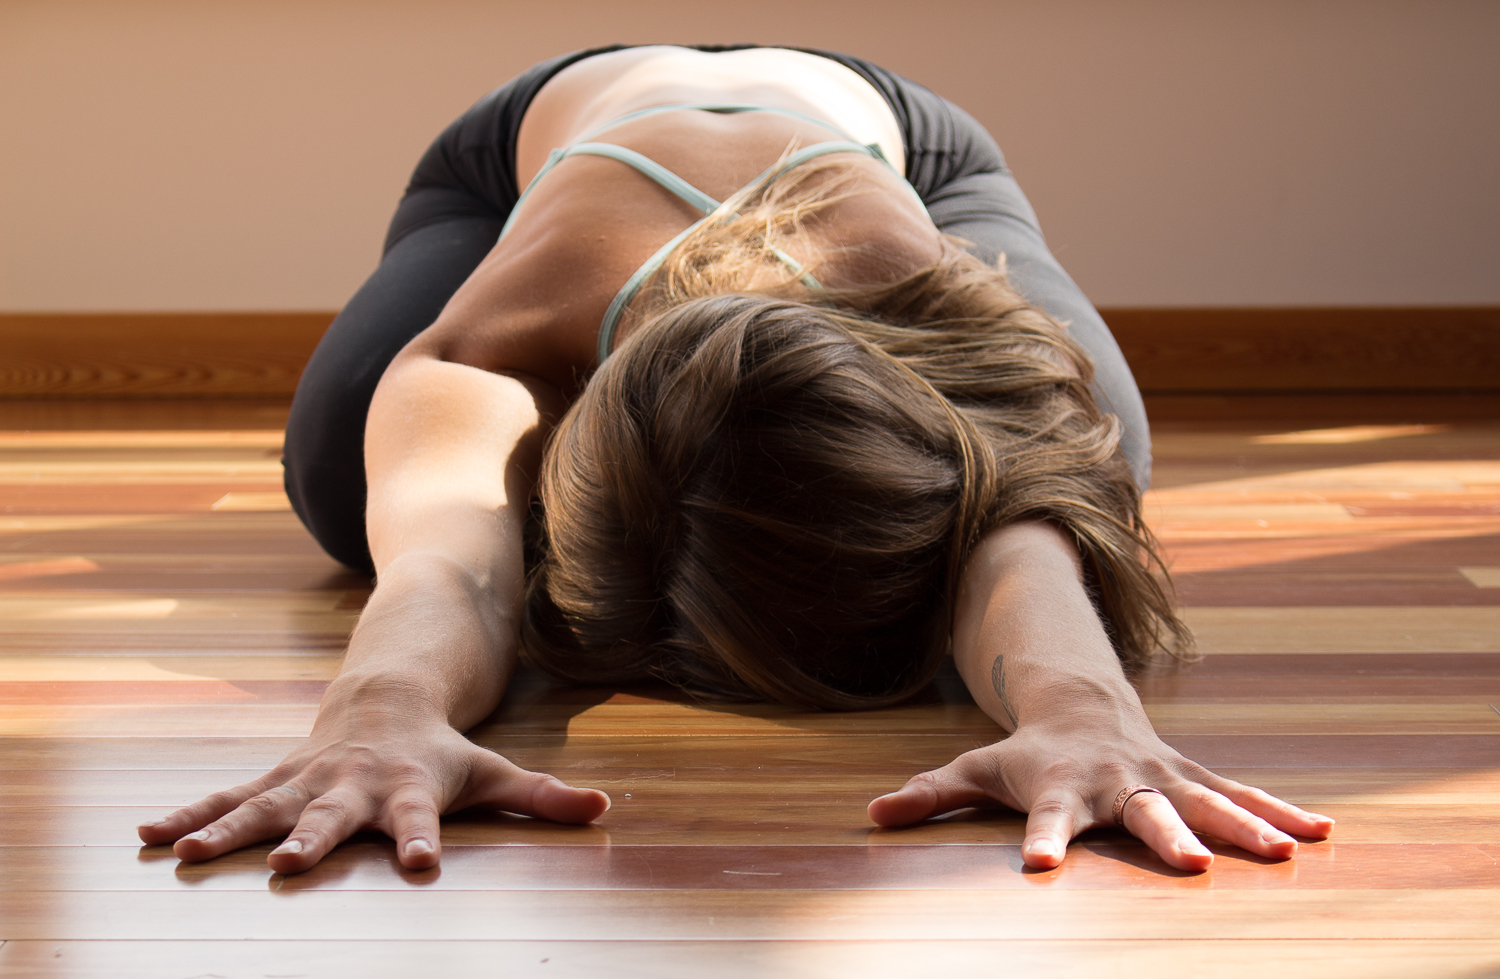
Try Puppy Pose instead! An active version of Child’s Pose (press palms into floor & keep chest & shoulders lifted), it relieves hamstrings and takes pressure out of shoulders and wrists while maintaining energy. Or, place blocks under hands to create more length and space throughout the shape.
Whether you're in that full flow or working with modifications and props, there is a comfortable way to build strength through vinyasa for every yogi!
Listen to what makes your body sing and let that be what guides your practice.
Namaste


Foundation Friday || The Busy Person's Guide to Meditation

Our Foundation Friday series delves into the basics of yoga—looking at its postures (asana), breath (pranayama), philosophy, and all the other essentials—giving you the foundations upon which to build a solid practice. Today’s post is adapted from The Busy Person's Guide to Meditation, written by Anna Patrick at MindBodyGreen.


Foundation Friday || The Busy Person's Guide to Meditation
How often do you hear yourself saying "I'm too busy for ____"? This is an anthem of Western culture; priorities shift/fade when we're in this constant momentum. The Zen saying suggests: "You should sit in meditation for 20 minutes a day, unless you’re too busy. Then you should sit for an hour. All Zen teachings are ideal, in theory, but for many of us these "shoulds" seem unattainable.
Here's 6 suggestions to help you start making the shift into daily quietness.
The Busy Person's Guide to Meditation by Anna Patrick

Foundation Friday || Eka Pada Koundinyanasana

Our Foundation Friday series delves into the basics of yoga—looking at its postures (asana), breath (pranayama), philosophy, and all the other essentials—giving you the foundations upon which to build a solid practice.


Today's post comes from Jenn Poholka, a Yogalifer who loves to fly!
Eka Pada Koundinyanasana, or Pose Dedicated to the Sage Koundinya, takes control of the breath, core strength, openness in the side body and trust in yourself.
1) Start to draw awareness to your breath. Inhale and exhale through your nose and match the length of your inhales to the length of your exhales. You can even awaken your Ujjayi Breath, still breathing through your nose, but with every exhale you will constrict the back of your throat.
2) It's important to warm up the core with poses like Navasana (boat pose) also laying on your back and doing leg raises and yogi bicycle to fire up your stomach muscles.
3) You can open the side body and strengthen your inner thighs with a lunge twist. From down dog step your right foot forward in between your hands. Shift your shoulders over your hips and joint your palms together at heart centre. With your inhale lengthen your spine, with your exhale hook your left elbow to the outside edge of your right leg. After a few breaths return to down dog and repeat the other side.
Now to get into the pose!
1) From down dog use your inhale to raise your right leg to the sky, with your exhale draw your right knee to your left tricep ( the outer edge of your arm).
2) Inhale to elongate your shoulders over your wrists and ground the inner edge of your hands as well as, the pads of your fingers. Use your exhale to bend your elbows and keep your elbows squeezing towards your side body (like chatarunga)
3) Inhale to shift your weight forward and extend your right leg, with your exhale hug your left thighbone to your hip socket and float your left toes off of the floor.
4) You can also get into the pose from your lunge twist. Just like the warm up, after you hook your left elbow to your leg disconnect your hands and place them shoulder width apart. Feel your spine grow with your inhale and use your exhale to lower your hands on the floor. Be sure to keep your elbows bent (Chatarunga). Root the inner edges of your hands and pads of your fingers and shift your weight forward as you feel your lower belly hug in and up float your left toes off of your mat.
*Believe in yourself and know that a few falls are always a great way to learn. *If you feel scared about falling forward or on your face you can put a pillow in front of you!

Foundation Friday || KULA

Our Foundation Friday series delves into the basics of yoga—looking at its postures (asana), breath (pranayama), philosophy, and all the other essentials—giving you the foundations upon which to build a solid practice.

The 2014 Gaiatri Kula at their retreat in Golden, BC.
Foundation Friday || KULA
“We are not going to change the whole world, but we can change ourselves and feel free as birds. We can be serene even in the midst of calamities and, by our serenity, make others more tranquil. Serenity is contagious. If we smile at someone, he or she will smile back. And a smile costs nothing. We should plague everyone with joy. If we are to die in a minute, why not die happily, laughing? (136-137)”
Swami Satchidananda, The Yoga Sutras
We are well into 2015 and the studios are bursting with yogis! We are so thrilled to see all your faces, new and familiar, and build new connections within our community. This week we are focusing on just that: community bonds. "Kula" is a sanskrit word meaning community, which stems from the term "Kula Siddhi" - the idea that the entire universe is connected in every aspect of the diversity of creation. These connections allow the universe to keep growing and expanding.
Yoga is a personal experience, yet practicing alongside your community of fellow yogis allows for an energy exchange, a symbiotic uplifting that unites the entire room. Everyone in the room is within their own intention, which radiates out to fill the space and heighten the power. This community that we build every time we step to our mats is a kula.

So get excited about your kula, and know that we're all in this self-study journey alongside one another. Smile at each other, ask questions and listen. The more we build smaller kulas within the walls of our spaces, the more we radiate that love back into the world! Namaste. See you on our mats, in the hallways, and in our communities.

Foundation Friday || Sādhanā

Our Foundation Friday series delves into the basics of yoga—looking at its postures (asana), breath (pranayama), philosophy, and all the other essentials—giving you the foundations upon which to build a solid practice.

Foundation Friday || Sādhanā
Welcome to 2015! In this time of transition, renewal and reflection, what is your intention for this year? Maybe you're inviting a theme to your life, or perhaps you've assembled a specific list of ways to live and the things to do to get you there. This concept of shaping and committing to a goal is called sādhanā, quite literally defined as "a means of accomplishing something". In yogic philosophy this is generally a spiritual exertion or focus to achieve your said goal, but the theme can arch into many other accomplishments you want to create in your life. Traditionally, the chosen sādhanā is guided by a guru until the practitioner steps into the rhythm autonomously. Who may you need to seek out to ensure your path is set up, or are your goals already so apparent that you can step forward with confidence?
Iyengar describes sādhanā in relation to other facets of self-study in his translation of Pantajali's Yoga Sutras:
Sādhanā is a discipline undertaken in the pursuit of a goal. Abhyāsa is repeated practice performed with observation and reflection. Kriyā, or action, also implies perfect execution with study and investigation. Therefore, sādhanā, abhyāsa, and kriyā all mean one and the same thing. A sādhaka, or practitioner, is one who skillfully applies...mind and intelligence in practice towards a spiritual goal.
Yogi Bhajan proposes the following questions for contemplation when working towards a goal:
1. How much am I a part of the I which made me what I am? 2. During my working day, during my existence, during my awareness, how much of the time have I been aware that I am part of the greatness that I am? 3. What can I do to extend myself to the greater I AM of which I am a part?”
"In finding the answers to these questions, you will find your way from the realm of finite ego to the realm of higher consciousness, and you will have the experience of total relaxation into mental happiness and contentment."
- Yogi Bhajan
Foundation Friday || Ujjayi Breath

Our Foundation Friday series delves into the basics of yoga—looking at its postures (asana), breath (pranayama), philosophy, and all the other essentials—giving you the foundations upon which to build a solid practice.
 Find the balance of fierce grace with this essential yogic breath.
Foundation Friday || Ujjayi Breath
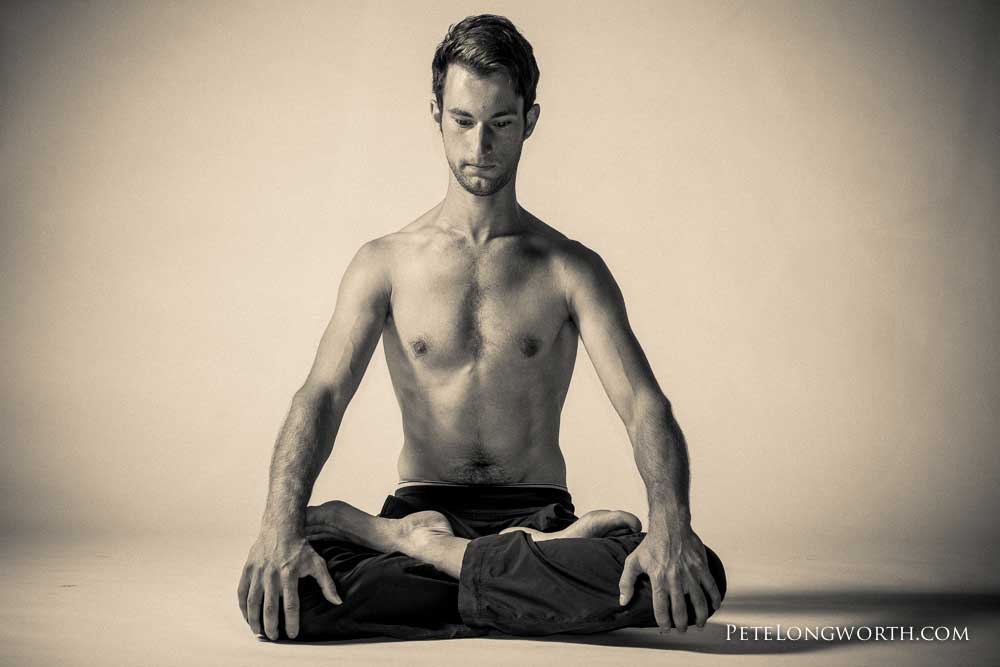
Ujjayi Breath Pranayama
"Ud" = moving upward, "Jaya" = conquest, victory fire breath, victorious breath, ocean breath
“Remember the connection between breath and movement: every movement comes out of breath. Rather than moving with and following the breath, the breath should initiate the movement. Practicing this way, we will be moved by the breath like the autumn wind picking up leaves.”
- Gregor Maehle
Ujjayi breath is a pranayama technique that allows you to focus and calm the mind. Often coupled with asana, this breath will guide you deeper into poses, steady your intention and allow you to experience your yoga more fully. In your practice, breath is regarded as the teacher; how you move and where you go is paralleled with the rhythm of your breath. Ujjayi breath is strong, fierce, warming - your pranayamic partner to bring you out of fear, anxiety, or judgement. Just as the intensity of your practice fluctuates, so does your breath. You may choose to use this fiery breath throughout your practice, or switch it up with a more gentle nostril breath like sama vritti to adjust the tone of the moment.
* note that Ujjayi pranayama involves breath retention and Ujjayi breath is the steady rhythm, sans retention
Benefits of Ujjayi Breath
- increases focus
- calms the mind
- builds concentration
- creates internal heat
- increases oxygenation
- tones the lungs
- facilitates the flow of prana
- builds energy throughout practice
- clears toxins
- creates awareness, especially within transitions of asanas

Foundation Friday | Prenatal Yoga
Our Foundation Friday series delves into the basics of yoga—looking at its postures (asana), breath (pranayama), philosophy, and all the other essentials—giving you the foundations upon which to build a solid practice. Today we're sharing tips on prenatal yoga.

Our post today comes from Emily NcNicoll (who you may remember from Monday), our prenatal-passionate yogalifer. This piece was written specifically for teachers and is equally important for an expecting yogi to understand the limits of her body and practice.
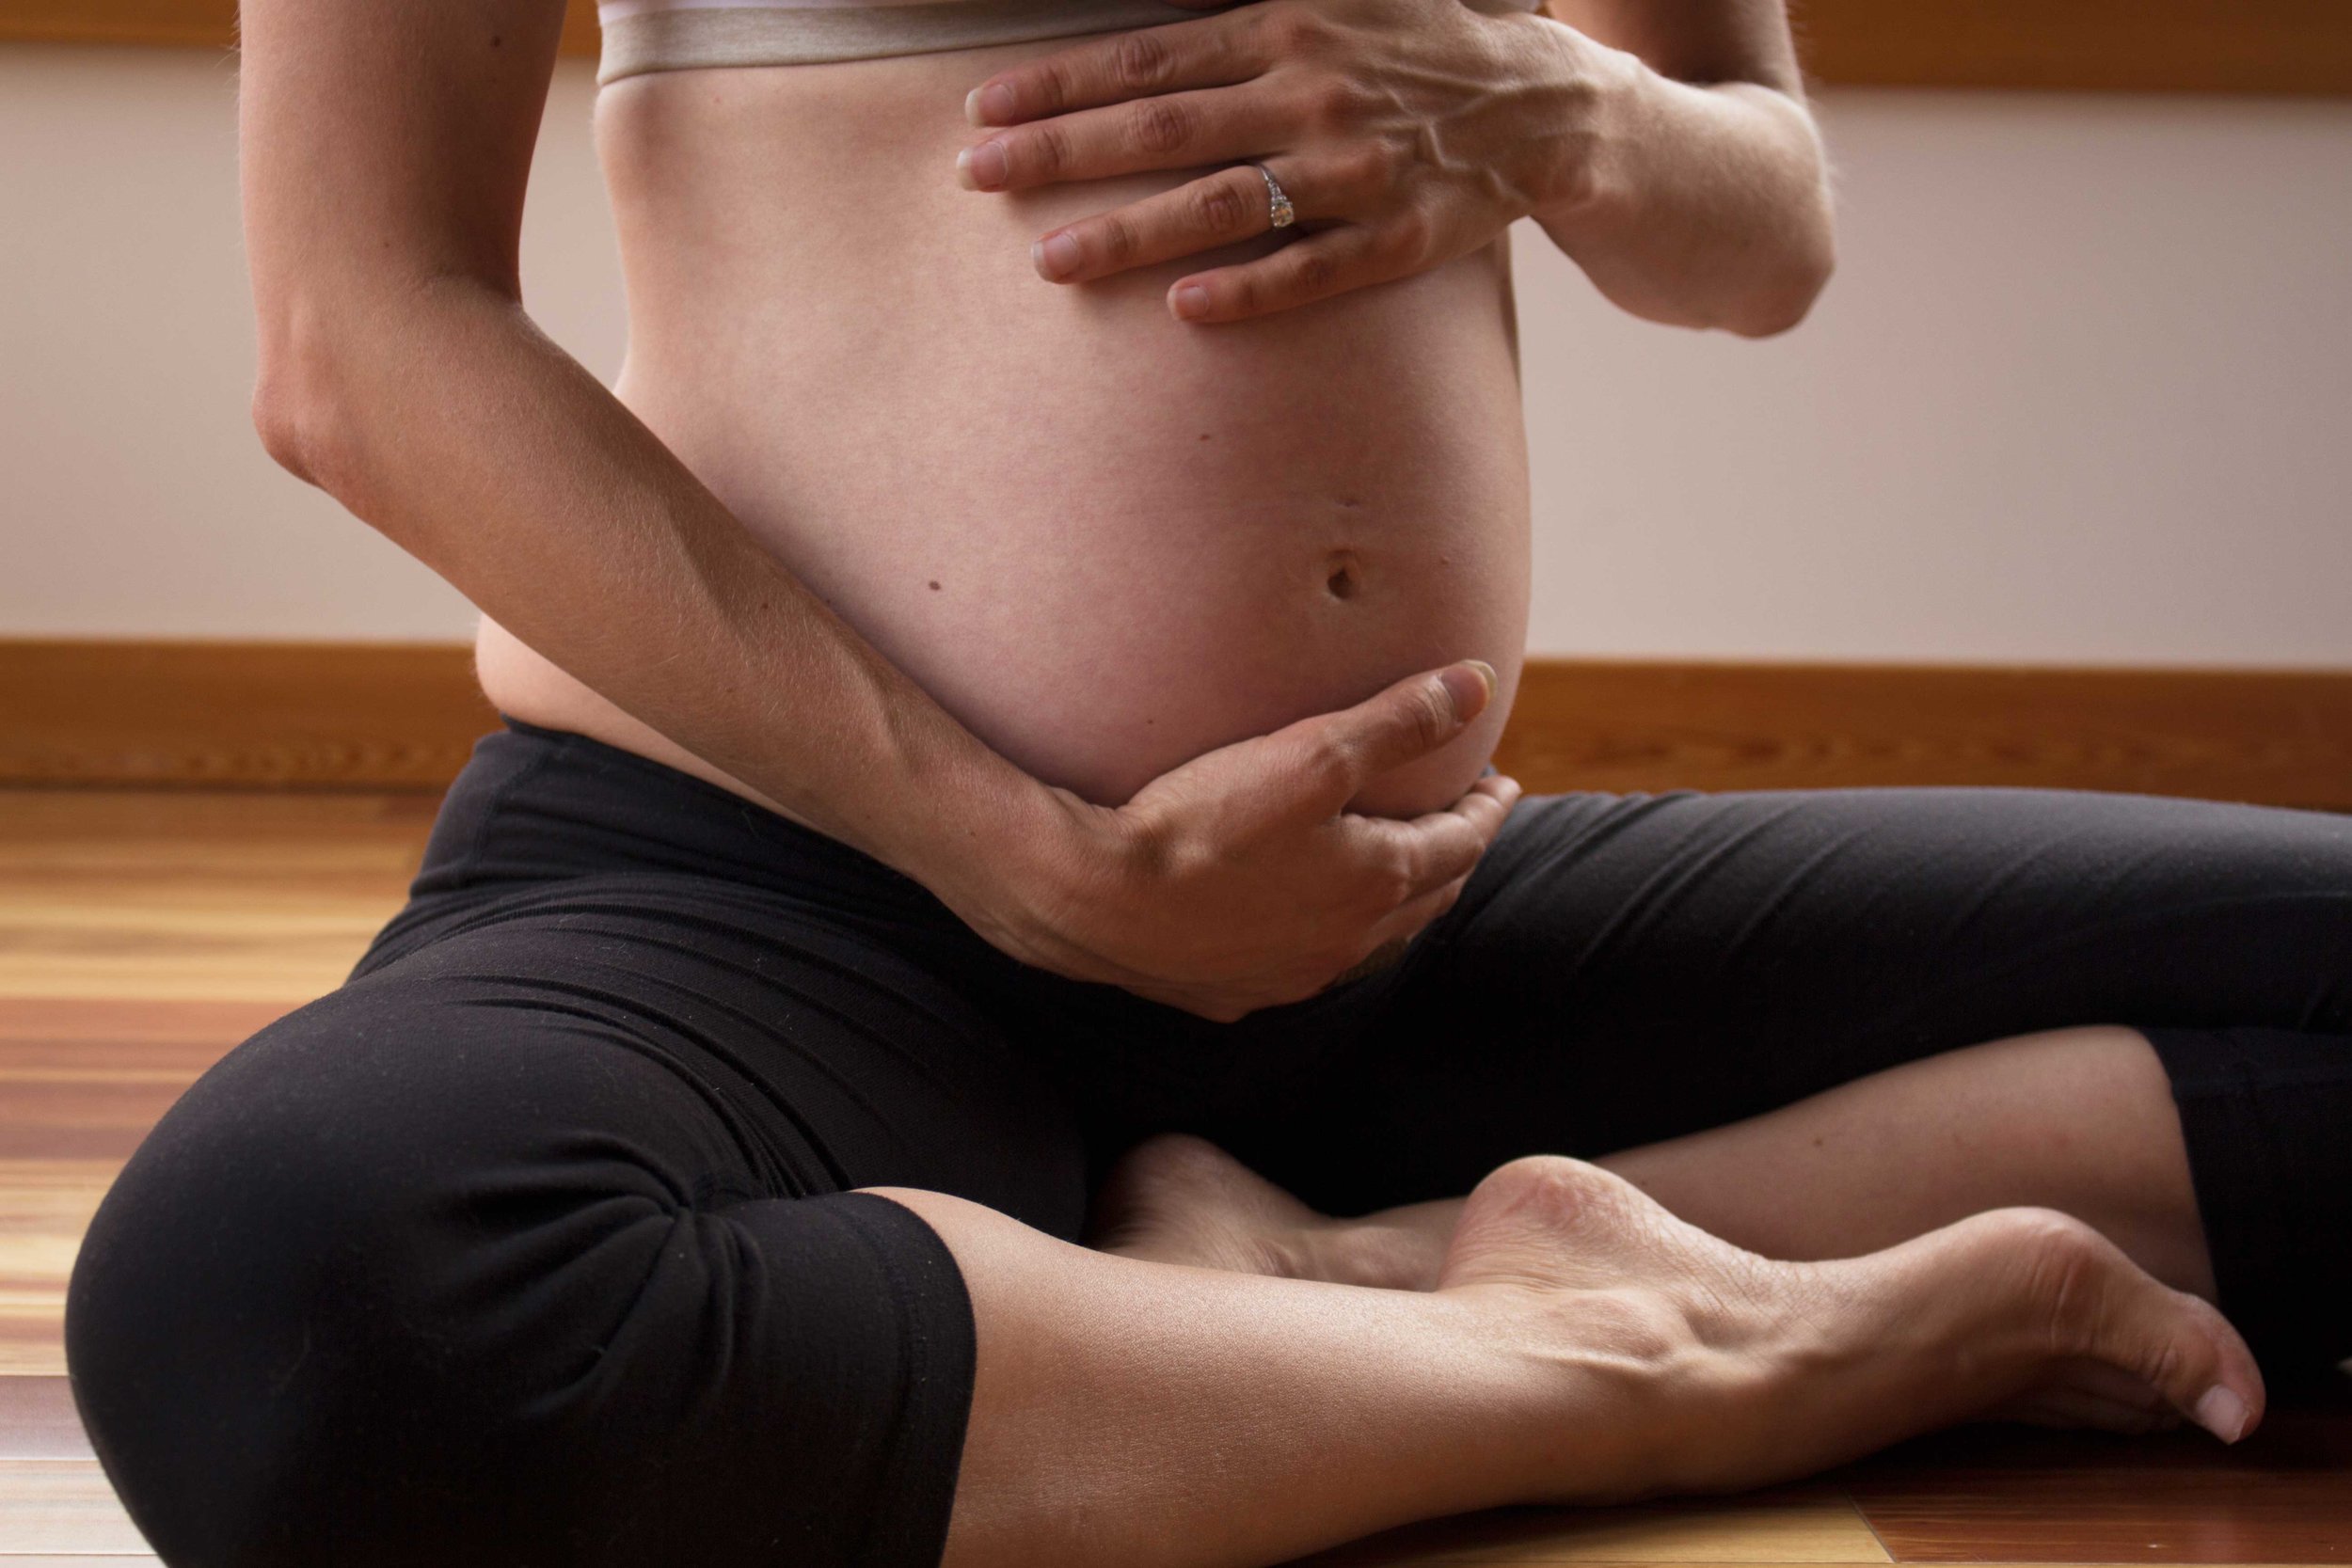
Pregnancy in Yoga by Emily McNicoll
Although it can be intimidating to have a pregnant lady walk into your class, it is a wonderful chance to serve a woman that is going through a lot of change and would likely appreciate your support. Remember that knowledge is power and keeping educated with simple guidelines can make a big difference to your teaching experience and the way in which you serve your community.
Just like asking people about injuries, being informed about a pregnant woman in class is important. A simple “If you’re pregnant, come have a chat with me before class starts” is a good way to let a woman know she is seen and cared for by her teacher. Also, talking with front desk staff at the studio can be a good way to stay informed. Knowing the basic do’s and don’ts about practicing yoga while pregnant is a great way to build confidence as a teacher and a great service to all potential students.

Things to keep in mind and at heart:
Pregnant women produce high levels of a hormone called Relaxin. One of the roles that this hormone has is allowing for the ligaments around the pelvis to relax therefore allowing the bones of the pelvis to shift for childbirth. In terms of any exercise that involves stretching, it is very important for a pregnant woman to stay away from acute sensation in her joints (i.e knees) as Relaxin can make her ligaments and tendons more susceptible to injuries than a person who is not pregnant. My advice to the woman is to engage firm foundation of hands and feet (hasta and pada bhanda,) avoid hyperextension, and ease away from any painful sensations.
Pregnancy tends to induce heat in the body as it is literally working to grow life. With this in mind, encouraging woman to ask the teacher to cool down the room when she is feeling too hot is really important. A cooler room is often a relief to a pregnant woman as her internal temperature is high. I often bring a sweater when I teach prenatal so all the woman can remain comfortable, myself included!
Just like paying close attention to painful sensations and her own temperature, encouraging a pregnant woman to set her own pace and listen to her body is important. Teaching modified postures first and then offering more challenging variations is a great way to allow a woman to empower herself with choice. One day she meets her mat she may be up for a lot of physical challenge and the next day it could be different. This is why as a teacher being educated in modifications and prop use is really important.
When a woman asks about other classes that she can attend, going through a studios schedule with her and advising her of a few “don’ts” is really important. Here are the things she should know when exploring her yoga practice:
Always talk to the teacher before class to inform them of the pregnancy.

No hot or warm yoga. As explained above, a pregnant womans body temperature is on the rise. It is important not to aggravate this further. Also, pregnancy is thought to be a good time to introvert and build the bodies energy. Hot yoga can easily exhaust energy reserves which are needed for childbirth and being a mother. This is another great reason to encourage a woman to go at her own pace as only she will truly know what she’s feeling and her own personal needs.
No core yoga. A little bit of core engagement is encouraged (like 20-25% of her capacity) as it helps to tone and strengthen the pelvic floor and support her spine and hips. A core yoga class would not be recommended.
No arm balances. Unless a woman already has a strong inversions practice, staying away from arm balances is a safe bet. The risk of her falling out of the posture must be considered. Keeping her and her child safe is obviously important. Likewise when doing one legged balancing postures. Pregnant woman should be encouraged to use a wall when getting into and out of the poses with the option to play with taking hands off the wall. Some women find their balance to be way different when they are pregnant and the wall is there for her safety.
No deep twists. Gentle twists are a great way to lengthen and restore the spine but deeper twists with core engagement are a great way to encourage elimination. Keeping a soft lower belly and lots of room for the uterus is important.
A couple other things to consider:
The feet in forward folds should be a little wider than hip distance apart. In the beginning stages of pregnancy it will leave space for the womb and with in the later stages it will be the best way to accommodate the babies growth.
In the second and third trimester laying flat on her back is not recommended. The baby can put pressure on the mothers aorta (a main artery) and cause loss of blood flow to the brain and heart. Modifying reclined postures like savasana with bolsters is a good way to keep her more upright. You can also recommend resting on the LEFT side with a bolster between the thighs and one under her head. The left side is important due to the position of the aorta.
Know your oils! Some essential oils can cause uterine contractions. If you’re using oils in class be aware of the contraindications and when in doubt, don’t use them.
If you're interested in prenatal classes at Yogalife Studios, please get in touch with us at info@yogalifestudios.ca or by calling either of the studios.
Our next round of prenatal yoga classes start December 4th at Yogalife Studios South with Sara Cueva and December 5th at Yogalife Studios North with Emily McNicoll.

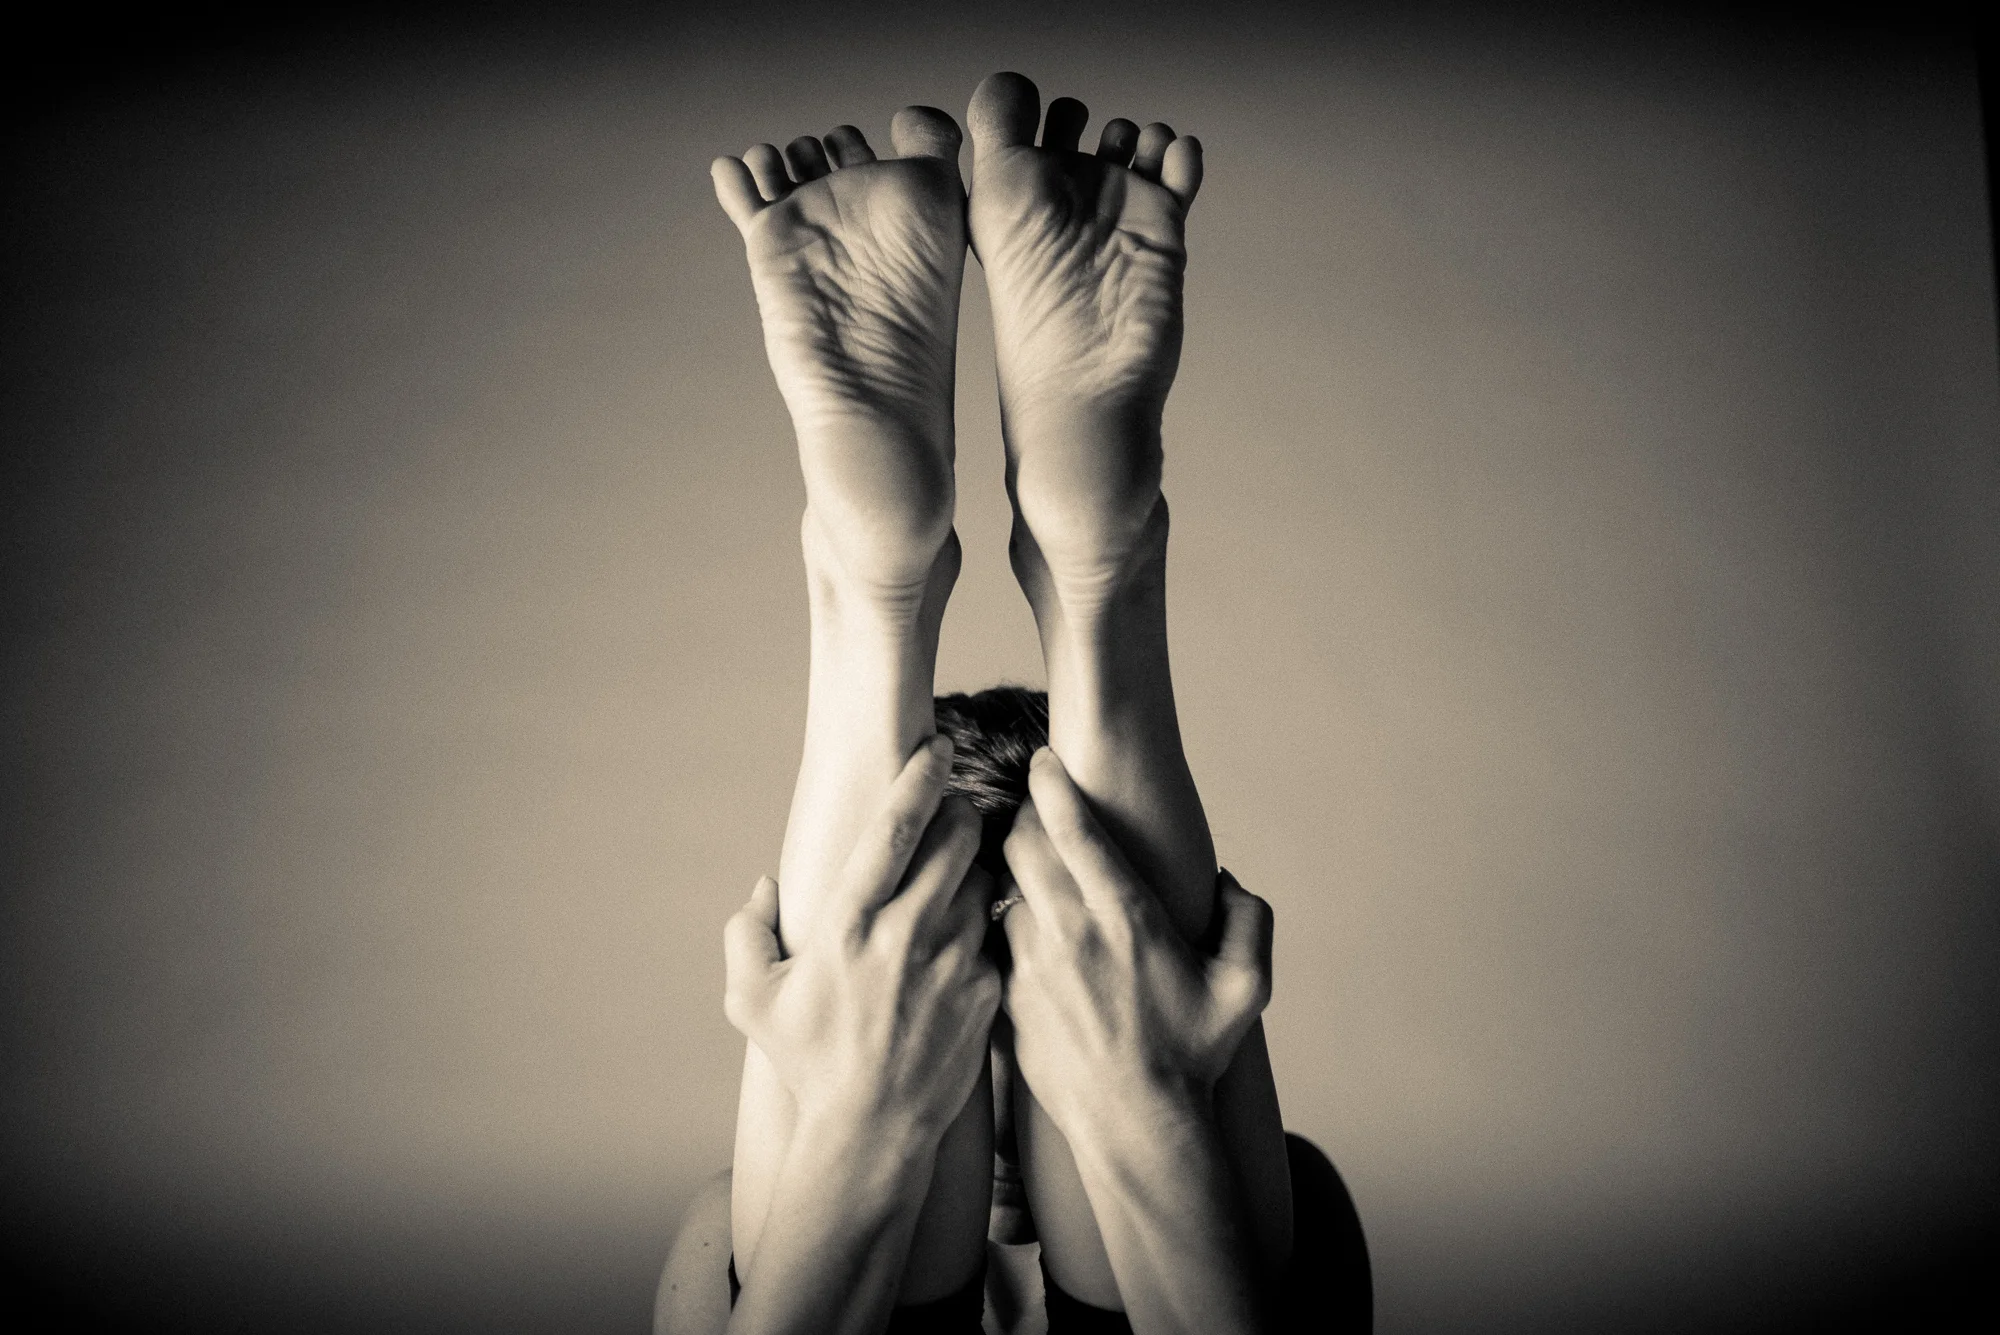
Foundation Friday | Viparita Karani
Our Foundation Friday series delves into the basics of yoga—looking at its postures (asana), breath (pranayama), philosophy, and all the other essentials—giving you the foundations upon which to build a solid practice. Today we are exploring 'legs up the wall' pose, or Viparita Karani.

Foundation Friday | Viparita Karani
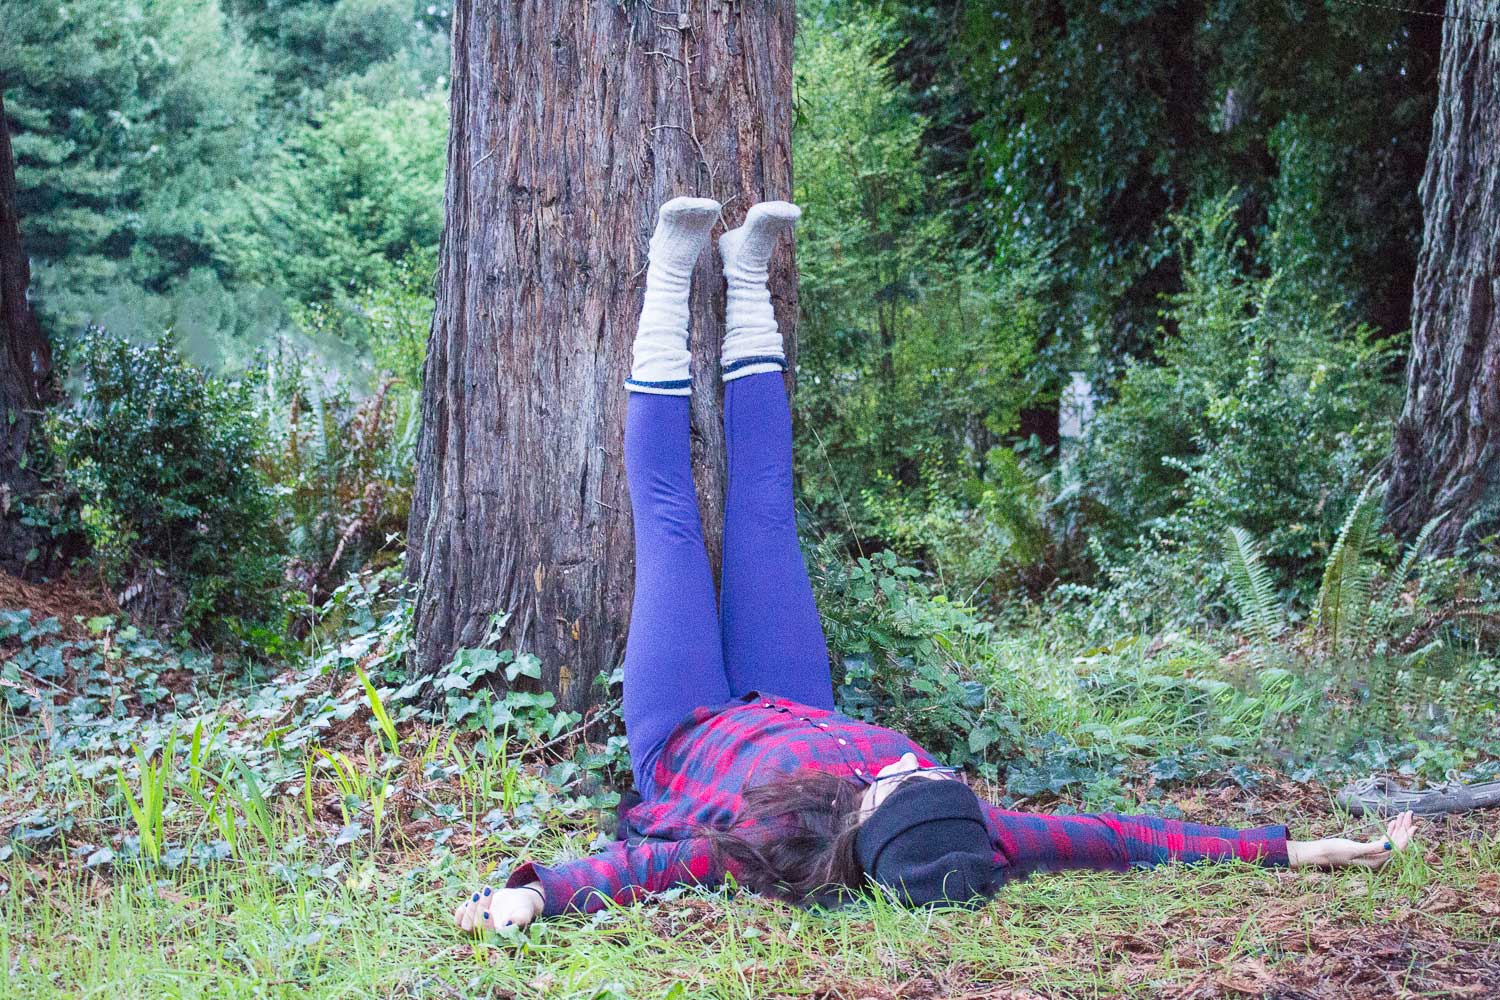
Viparita Karani
Viparita, inverted or turned around
Karani, action
One of the most gentle and nurturing ways to care for yourself is through restorative yoga, a passive form of practice that invites the use of props alongside long-held postures to facilitate subtle opening and overall relaxation of the body. In the case of viparita karani, the wall is your prop! This pose is a passive inversion and holds the same benefits of many other active poses in the same category.
Benefits of Viparita Karani
Legs up the Wall Pose is a restorative, relaxing and gentle inversion that has many benefits:
- Eases anxiety and stress
- Therapeutic for arthritis, headaches, high blood pressure, low blood pressure and insomnia
- Eases symptoms of premenstrual syndrome, menstrual cramps and menopause
- Relieves tired or cramped feet and legs
- Gently stretches the hamstrings, legs and lower bacK
- Relieves lower back pain
- Beneficial pose for varicose veins (takes pressure off the veins as blood is directed back to the heart)
- Calms the mind
- Grounds your back body into the earth

How do you get there?
- find a clear wall and snuggle your bum right up close to it
- swing your legs up the wall and lay flat on your back (your bum may not necessarily touch the wall when you first start, nor does it need to ever)
- you may put a foam block between you and the wall to press into if your bum isn't touching the wall
- position your legs straight up the wall and make sure your sacrum is flat on the ground
- ensure a bend in your ankles, like you were standing on the ground
- relax your arms out beside you with your palms facing up
- you may choose to use a towel under your head (just a single fold so it's not too high)
- relax into the pose for at least 1-2 minutes, although you may hold it for as long as you like
- to bring more space into your heart and lungs, you may choose to use a bolster, folded blanket, or foam blocks under your upper pelvis (hips cascading, shoulder blades on the floor)
- play around with the height of your hips, the placement of your arms, and the length of the pose to explore its benefits fully
Foundation Friday: Swadhyaya

Our Foundation Friday series delves into the basics of yoga—looking at its postures (asana), breath (pranayama), philosophy, and all the other essentials—giving you the foundations upon which to build a solid practice. Today we are sharing a teaching from Pantanjali's classic yoga sutras, Swadhyaya or self-study.

Foundation Friday: Swadhyaya, Self-Study
Swadhyaya, the 4th Niyama Sva | Self Adhyaya | investigation or inquiry
“Study, when it is developed to the highest degree, brings one close to higher forces that promote understanding of the most complex.”
-The Yoga Sutras of Patanjali, 11.44
Swadhyaya is one of the five Niyamas (daily observances) presented in Patanjali’s Yoga Sutras. These practices are the foundation of a yogic life; the system of the Niyamas lend to simplifying clutter and observing/attaining stillness. Pantanjali teaches that these practices progress your spiritual life on the basis that everything you need is inward. What one looks for is already there. These 5 observances are a system meant to work in harmony rather than isolation.

Patanjali also notes that this Niyama involves the study of the ancient scriptures pertaining to Yoga (The Vedas, Upanishads, Bhagavad Gita, and The Yoga Sutras of Patanjali). These teachings are used to assist us in engaging in life spiritually through self-inquiry. As we meditate and contemplate our own life's lessons - our thoughts, emotions, reactions - we begin to learn about our true Self. Reflecting on our own flaws, patterns and stories rather than those of others gives us the opportunity to grow, allowing our mistakes to become lessons. In your life and within your yoga practice, look at yourself with the same discernment you use with others. As if you are watching your life on film, notice what happens with your sensations, emotions, feelings, thoughts and breath; feel empowered through your process of self-study.
The Five Niyamas
The first Niyama: Saucha
Saucha is cleanliness which involves keeping your body clean inside and out. This includes eating the right food, decluttering your environment, communicating with clean and clear words as well as purification of the mind.
The second Niyama: Santosha
Santosha or contentment is the practice of being content with having enough in life.
The third Niyama: Tapas
Tapas is the practice of austerity or self discipline. This is a practice for simplifying your life, removing all the unnecessary things that do not serve you. It is a way of reflecting the external into the internal to refine your needs. The interference of thoughts and emotions can prevent us from seeing our inner stillness.
The fourth Niyama: Swadhyaya
The observance of Self allows you freedom to step into your highest form through truth and discernment.
The fifth Niyama: Pranidhana
This practice allows us to surrender to the divine or higher reality. Yoga is a spiritual practice but not a religion - the science and vehicle that enables us to understand our own beliefs better.

Foundation Friday: Abhyanga
Our Foundation Friday series delves into the basics of yoga—looking at its postures (asana), breath (pranayama), philosophy, and all the other essentials—giving you the foundations upon which to build a solid practice. As this month is geared towards self-care, we are taking a look at the basics of Abyhyanga, or self massage, and sharing the foundations for you to give back to yourself.

Foundation Friday: Abhyanga
Abyhanga is the Indian tradition of self massage, done ritualistically to honour one's body as a temple. In India, this practice is done with babies until they grow old enough to do their own self massage and help the elders. Different oils are used for different doshas, the three human constitutions in the system of Ayurveda, or depending on climate and time of year. Sesame oil is the most common; be sure to opt for an organic, food-grade product as you are applying it to your largest organ. This Ayurvedic practice is traditionally performed in the morning, before your bath or shower, to facilitate the release of toxins that may have accumulated during the previous night. Self massage is perfect after dry skin brushing, another step in honouring your temple inside and out.
Benefits of Abhyanga
- Increased circulation, especially to nerve endings
- Toning of the muscles and the whole physiology
- Calming for the nerves
- Lubrication of the joints
- Increased mental alertness
- Improved elimination of impurities from the body
- Softer, smoother skin
- Increased levels of stamina through the day
- Better, deeper sleep at night
If you're interested in learning more about Ayurveda, we have an upcoming workshop at Yogalife Studios North An Ayurvedic Approach to Food Digestion & Cleansing with Ian Hayward November 1 || 11am-6:30pm

Foundation Friday: Uttanasana

Our Foundation Friday series delves into the basics of yoga—looking at its postures (asana), breath (pranayama), philosophy, and all the other essentials—giving you the foundations upon which to build a solid practice. Today we are highlighting Uttanasana, or standing forward fold.

Foundation Friday: Uttanasana
Uttanasana || Standing Forward Fold OOH-tah-NAH-sah-nah
Ud (उद्; ud) = prefix for verbs or nouns, indicating superiority in location, rank, power, intensity Tana (तान; tāna) = "stretched" Uttana (उत्तान; uttāna) = "intense stretch" or "straight" or "stretched" Asana (आसन; āsana) meaning "posture" or "seat"
Uttanasana is an active time-out; your legs release, your feet root and ground you, your head is below your heart, and your spine releases. Taking time here allows your other postures to integrate and connects you to the present moment. With a variety of ways to execute uttanasana, you can tailor your experience in this asana to suit your intention. You may choose to dangle and sway, releasing tension from your entire back body, or you may choose a variation including a grip on the toes or hands under the feet with a more active core, spine and legs. Regardless, uttanasana allows you to hang your heart close to your body, a shape that offers inner reflection and the opportunity to create self-love. As our postures are medicine, this one bows you into your Self, creating a reverent pause to fall deeper in love.
Benefits of Uttanasana
- stretches your hips, hamstrings and calves
- strengthens your knees and thighs
- keeps your spine strong and flexible
- calms your mind, soothes your nerves
- reduces stress, anxiety, fatigue and depression
- releases neck, spine and back tension
- activates your core
- stimulates your kidneys, liver and spleen
- addresses symptoms of menopause, asthma, headaches and insomnia
- improves digestion
- can lower high blood pressure

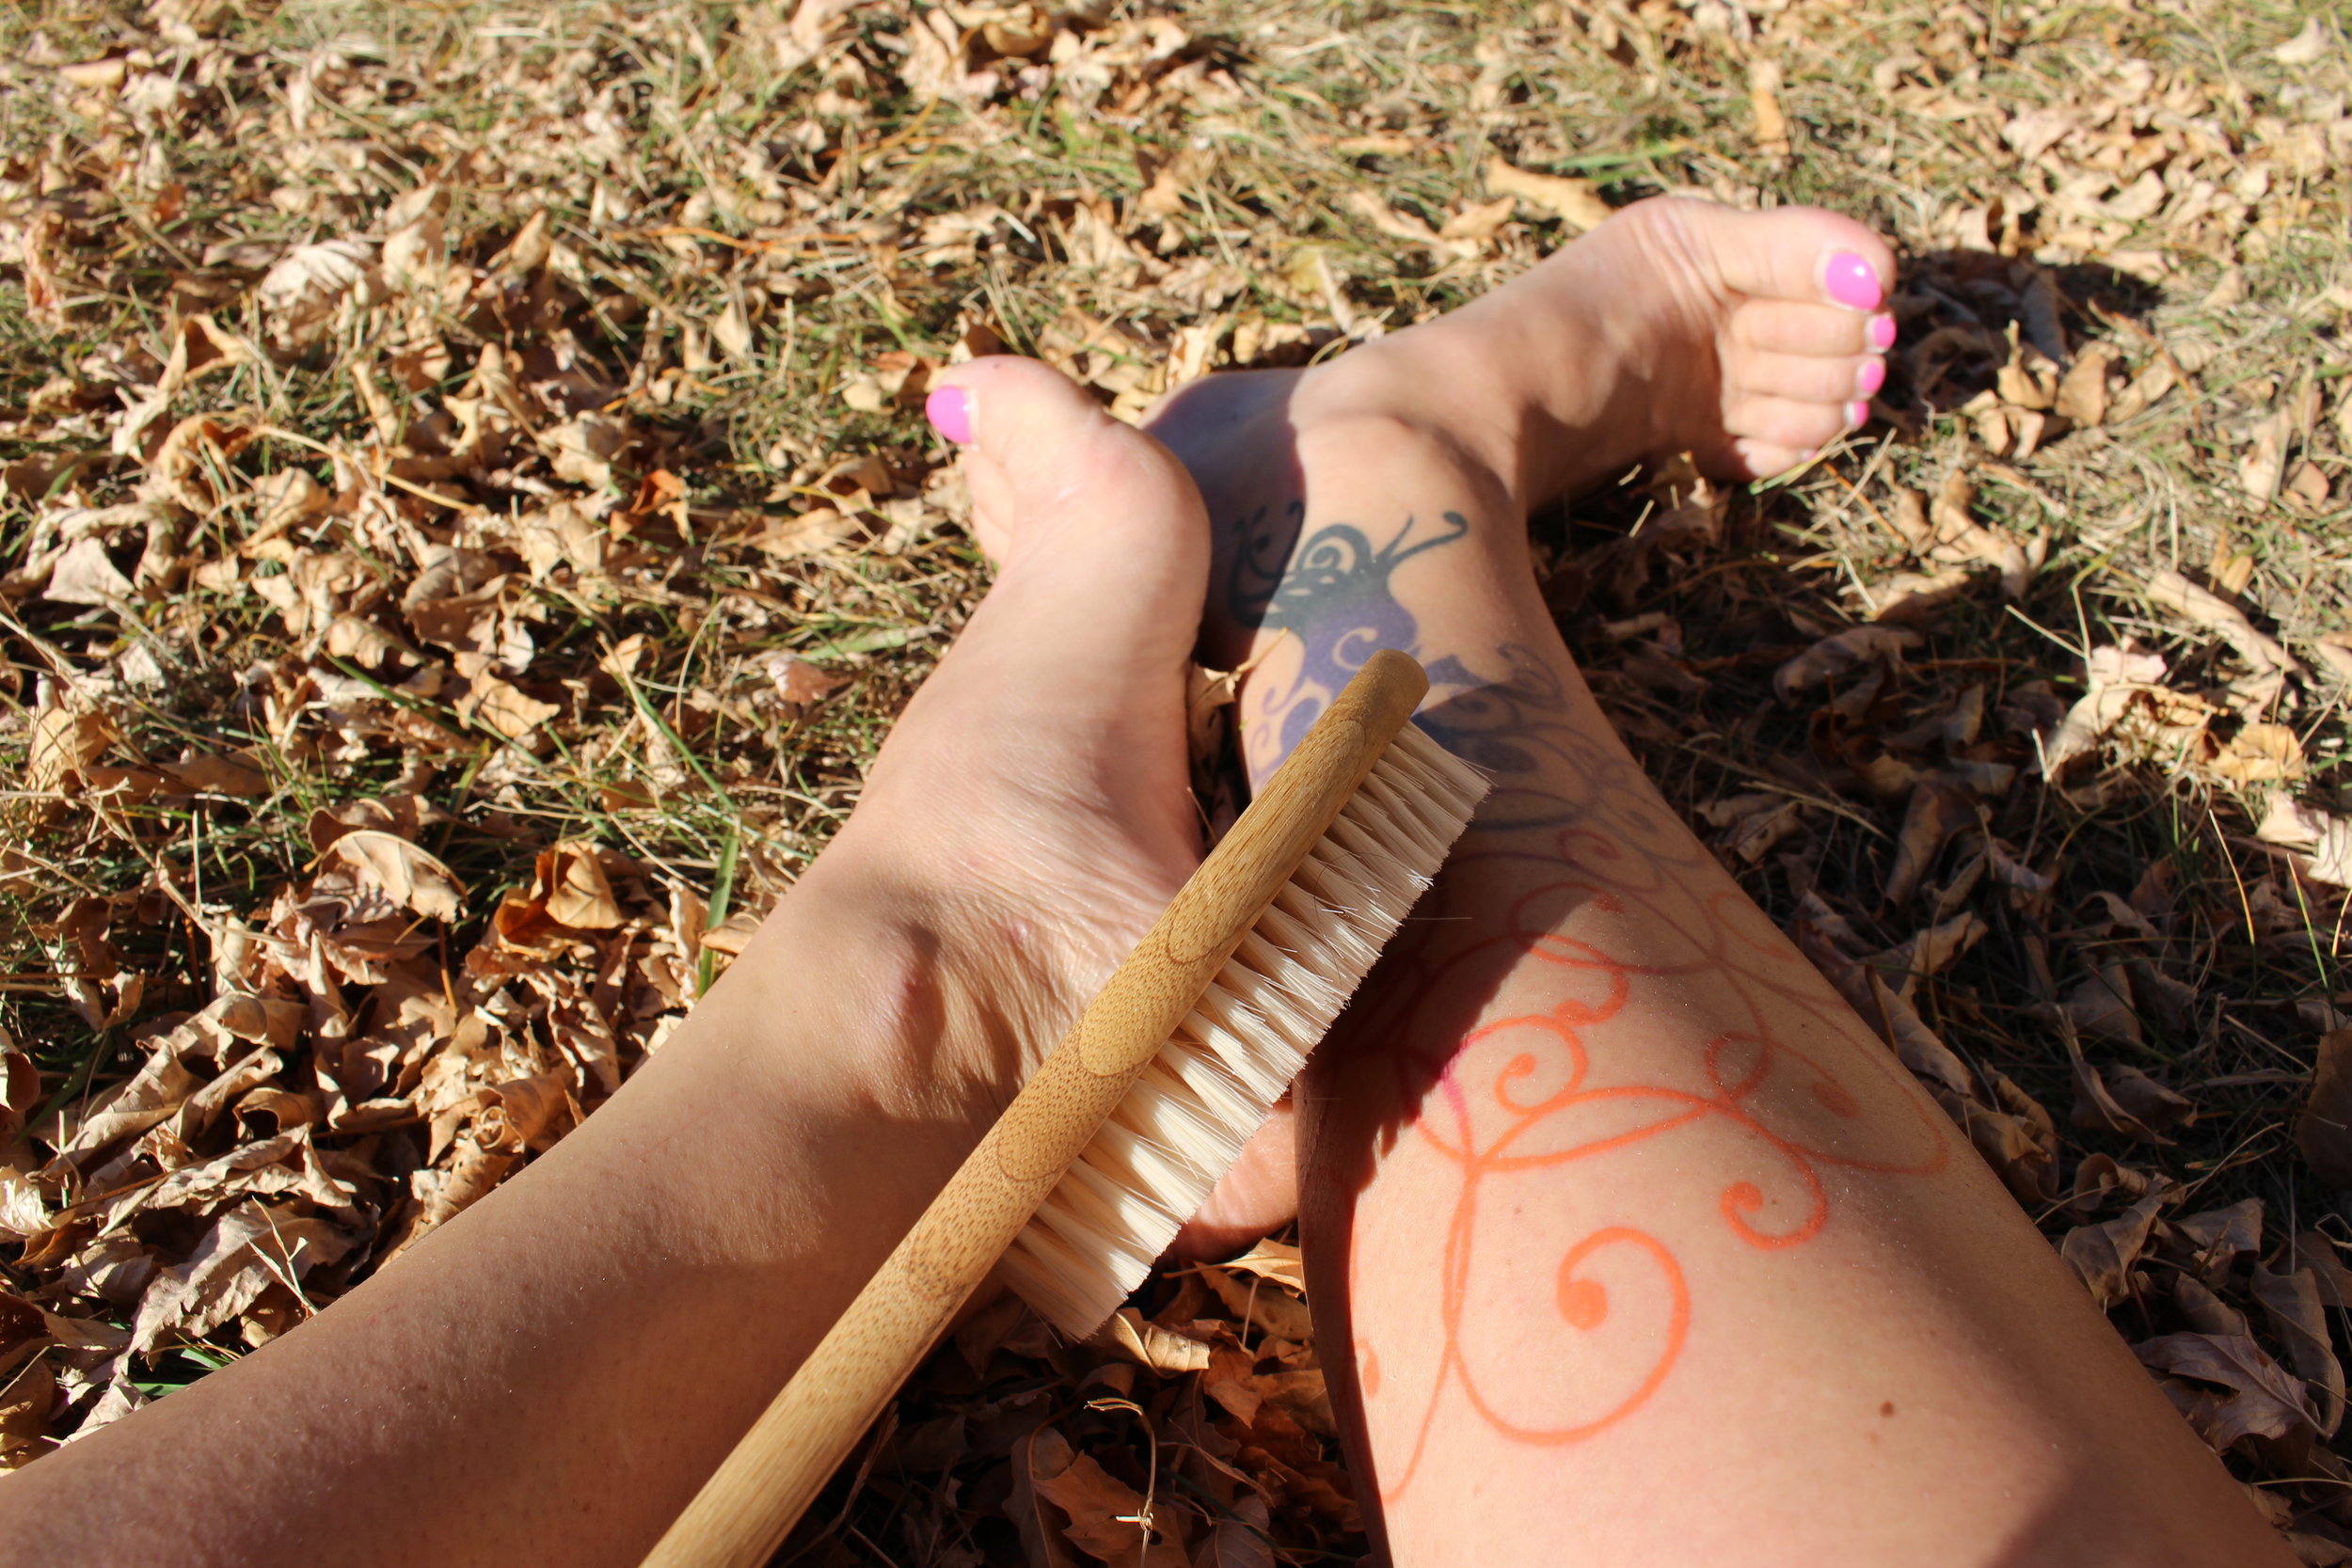
Foundation Friday: Dry Skin Brushing
This post is yet another instalment in our Foundation Friday series - tidbits of information to deepen your practice. This month we are focusing on falling deeper; exploring the practices that allow you to shine from the inside out. We will focus on a variety of self-love and self-care practices to get you falling!
Foundation Friday: Dry Skin Brushing

Earlier this week we shared yoga poses to get you glowing, focusing on postures that stimulated the lungs and digestive systems to make your skin radiate. Today we're sharing something even more simple and incredibly effective: dry skin brushing. This simple wellness technique is quick, inexpensive, and helps to cleanse your body inside and out.
Benefits of Dry Skin Brushing
- exfoliates dead skin
- stimulates the lymphatic system
- helps reduce cellulite
- unclogs pores
- improves circulation
- allows skin to absorb more nutrients
- make sure to purchase a natural bristle brush (not synthetic!) that has a long handle to reach your entire body
- strip down and stand in the tub or a surface you can sweep up (it may get a little "dusty")
- brush from your extremities in towards your heart; start at your feet and work up your legs to your torso then move to your arms and follow the same path
- use long, sweeping motions and be mindful of sensitive areas (skin will become less sensitive the more your brush)
- you may choose to shower first and then apply an organic oil like sesame or coconut
- you may warm up your oil and apply it after you brush; let the oil sink in for 10 minutes and then shower off and pat dry
- this technique is recommended twice a day
- don't forget to clean your brush with soap once a week
Happy Brushing!
Foundation Friday: Fall Deeper


October: Bold, earthen colours float amongst the the fall foliage. Leaves whiz atop the earth in a dizzying haze. Us Edmontonians savour the all-too-short time to run about in our fall scarves and jackets, sipping warming teas, and feasting on the foods of the fall harvest (like pumpkin-spiced everything) before the heavy winter sets in. Routines that fell away during summer return to their regular rate, and maybe you're finding yourself craving some time in the hot room again. This month, we're focusing on falling deeper into practice—we will be sharing our favourite self-healing practices and ways to glow from the inside out. Come along with us on the blog and in our studios as we move through a journey of self-love and healing!
Foundation Friday: Love-Yourself Affirmations
Affirmation the action or process of affirming something or being affirmed emotional support or encouragement
A huge part of self-love is physically telling yourself how and why you love you. Affirmations are these personal statements; they encompass anything you need to plant within you at that moment. The result is an increased positive self-perception that can condition your subconscious mind to get on board with your needs and goals. Just as you can create a damaging inner effect by constantly negative self-talking and keeping ourselves down, you can reverse the pattern and get on your own team through dedication to your positive affirmations. Shifting your thoughts from negative to positive can truly shift your life.

How do I get there?
1. Choose your affirmations for YOU Allowing your script to come from a place of what YOU need is important. Think about your goals, needs, desires, and let that guide the words.
2. Write down what you love about yourself It can be a daunting task to compliment yourself, but it is a huge part of letting the self-love pour in. Sit with a pen and paper and record everything you love about you. This will help you gain the confidence you need to let your affirmations land and work. Use present tense for this writing: I am beautiful. I am strong. I am worthy.
3. Replace the negative Think about all the negative scripts you rattle off in your head - this may be a written physical list too. For each one, find its positive counterpart. Use this positive list to counteract the negative. Be vigilant in changing your language to yourself.
4. Prioritize As you go through this process and start creating your lists and really looking at your language, you may find there is a lot to sift through. Rather than feeling overwhelmed, prioritize what your most immediate goals and needs are and then focus on those. The other things may just fall into place! Once you see improvements in one area you can move onto the next.
5. Write it down You've had lots of practice writing things out by now! Continue that with your chosen affirmations. Choose to create these as "I can" and "I will" statements. See yourself achieving your goals!
6. Repetition is key Find yourself coming to your affirmations multiple times a day through different mediums. Writing them in your journal, on your bathroom mirror, the fridge, the front door, on your yoga mat, in your car... keep letting the positive energy of your words take you into a deeper self-love.
We'd love to hear your experience with self-love, goal-setting and affirmations. Connect with us on our Facebook page or get the conversation going around the studio next time you're in. We love this stuff and we love YOU!

Foundation Friday: Balasana
This post is yet another instalment in a series that delves into the basics of yoga—looking at its postures (asana), breath (pranayama), philosophy, and all the other essentials—giving you the foundations upon which to build a solid practice. Today's posture is another great addition to our Grounding Series.
Foundation Friday: Balasana
Pose, or Asana Child's Pose bah-lah-sah-nah

Mmm. Child's Pose.
Don't you just love it when your teacher says those words, offering you the chance to retreat inside, to turn inwards, to shut off all external noise and simply breathe? Child's pose, or Balasana, is frequently offered as a break within sequences, a time to re-establish steady breath, calm the heart rate, or return to intention if we've gravitated away from what we've set out to do.
Why is child's pose so grounding and calming?
- First of all, the shape of the spine in a child's pose mimics the shape of the spine in a fetal position—and our time in utero was, for most of us, the most stress-free, comforting, and grounded environment we've ever known. It's a gentle reminder to our bodies, and then our minds, to return to that calm, quiet state.
- Secondly, all forward folds are—in their physical nature—calming and quieting as our bodies are literally turning in towards themselves. The anatomical action of folding our bellies, chests, and faces into our legs—or in this case, the floor—seals us away from whatever is going on externally so we can only look at ourselves.
- Further, the action of resting the forehead down on something (the earth, stacked fists, a block) gently stimulates the vagus nerve. The vagus nerve helps to regulate the parasympathetic nervous system (the part that allows us to rest and relax), and in doing so it naturally lowers our heart rate, blood pressure, lessens tension and the stress hormone cortisol. That's why child's pose is also an excellent bed-time posture!
Balasana may help…
- Opens through your hips, thighs, and ankles
- Open the shoulders (especially in the traditional variation)
- Calm anxiety, soothe stress, and relieve fatigue
- Help move your nervous system into a more relaxed state

So, how do I get there?
- From Downward Facing Dog, lower your knees down, about mat-distance apart.
- Touch your toes together, and rest your seat back on your heels.
- Fold your torso forward. Let your belly rest in between your thighs.
- Extend your arms forward, palms facing down.
- Find someplace for your forehead to rest—if the ground is not available, you can use a block, a folded blanket, or even stack your palms or your fists.
- Breathe.
We hope this helps you better understand balasana, or child's pose. Please feel free to comment on our Facebook with any further questions. And let us know if you have something you would like to see featured in Foundation Friday!

Foundation Friday: Tadasana

This post is an instalment in a series that delves into the basics of yoga—looking at its postures (asana), breath (pranayama), philosophy, and all the other essentials—giving you the foundations upon which to build a solid practice. Today’s focus will be on Tadasana, or Mountain Pose.
Foundation Friday: Tadasana
Pose, or Asana Tadasana, or “Mountain Pose”
Tada - Mountain, Asana - Pose tah-dah-sah-nah

This month we're sharing our favourite grounding poses and, as the name suggests, Mountain Pose creates stable roots from which to rise. Depending on the style of yoga you are practicing, you may also hear this pose referred to as Samasthitiḥ. Essentially, this is your center. Tadasana creates a feeling of union in your body; a sense of connection to the earth and the sky. Just as the majestic mountains boast height and width to secure their stature to the planet, tadasana is your foundation to feel grounded.
Although tadasana is a basic pose, it is the blueprint for many other poses (you could almost say all!). You can find this anatomical position of the body in many other poses and relate how that center stability is present in other asanas. It is an important pose to allow your body to receive and integrate the information and benefits from your practice. Tadasana allows you to recalibrate and prepare for the next posture; stability and grounding are the foundations of this pose.
Benefits of Tadasana...
- corrects posture
- strengthens feet, ankles, knees and thighs
- steadies the breath
- increases awareness
- tightens the core
- relieves sciatica
- helps flat foot
- helps to strengthen and lengthen the spine
- increases energy
- beings harmony to the mind and body

How Do I Get There?
1. Start standing with your feet hip distance or wider - make sure this is a comfortable, stable stance.
2. Check in for foot/ankle alignment - the base of the second toe lines up with the center of your ankle. You may choose to sway gently here, finding the balance in the souls of your feet to ground down with.
3. Engage pada bandha, drawing energy up the inner line of your leg to stabilize your knees and charge your thighs all the way up to your pelvic floor, finding a subtle connection to your core.
4. Supinate (rotate outwards) your arms to create "anatomical position". Allow your thumbs to open up outward, rolling your arms open and creating space in your collarbones and shoulders as your scapulae gently draw onto your back. Watch that your ribs don't jut forward here - use core stability to keep the spine growing tall right through your crown.
5. Relax your shoulders and draw attention to your back body - feel the base of your skull stack over the back of your heart and sacrum. This back body awareness allows you to feel genuinely stacked and supported: rooted from your feet, all the way into your lower back, shoulders, and head.
6. Balance the crown of your head directly over the center of your pelvis, with the underside of your chin parallel to the floor, throat soft. Soften your eyes.
7. Tadasana is generally the starting point of all standing postures, although it is an important posture in itself. Stay in the pose for at least 30 seconds to a minute, scanning the alignment through your entire body and focusing on your breath.
We hope this helps you better understand this essential posture, tadasana. Please feel free to comment on our Facebook with any further questions. And let us know if you have something you would like to see featured in Foundation Friday!

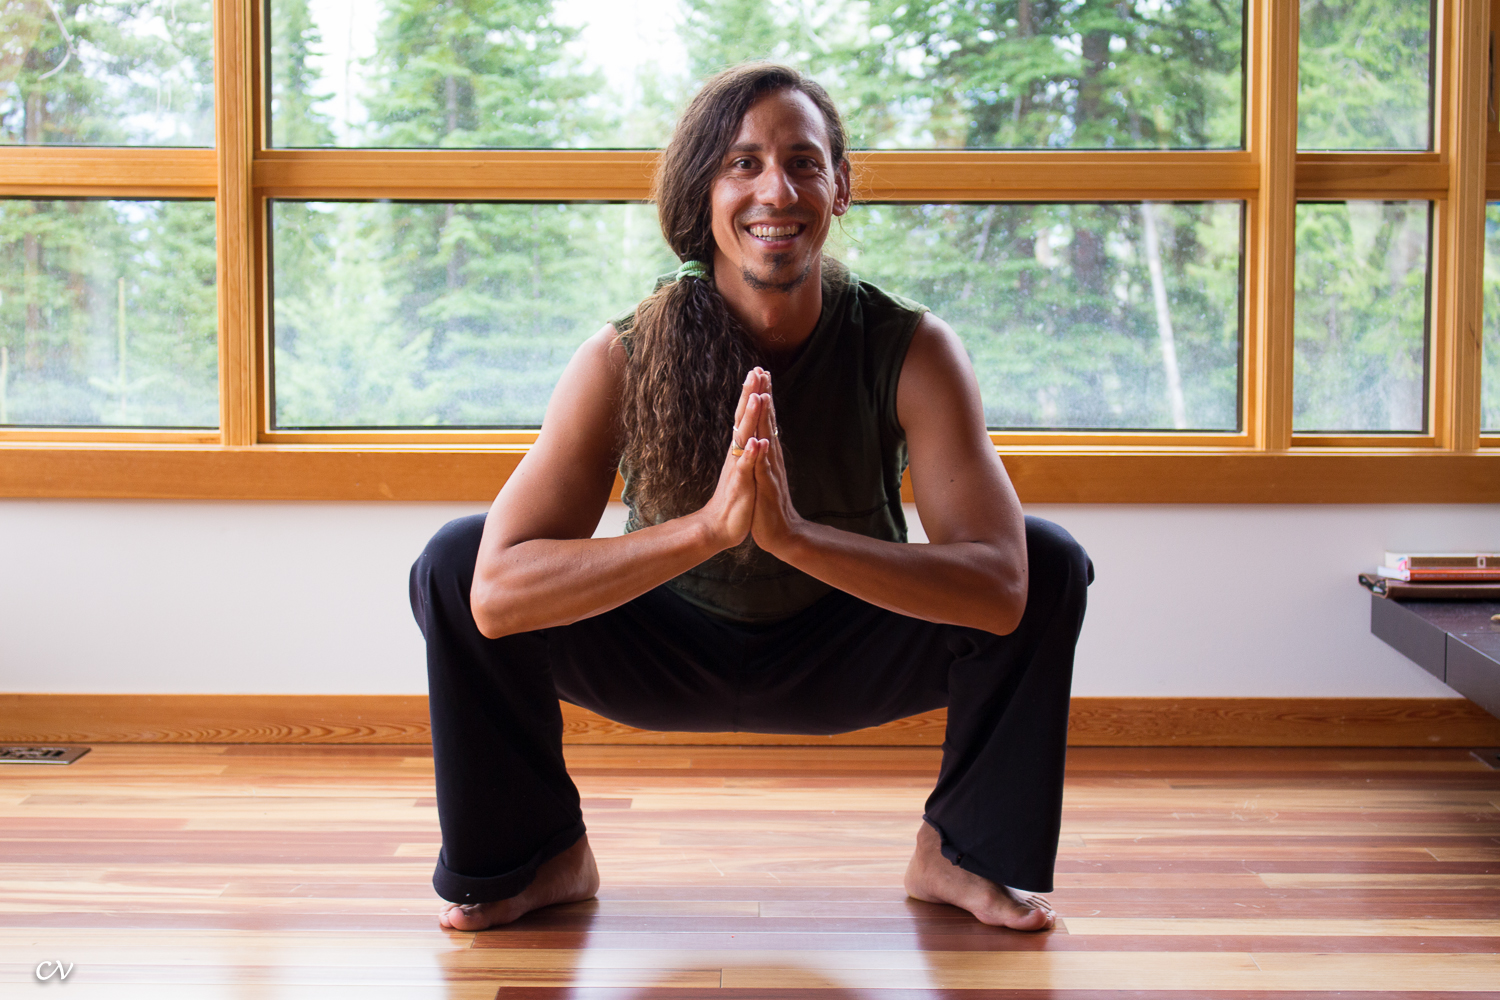
Foundation Friday: Malasana
This post is an instalment in a series that delves into the basics of yoga—looking at its postures (asana), breath (pranayama), philosophy, and all the other essentials—giving you the foundations upon which to build a solid practice. Today's focus will be on Malasana, or Garland Pose.
Foundation Friday: Malasana
Pose, or Asana Garland Pose, or "Yogi Squat" mah-lah-sah-nah

In conjunction with our monthly theme, Malasana is one of the ultimate grounding yoga postures. The rooting through the feet, the closeness of the pelvis to the earth, and the general feeling of heaviness and surrendering to the weight of gravity in this posture all encourage a downward flow of energy. Malasana's energetic qualities are calming, soothing, and quieting for the busy mind, as this asana activates a flow of prana down through the body, towards the ultimate source of grounding—the earth.
Many Eastern cultures are accustomed to sitting on the floor for meals and meetings, or squatting comfortably as they go about their daily activities— whereas In our Western world, we spend so much of our lives seated in chairs, car seats, or on couches. We lose the softness and suppleness of our hips, calves, and ankles, and the strength of our low back, thighs, and core. Physically and energetically, malasana helps to counteract these losses.
Malasana may help…
- Tone your thighs, glutes, and calves
- Strengthen your low back and abdominal muscles
- Open through your hips and inner thighs
- Aid in digestion and elimination
- Soothe anxiety and promote calm

So, how do I get there?
- Start standing with your feet about mat-distance apart. Turn your toes slightly outwards.
- Lower your hips in between your legs. Keep your heels on the floor if you can, or support them with a folded mat or towel. You might even try this posture with a prop—like a block, or bolster under your seat.
- Draw your hands into anjali mudra (prayer position) and slide your shoulders back. Press your outer elbows into your inner thighs, and vice versa. If this is too much, keep both of your hands on the floor in front of you for support.
- Lengthen your tailbone down towards the earth—like gravity is pulling it lower—but lengthen the crown of your head higher to elongate your spine.
- Broaden the front of your chest.
We hope this helps you better malasana, or garland pose. Please feel free to comment on our Facebook with any further questions. And let us know if you have something you would like to see featured in Foundation Friday!

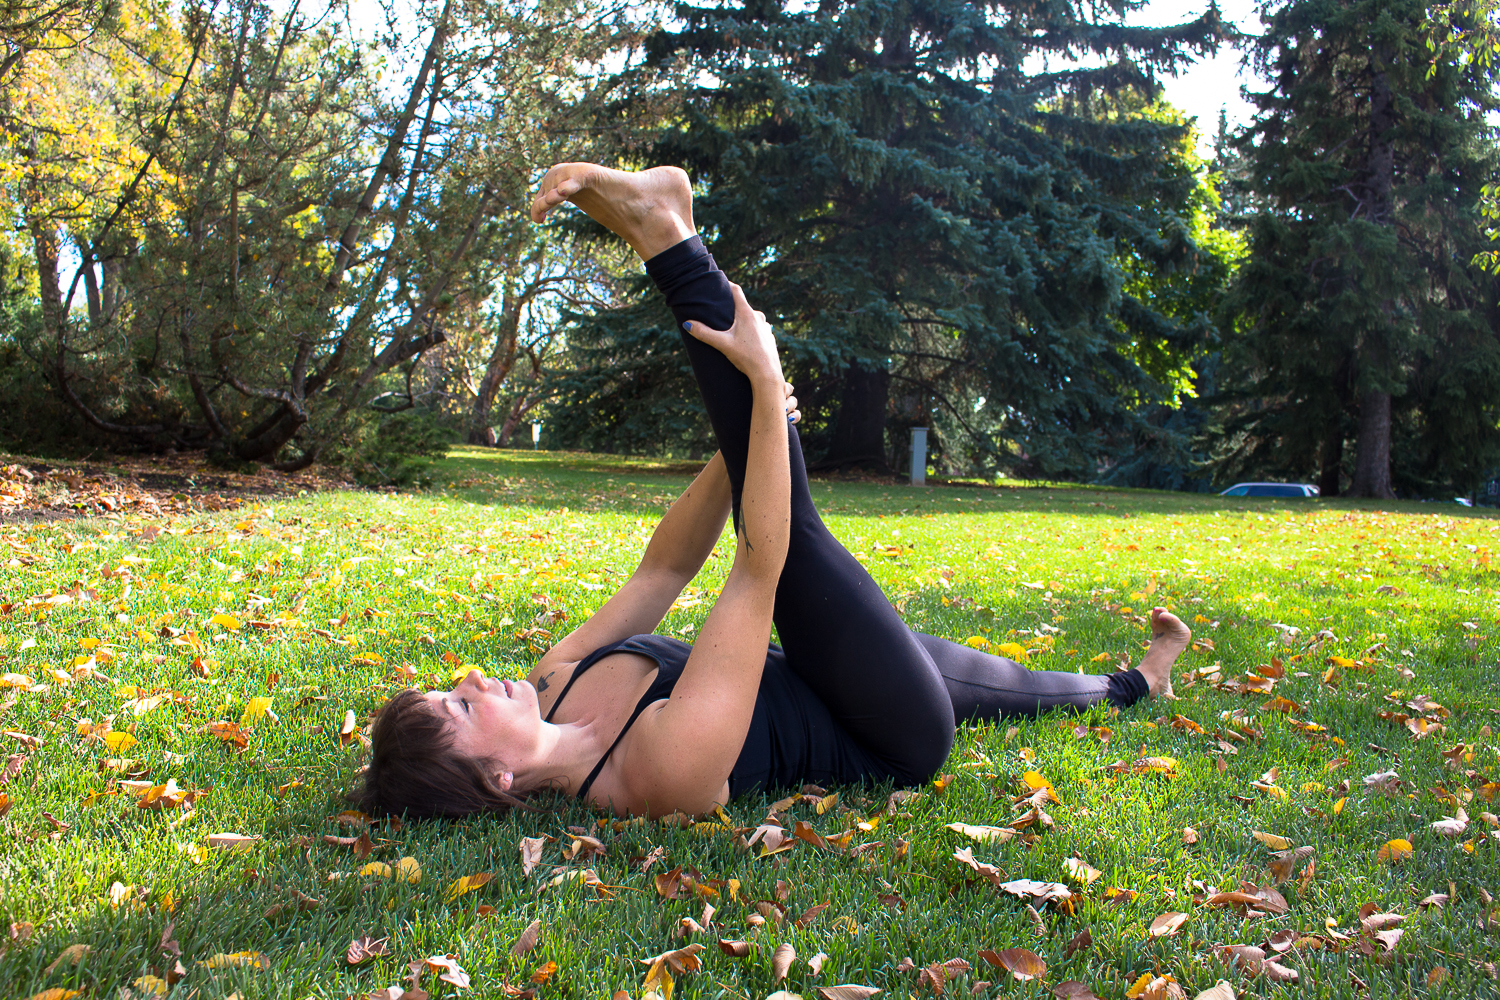
Foundation Friday: The Spine

A reclined twist is a wonderful, gentle way to nourish, massage and lengthen by inviting rotation to the thoracic and cervical spine.
Foundation Friday: The Spine
Fitting with foundation, today we're taking a look at the spine: the literal backbone of life! Spine alignment comes into play with each and every asana and yoga is an amazing practice for spine health and rehabilitation. At the most basic level, the spine is comprised (normally) of 33 vertebrae - 24 articulated and separated from each other by intervertebral discs, the 9 lower vertebrae fused together (5 in the sacrum and 4 in the coccyx or tailbone). A healthy spine has 4 curves to it - a lordodic curve in the cervical and lumbar spine and a kyphotic curve in the thoracic and sacral spine - which creates a balance to support two main functions of the skeletal system: stability and mobility.
Spinal Rotation
In yoga we refer to the rotation of the spine as a twist, often used throughout a sequence at varying levels of intensity. Twists may be active or passive, supported or strengthening. In general, they are all meant to lengthen and nourish the spine. It is important to remember to twist from your thoracic spine and allow the twist to finish in your cervical spine for full rotation. As always, it is also important to listen to your body and especially not overdo these poses. Let your breath guide you into depth. Cherish this masterpiece within your body!
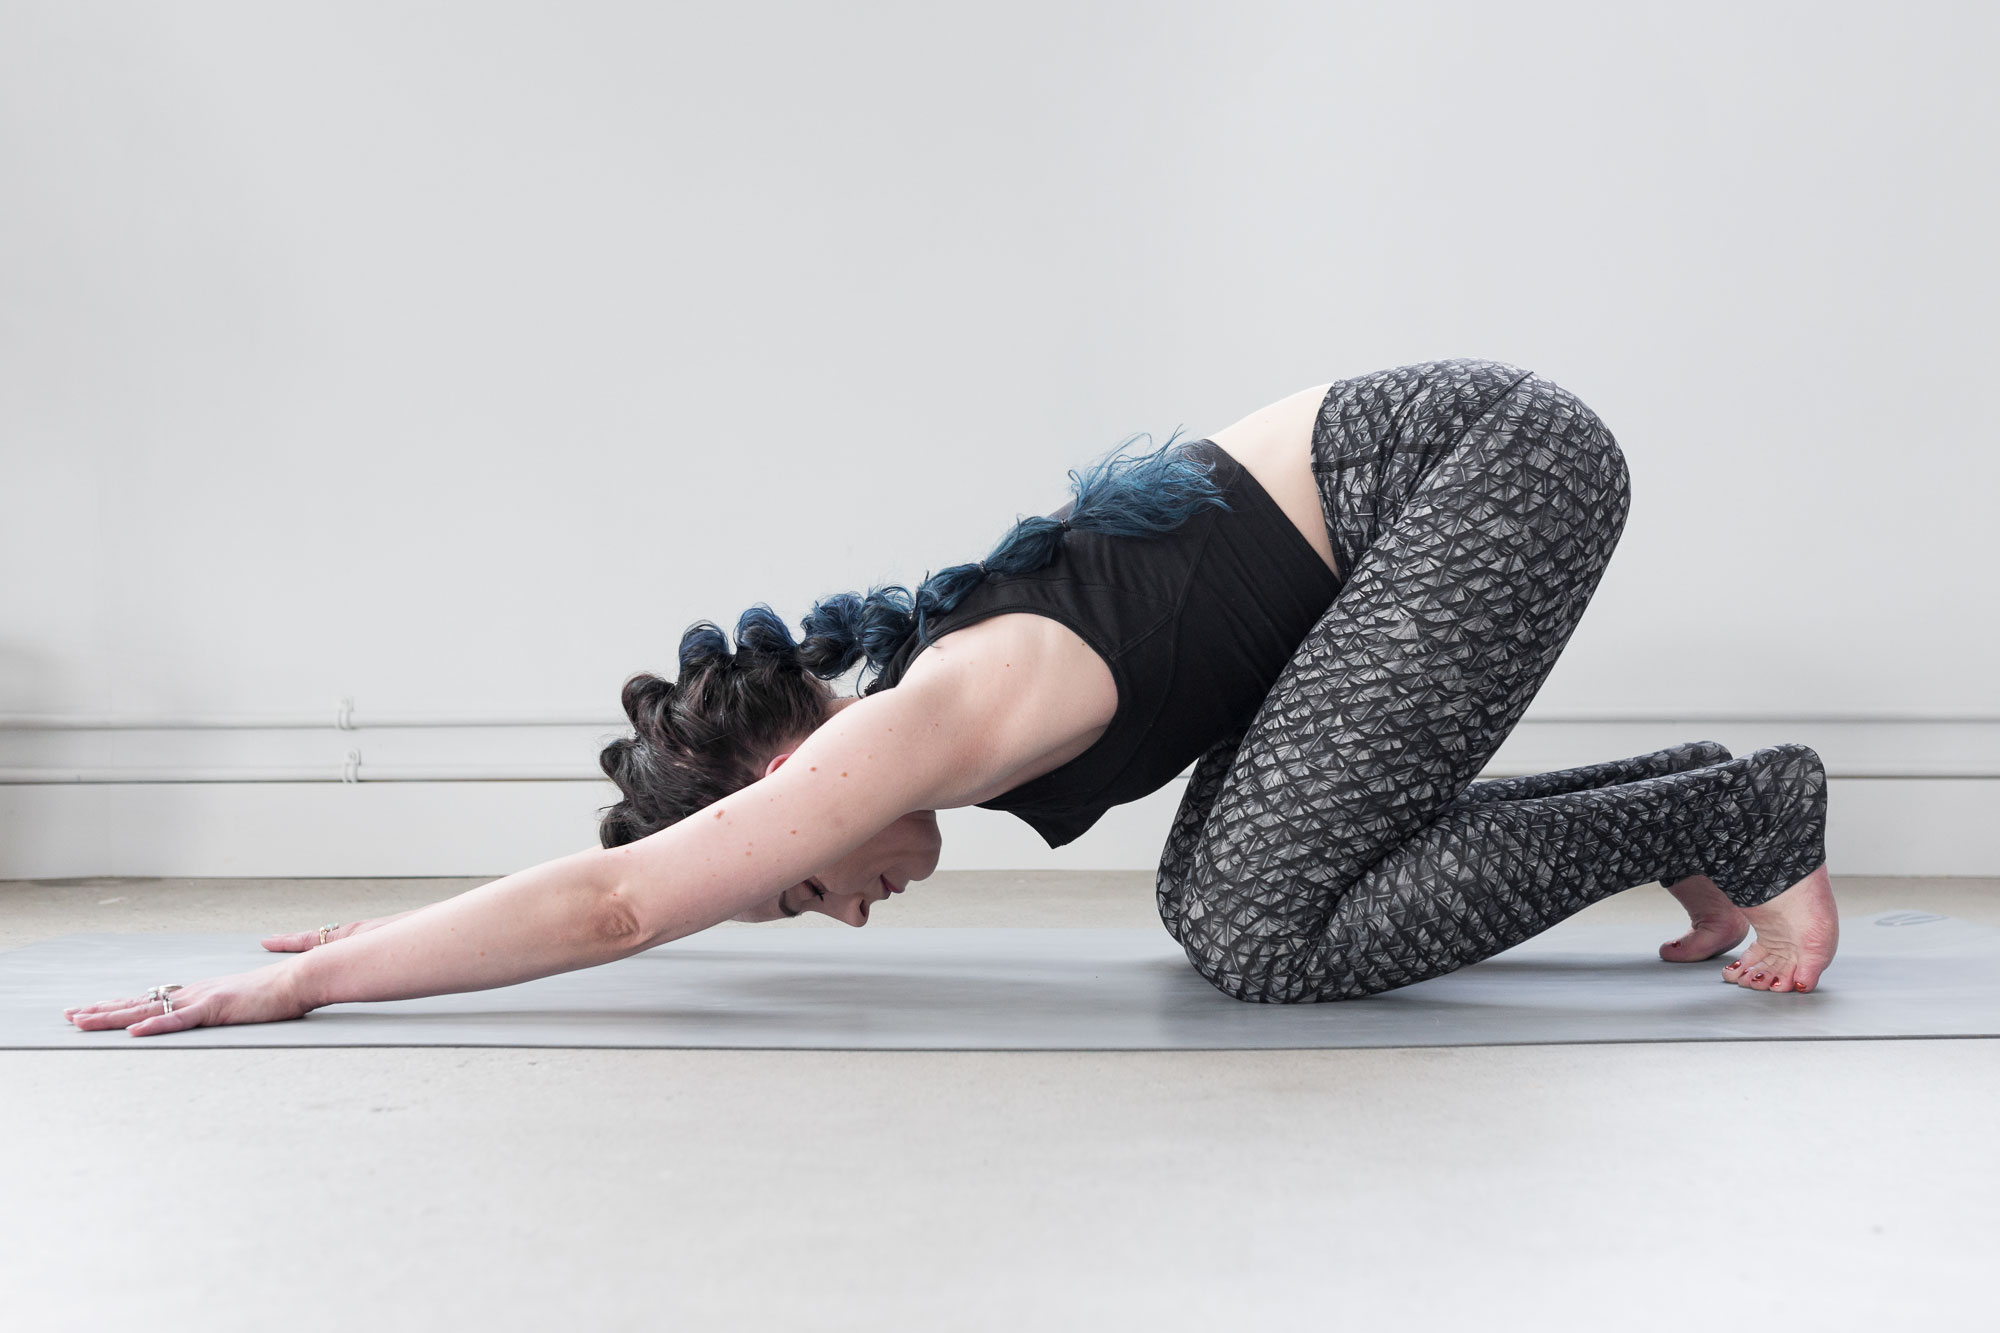
Other Ways To Move Your Spine
Action: Spinal Flexion Asana: Cat
As you press into the earth, hollow your tummy and round your spine, flexion is created by deepening the thoracic spine's natural kyphosis. The natural curve of the cervical and lumbar regions allow the flexion to continue in the neck and lower back.
Action: Spinal Extension Asana: Cow
Spinal extension is created by tilting your sit bones and heart upwards, rolling your shoulders back and lifting through your collarbones. This hammock shape provides the opposite curve that the thoracic spine is normally resting in and range of motion may be limited here. It is important to concentrate on lengthening your energy and breath through the entire spine to free up tension from the lumbar region.
Action: Lateral Flexion Asana: Crescent Moon
As the legs and pelvis root into the earth, the spine lengthens up and over to the side in a C-curve to create lateral flexion. Be mindful of space in this pose, especially around the shoulders. By keeping soft and your upper back and neck and connected in your core, the spine will be supported to move in this manner. The most freedom will be felt in the cervical and lumbar spinal curves.
"The yogi will tell you that you feel and look as young as your spine is elastic."
Richard Hittleman

Foundation Friday: Yoga for Better Sleep

This post is an instalment in a series that delves into the basics of yoga—looking at its postures (asana), breath (pranayama), philosophy, and all the other essentials—giving you the foundations upon which to build a solid practice. Today's focus is a little bit different—we're looking at how yoga can be beneficial in sleep. Because what could be more foundational for your yoga practice, your day—your life!—than a good night's rest?!
Foundation Friday: Yoga for Better Sleep
We all know the symptoms—dark half-moons under the eyes, lion-sized yawns, a lowered level level of alertness. If you've ever spent a night—or a string of them—tossing and turning, clock-checking, and worrying yourself awake, you're certainly not alone. According to the CHFA, one in seven Canadians have insomnia, or trouble falling asleep or staying asleep. And sleep deprivation is one of the leading causes of stress among American adults. As anyone who's spent a night sleepless in bed knows, counting sheep may be a somewhat entertaining attempt to lull yourself into a sweet slumber—but it's not always the most effective.

Bed-time yoga has been proven as an effective method of lessening the time it takes to fall asleep, and lengthening the time it takes to stay asleep—so much so, that even the U.S. Department of Defense has been using a yoga nidra derivative to help treat its soldiers sufferrering from Post-Traumatic Stress Disorder—an ailment that shares similar symptoms with insomnia, like anxiety, or the inability to sleep at night. While sun salutations and vinyasa are not particularly recommended, some gentle, calming yoga postures—done next to, or even right in your bed may help to soothe your mind and body into a sleep-state. Check out our top five yoga postures to help with sleep, below.
You'll notice that this list includes plenty of forward folds—forward folds, or extension promote a turning inwards, helping to rest and soothe the brain. Forward folds stimulate a cooling sensation in the body, and also help the digestive system to assimilate whatever hasn't yet been digested, whether physically or metaphorically.
1.Downward Facing Dog, or Adho Mukha Svanasana
 Start from all fours, or a Tabletop position with your wrists outer-shoulder distance apart and your knees under your hips. Tuck your toes under, and press your hips skyward. You might need to bend one knee, and then the other to find some space in your back body to make this posture more comfortable. Bend both knees, and send your belly back towards your thighs. Lengthen your ears away from your shoulders.
2. Seated Forward Fold, or Paschimottanasana
 Sit up with your legs extended in front of you. Remove the flesh from underneath your sit bones by manually sliding it out from underneath your seat. Extend your heart forward towards your legs, and then fold forward. Relax your arms beside your feet or legs and let your head be heavy. Use the physical feeling of turning inward to help guide your mind inward as well—turning your thoughts off from the day behind or ahead of you, and instead focusing on calm breath and the physical sensations you feel inside your body.
3. Supine Twist, or Supta Matsyendrasana
 Bend your knees, scoot your hips slightly over to one side, and then lower your legs to the opposite side of your hips. This should help your hips to stack over top of each other. Turn your head opposite your legs if it's okay for your neck. If your knees are lifted uncomfortably away from the floor or your bed, you might support them with a blanket or pillow (bonus since they're so close!). Again, breathe deeply into your belly to invite a gentle compression into your internal organs, facilitating digestion both physically and metaphorically—helping yourself to integrate the happenings of your day so that you can rest and prepare yourself for the next. This posture may also help to alleviate any back and neck discomfort that prevents you from falling asleep.
4. Child's Pose, or Balasana
 Fold your torso forward between your legs and allow your forehead to rest, on either your bed, or stacked palms or fists. Take slow, deep belly breaths. If you like, you can massage your brow by gently rocking your head from side to side.
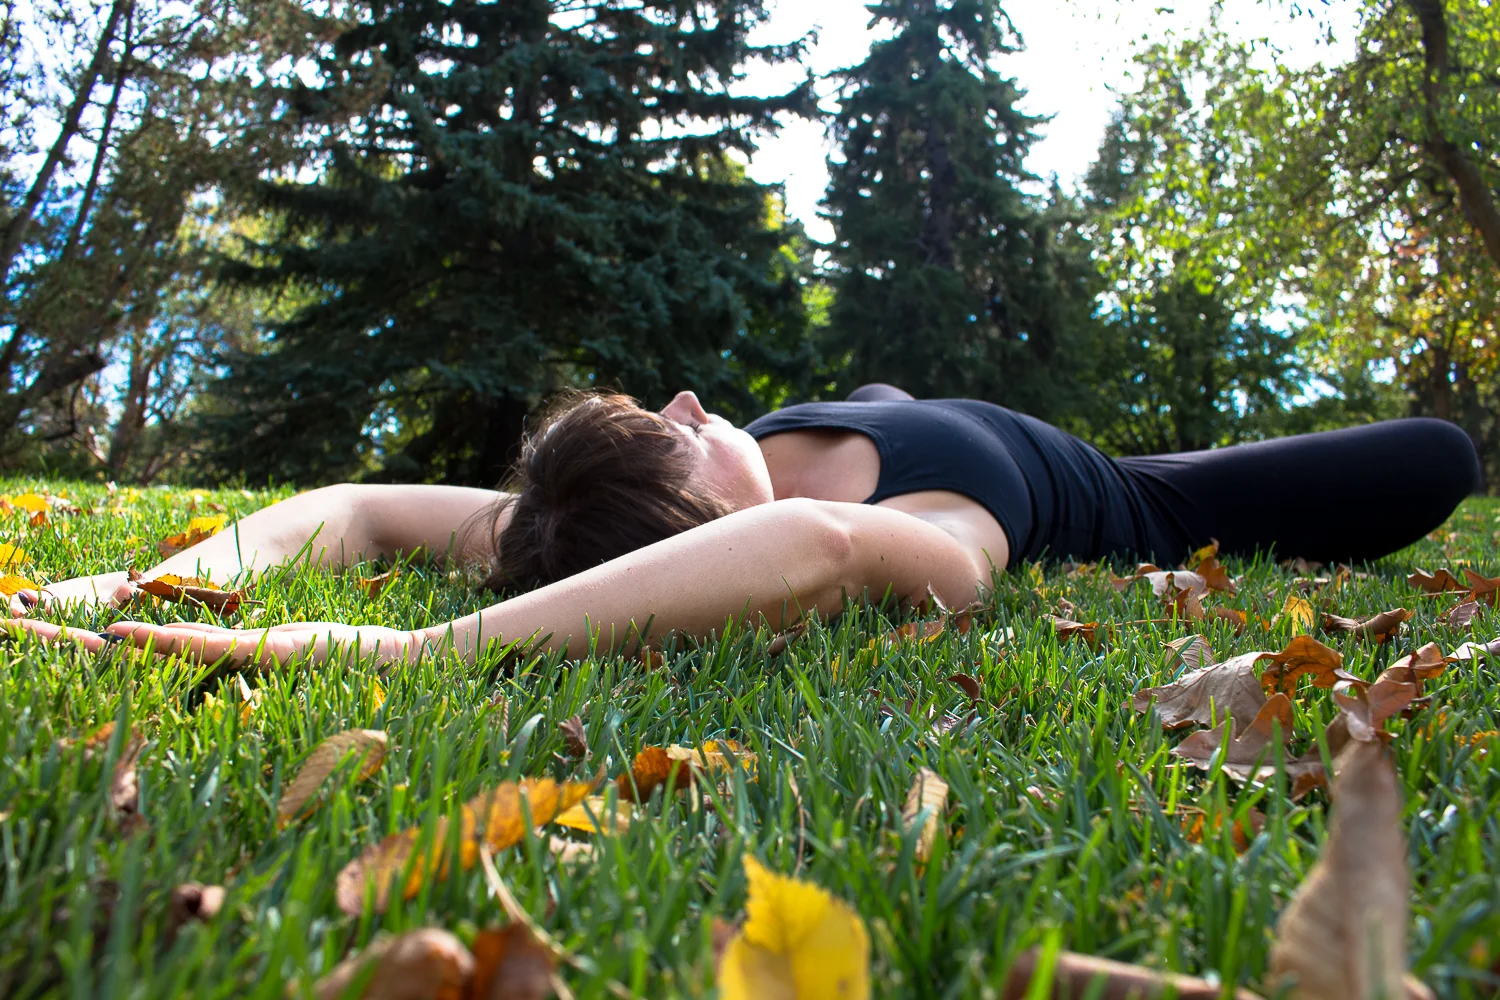
5. Corpse Pose, or Savasana

Set yourself up into a final resting posture—you might try lying down with your arms right alongside your body and feet hip-distance, or maybe you feel more comfortable extending your limbs further away from your torso. Once you're completely comfortable and at ease, try a yoga nidra technique:
Work through your body slowly, one piece at a time—draw all of your awareness to that part, starting at your feet. Notice the way your feet feel, and if there is any tension or muscular engagement in your toes, the balls of your feet, your arches, your heels, your ankles. Consciously relax that part of your body, using your long, drawn-out exhales to soften. Work your way up through your legs, your arms, your torso, and your head. Once you've covered all of the areas of your body—if you've made it through all of them without dozing off!—notice the way you feel now, and see if you can tell your mind to relax in the same way you have your body.
Use these postures alongside a deepened, calm breath. If thoughts are giving you anxiety, or preventing you from falling into a sleepy state, you can try writing them down in a bed-side journal, or try to let them pass by you without getting attached. If these postures aren't enough, you might try making some small lifestyle changes—like avoiding caffeine after lunch, turning all your screens off at least an hour before bed, or settling into a nighttime ritual to help tell your body it's time to rest.
Let us know what's helped, and what hasn't in your journey to easy rest. Sweet dreams, yogis!

Foundation Friday: Anjaneyasana

This post is an instalment in a series that delves into the basics of yoga—looking at its postures (asana), breath (pranayama), philosophy, and all the other essentials—giving you the foundations upon which to build a solid practice. Today's focus will be on Anjaneyasana, or Crescent Lunge Pose.
Foundation Friday: Anjaneyasana
Pose, or Asana "Crescent Lunge Pose" ahn-jahn-eh-yass-a-nah

Anjaneyasana, or Crescent Lunge Pose is a posture you'll find in nearly every yoga class. You might find yourself in an Anjaneyasana variation with your back knee lifted or lowered, toes tucked under or not, perhaps in a slight back bend, or with your arms reaching back like you're a runner about to leap off your starting block. Lunges strengthen and stretch the feet, legs, hips, core, back, and even the shoulders and arms—this posture gets your whole body involved!
Anjaneyasana may help…
- Relieve symptoms of sciatica
- Build stabilizing muscles in your legs
- Open through your hips, shoulders, groin, armpits, and neck
- Strengthen your thighs, calves, arches, back, shoulders, and arms

So, how do I get there?
- From Adho Mukha Svanasana (Downward Facing Dog), step your right foot up in between your hands. Or, from Tadasana (Mountain Pose), bend your knees and take a long step back with your left leg. Ensure your legs are hip-distance apart.
- Lunge into your front leg—bend your front knee to a 90-degree angle, while ensuring your stance is long enough that your front ankle lines up directly underneath your knee.
- Choose to lower your back knee (low lunge), or keep it lifted (high lunge). *If lowering your back knee bothers your knee joint, you can place a foam composite block underneath that knee, or fold your mat over to offer the joint extra padding.
- Press your front foot down strongly to lift your torso so that it's vertical, stacking your shoulders over your hips.
- Squeeze your inner thighs towards each other to press your right hip back and your left hip forward, so your hips are square.
- Root your tailbone, but lengthen up throughout your spine to the crown of your head.
- Reach your arms skyward, slide your shoulders back and down your spine, and fan your fingers out wide.
We hope this helps you better anjaneyasana, or crescent lunge pose. Please feel free to comment on our Facebook with any further questions. And let us know if you have something you would like to see featured in Foundation Friday!
Foundation Friday: Pada Bandha

This post is an instalment in a series that delves into the basics of yoga—looking at its postures (asana), breath (pranayama), philosophy, and all the other essentials—giving you the foundations upon which to build a solid practice. This post focuses on one of the "bandhas", or "locks"—in what might be our most literal "Foundation" Friday yet!
Foundation Friday: Pada Bandha
Lock, or Seal ("Bandha") Foot Lock, or “Pada Bandha” pah-dah bahn-dah

First off—what is a bandha?
The sanskrit word "bandha" translates to lock, seal, or closure. During asana (postural) or pranayama (breath work) practice, bandhas help to energetically "lock" in energy and prana (life force), consciously sealing it inside of our bodies so that it can aid us in our practice. There are three main internal bandhas, one "mother" bandha, and two stabilizing, grounding bandhas—pada bandha, as we'll look at today, is of the stabilizing, foundational variety.
What then, is pada bandha?
Pada, in sanskrit, means "foot"—so pada bandha, is then a "foot lock," or "foot seal." It is a sealing of your connection—or a rooting—with the earth beneath you. It is a solid foundation upon which you can balance. It's a way to get acquainted with all the tiny, underused muscles in your feet (all twenty of them!).
Pada bandha may help…
- You to feel more energized by "locking" your energy in
- Give a sensation of "grounding" while simultaneously lifting (may aid in anxiety or depression)
- Protect your knees
- Support your balance
- Alleviate problems with fallen arches
- Strengthen your legs
- Activate mula bandha (more on that to come!)

So, how do I get there?
- Take a good look at the bottom of your foot.... get really up close and personal! Notice its curvatures, and its raised and recessed areas. Thank them for all the work they do—these feet are what support you, day in and day out!
- Find the four corners of the sole of one foot—the mound of your big toe and pinky toe, and your inner and outer heel. From standing, place your foot down on an even surface and press each of those four corners down evenly.
- Pick up all five of your toes and spread them away from your foot and as far apart from each other as you can.
- While still pressing down through your "four corners," and with your toes lifted, draw, or squeeze the ball of your big toe mound towards your inner heel, and your inner heel towards the mound of your big toe in a way that lifts your arch. Without releasing through the inner edge, do the same with the mound of your pinky toe, and your outer heel. Perhaps you might notice your ankle lift slightly, or feel like you can draw the strength of your feet up your whole leg.
- Keeping all of the engagement you found in Step 4, place your toes back down—one at a time if you can—still spread widely, almost as if you had webbed feet, or spacers in between your toes (this is what we like to call "yogi toes!").
- Do the same with your other foot.
We hope this helps you better understand the concept of pada bandha. Please feel free to comment on our Facebook with any further questions. And let us know if you have something you would like to see featured in Foundation Friday!
Categories
- Wellness 241
- Zen Habits & Inspiration 100
- Yoga Specific 54
- Yogalife Workshops, Retreats & Trainings 37
- What's Going On 35
- Workshops 34
- Anatomy & Information 30
- Injury Prevention & Health 30
- Foundation Friday 25
- Instructor Stories 22
- Studio Information 17
- Community Event 15
- Yogi of the Month 13
- Recipe 11
- Staff Adventures & Journeys 10
- YEG Highlight 8
- Yogalife Classes 7
- Karma Program 5
- Member Stories 5
- Registered Classes 4
- Physical Health 3
- Curated Playlists 2
- Mental Health 2
- Classes 1
- Pregnancy & Family 1
- Prop Specific 1
- Relaxation 1